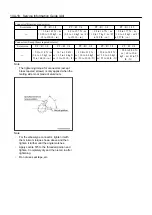
Plastic gauge
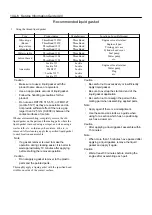
1. Using the plasti-gauge
Type
Measurable range
PG-1 (Green)
:
0.025 to 0.076 mm { 0.00098
to 0.00299 in }
PR-1 (Red)
:
0.051 to 0.152 mm { 0.00201
to 0.00598 in }
PB-1 (Blue)
:
0.102 to 0.229 mm { 0.00402
to 0.00902 in }
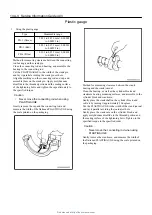
Method for measuring clearance between the connecting
rod bearing and the crank pin
Clean the connecting rod and bearing, and assemble the
bearing to the connecting rod.
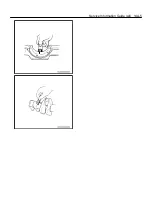
Cut the PLASTIGAUGE to the width of the crank pin
and lay it parallel avoiding the crank pin oil hole.
Align the markings on the connecting rod and cap, and
assemble them on the crank pin. Apply molybdenum
disulfide to the threaded portion and the seating surface
of the tightening bolts, and tighten the caps alternately to
the specified torque.
Caution
:
・
Never move the connecting rod when using
PLASTIGAUGE.
Gently remove the cap and the connecting rod, and
measure the width of the flattened PLASTIGAUGE using
the scale printed on the packaging.
Method for measuring clearance between the crank
bearing and the crank journal
Clean the bearing, as well as the cylinder block and
crankcase bearing mounting surfaces, and assemble to the
cylinder block and crankcase.
Gently place the crankshaft on the cylinder block, and
settle it by turning it approximately 30 degrees.
Cut the PLASTIGAUGE to the width of the crank journal
and lay it parallel avoiding the journal oil hole.
Gently place the crankcase on the cylinder block, and
apply molybdenum disulfide to the threaded portion and
the seating surface of the tightening bolts. Tighten to the
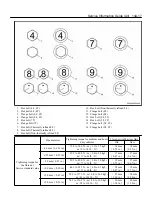
specified torque in the specified order .
Caution
:
・
Never move the connecting rod when using
PLASTIGAUGE.
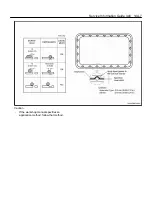
Gently remove the crankcase, and measure the width of
the flattened PLASTIGAUGE using the scale printed on
the packaging.
14A-4 Service Information Guide (All)
Find manuals at https://best-manuals.com
Find manuals at https://best-manuals.com


