background image


49


  PRODUCT SPECIFICATIONS


Display dimensions 

Approx. 42 inches (926 (H) x 525 (V) mm, diagonal 1064mm) 

Panel


Resolution


1024(H) x 1024 (V) pixels 

Net dimensions 

1036 (W) x 713 (H) x 121 (D) mm 

Net weight 

33.6 kg 

Temperature


Operating : 5°C to 35°C, Storage : 0°C to 40°C 

Ambient 
conditions 

Relative humidity


Operating : 20% to 80%, Storage : 20% to 90% (non-condensing) 

Power supply


AC100 - 240V, 50/60Hz 

Power consumption/at standby


350W / <3W 

Audio output


speaker 10W + 10W (8

(RGB input)


Input terminals


D-Sub input terminal (D-sub 15-pin) 
PC audio input terminal (3.5mm Stereo Mini Jack) 

Input signals 

0.7Vp-p, analog RGB (Recommended Signal) 

Sync signals


H/V Separate, TTL level[2k

H/V Composite, TTL level[2k

Sync on green, 0.3Vp-p[75

Recommended signal


17 modes  51 

(Video input)


Input terminals


Composite video input terminal (RCA) 
Composite video L/R audio input terminal (RCA) 
S-Video input terminal 
S-Video L/R audio input terminal (RCA) 
Component - YC

B

C

R

/YP

B

P

R

 video input terminal (RCA) 

Component - YC

B

C

R

/YP

B

P

R

 L/R audio input terminal (RCA) 

HDMI input terminal 

Input signals


Composite video: PAL, SECAM, NTSC 
Component - YC

B

C

R

/YP

B

P

R

 video: 480i, 576i, 480p, 576p, 1080i/50, 1080i/60, 

720p/50, 720p/60 
S-Video: PAL, SECAM, NTSC 
HDMI: HDMI input signal 

Output Signal


Video Output: TV/Composite video/S-Video output terminal (RCA) 
Audio Output: L/R audio output terminal (RCA)/Subwoofer output terminal(RCA)/ 
                          S/P DIF 

Recommended signal


19 modes  50 

(RF input)


Input terminals


ANT : 75

 Unbalanced 

Analog RF Video System


PAL B,G/ I / D,K 
NTSC-M 
SECAM B,G / D,K 

Digital RF Video System 

DVB-T 

This television takes at least 30 minutes to attain the status of optimal picture quality. 


Summary of Contents for 42PD580DTA

Page 1: ...0DTA USER S MANUAL READ THE INSTRUCTIONS INSIDE CAREFULLY KEEP THIS USER S MANUAL FOR FUTURE REFERENCE For future reference record the serial number of your Plasma TV SERIAL NO The serial number is located on the rear of the Plasma TV ...

Page 2: ... TRADEMARK ACKNOWLEDGEMENT VGA and XGA are registered trademarks of International Business Machines Corporation APPLE and Macintosh are registered trademarks of Apple Computer Inc VESA is a trademark of a nonprofit organization Video Electronics Standard Association All brand or product names are trademarks or registered trademarks of their respective holders ...

Page 3: ......

Page 4: ...E030039027 Printed in Thailand ...

Page 5: ...s on Installation Work This product is marketed assuming that it is installed by qualified personnel with enough skill and competence Always have an installation specialist or your dealer install and set up the product HITACHI cannot assume liabilities for damage caused by mistake in installation or mounting misuse modification or a natural disaster Note for Dealers After installation be sure to d...

Page 6: ...ources such as radiators heat registers stoves or other apparatus including amplifiers that produce heat 9 Do not defeat the safety purpose of the polarized or grounding type plug A polarized plug has two blades with one wider than the other A grounding type plug has two blades and a third grounding prong The wide blade or the third prong are provided for your safety If the provided plug does not ...

Page 7: ...puter signals from 640 x 400 and 640 x 480 VGA to 1280 x 1024 XGA PC RGB Input Easy to use remote control and on screen display system The remote control included eases the work of setting display controls Further the on screen display system displays the status of signal reception and display control settings in an easy to view fashion Power saving system The power saver feature saves power consu...

Page 8: ... 42 OTHER FUNCTIONS 43 Audio Switching 43 Signal Check 44 Power Save Mode 45 TROUBLESHOOTING 46 Symptoms That Seemingly Appear to be Failures 46 Actions to Correct Abnormal Displays 48 PRODUCT SPECIFICATIONS 49 Recommended Signal List 50 Notes about This Manual The information in this manual is subject to change without notice While meticulous care has been taken in the preparation of this manual ...

Page 9: ...r electrical shock Use special caution in households where children are present If liquids or foreign objects should enter the television immediately turn off the power switch disconnect the power plug from the power outlet and contact your dealer Do not place the television in a bathroom Do not expose the television to rain or moisture Do not place flower vases pots cups cosmetics liquids such as...

Page 10: ...er cord and cables Also do not place a spread cover etc over them because this could result in the inadvertent placing of heavy objects on the concealed power cord or cables Do not pull the power cord and cables When connecting and disconnecting the power cord or cables do it with your hand holding the plug or connector Do not place the cord near the heater Do not touch the power plug just after d...

Page 11: ...Place where you can trip over it Always vibrating or strongly vibrating places Distorted or unstable places How to view the PDP TV If you use the television in too dark a room your eyes may become tired Please use it in a reasonably bright room Avoid direct rays of the sun to the screen in order to prevent eye fatigue Your eyes will get fatigued after viewing the television for long period of time...

Page 12: ...he remote control Do not place heavy objects on the remote control Avoid strong rays Any strong rays such as direct sun rays or room lighting onto the remote control sensors could invalidate the remote control Avoid radio interference Any interfering radiation could cause distorted images or noises Avoid radio generator such as a mobile telephone transceiver etc around the television Set the sound...

Page 13: ...he display that controls the brightness of the screen to reduce degradation of the panel Using this function makes it possible to reduce image retention Set the PDP TV to a Move Screen display Move Screen function works to reduce image retention when displaying images on the four corners such as TV station logos and clock display Settings can be made using Move Screen from Function MENU shown on 3...

Page 14: ...amp 26 POWER PROGRAMS UPS PROGRAMT DOWNT VOLUMEX RIGHTX VOLUMEW LEFTW INPUT EXIT MENU ENTER Normal button action Button action when MENU engaged Remote control 11 receiver Main power switch 26 Caution when moving the main unit As this product is heavy whenever it is moved two people are required to transport it safely Whenever the unit is moved it should be lifted forwards using the two handgrips ...

Page 15: ... put it on a wet object to avoid possible failures Before leaving the remote control out of use for an extended period of time remove the batteries from it If the remote control begins to lack responsiveness replace the batteries Strong light such as direct sunlight impinging on the photoreceptor of the remote control can cause operational failure Position this unit to avoid direct contact with su...

Page 16: ...ote control continued 1 POWER button Press this button to turn the TV set on or standby 2 I II button Press to select sound mode Mono Stereo Language A I Language B II Function Buttons NOTE ZOOM ZOOM buttons This function not support ...

Page 17: ...urrent and last channel viewed and press jump back to last page of OSD 9 button Press this button to choose specific number channel for three code upper channel 10 EXIT button This button will exit all On Screen Displays 11 MENU button The MENU button will start the OSD 12 W X buttons Press Up Down Left Right buttons to adjust the options under OSD menu 13 ENTER button Press ENTER button to select...

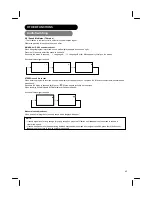
Page 18: ...gnal format received the picture format ratio allows you to adjust the images through the following options 1 TV Composite S Video Component 480i 480p 576i 576p Input 2 Component 720p 1080i HDMI Input 3 RGB Input Auto adjust to full size Aspect ratio is not changeable 20 ZOOM buttons This function not support 21 PIP SWAP button Press to exchange the main video signal source with PIP video signal s...

Page 19: ...in video source Component YCBCR YPBPR HDMI and PC RGB are not accessible to PIP HDMI 480i 576i cannot support PIP function Main Sub TV HDTV Composite S Video Component HDMI PC RGB TV HDTV Composite S Video Component HDMI PC RGB 23 SLEEP button Press the sleep button repeatedly to set the sleep timer to 30 60 90 and 120 minutes NOTE For changing TV channel under PIP function Press directly channel ...

Page 20: ...ext pattern F REVEAL button Press this allows hidden information found on some Teletext pages to be displayed on the screen G SUB PAGE button Use this to activate sub page mode directly in Teletext service H CANCEL button This allows the screen to return to the TV mode temporarily while searching for a required text page When the required text page has been received the page number will be display...

Page 21: ...ustment d BLUE button Press to operate the HDTV function in HDTV OSD Function depends on the HDTV OSD e YELLOW button Press to operate the HDTV function in HDTV OSD Function depends on the HDTV OSD f GREEN button Press to operate the HDTV function in HDTV OSD Function depends on the HDTV OSD g RED button Press to operate the HDTV function in HDTV OSD Function depends on the HDTV OSD h FAV CHANNEL ...

Page 22: ...18 COMPONENT NAMES continued Remote control continued i CANCEL LIST button Use this to switch directly to your HDTV channel list j GUIDE button Use this to switch directly to HDTV guide ...

Page 23: ...fire electrical shock or injury Please note that our company assumes absolutely no responsibility for personal injuries or property damage caused by use of other mount units or improper installation Have this unit mounted in a stable place Take measures to prevent it from tumbling down to avoid possible In order to prevent an internal temperature increase maintain a space of 10cm 4 inches For a de...

Page 24: ...o an outdoor antenna 2 Connect all power sources before activating the PDP TV 3 Turn on the PDP TV 4 To use the TV press DTT TV button on the remote to choose TV mode 5 When operating the TV at first time its TV system is at default factory mode and this mode cannot display the image normally on the screen In order to watch the TV program without problem please execute TV Channel Setup menu 33 for...

Page 25: ... Connect all power sources before activating the PDP TV 3 Turn on the PDP TV 4 Press the button corresponding to the appropriate signal source HDMI or Component Video YCBCR YPBPR 1 Connect the TV Cable Box or Satellite Receiver device using Component cable and Audio cable or S Video cable and Audio cable or Composite cable and Audio cable 2 Connect all power sources before activating the PDP TV 3 ...

Page 26: ...ignal source HDMI Component Video YCBCR YPBPR S Video or Composite Video For improved sound quality you may want to play the audio of the PDP through your stereo system 1 Use an audio cable and Subwoofer cable to connect the PDP s audio output jacks to the line input jacks on the A V receiver 2 Connect all power sources before activating the PDP TV 3 Turn on the PDP TV 4 Press the MENU to display ...

Page 27: ... is used cabling by the S Video cable is recommended to provide finer Video quality HDMI the HDMI logo and High Definition Multimedia Interface are trademarks or registered trademarks of HDMI Licensing LLC HDMI High Definition Multimedia Interface is a digital interface based on DVI Digital Visual Interface which is an added function for audio visual equipment It does not have degradation by trans...

Page 28: ...f this device and the output terminal of the personal computer Depending on the type of personal computer being connected the use of an optional conversion adapter or the adapter provided with the personal computer may be necessary in some cases For details refer to the instruction manual of the personal computer or ask the personal computer manufacturer or your local retail dealer CONNECTING PC 1...

Page 29: ...onnection Incorrect connection of the power cord could result in fire or electrical shock Do not touch the power cord with a wet hand Check that the connecting portion of the power cord is clean with no dust before using Use a soft and dry cloth to clean the power plug Insert the power plug into a power outlet firmly Avoid using a loose unsound outlet or contact failure Do not cut off the fitted p...

Page 30: ... the main power switch on the PDP TV main unit to OFF During normal use the main power switch is set in the ON position and the monitor can then be turned ON OFF using the POWER button or the POWER button on the remote control When the indicating lamp lights in orange or the message CABLE NO INSERT or Blue picture appears on the screen there is something unusual about the status of reception See P...

Page 31: ...el or Vol and Vol buttons of the remote control When a button is pressed the volume adjustment status guide will be displayed The volume will increase when the volume X or Vol buttons are pressed while the guide is being displayed The volume will decrease when the volume W or Vol buttons are pressed while the guide is being displayed Adjustment status guide display CHANNEL S T buttons INPUT EXIT b...

Page 32: ...ds TV VIDEO PC RGB Activate PIP by pressing PIP Input button to select desired video input Press on the remote control to select audio source of video input Picture Mode Brightness Contrast Color Tint and Sharpness can be adjusted by Audio source to settle on 1 I TV position Sound mode RECALL button Analog RGB 1024X768 60Hz Signal mode Input frequency CATV Composite VIDEO Main video input Audio so...

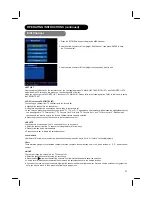
Page 33: ...N on the remote control to go to the last page press EXIT to quickly exit from the menu THERE ARE TWO DIFFERENT MODES FOR THE OSD AS BELOW TV Video Mode Displays when the TV HDTV Composite S video Component or HDMI is selected PC Mode Displays when the Analog RGB input is selected TV Video Mode PC Mode Picture Mode Brightness Brightness Contrast Contrast H Position Color V Position Tint Color Temp...

Page 34: ...r most realistic skin color Sharpness Soft Sharp Shift to the minus side for a softer effect and plus for sharper picture Color Temperature Cool Natural Warm User Black White Normally set to Cool Reset off the function The original factory settings for the items of this Menu page can be restored by pressing the ENTER button PC Mode Selected characters W X Setup hint Brightness Black is subdued for...

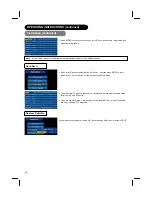
Page 35: ...y static image If this is set from Off to Level3 it helps to reduce the noise interference visible on the static image especially in the weaker signal reception areas 3 2 Pull Down Disable Enable Adjust to improve the picture quality Reset off the function The original factory settings for the items of this Menu page can be restored by pressing the ENTER button PC Mode Selected characters W X Setu...

Page 36: ...hen SRS WOW select On this function is not available SRS WOW On Off Adjust to preference Reset off the function The original factory settings for the items of this Menu page can be restored by pressing the ENTER button SRS WOW is an audio enhancement technology from SRS Labs that provides deep rich bass on any speaker system without the need for a subwoofer or additional extra physical components ...

Page 37: ...e Left Middle Center Middle Right Lower Left Lower Center Lower Right Adjust to preference Audio Source Main PIP Adjust to preference Brightness Black is subdued for increased overall darkness Black is set off for increased overall brightness Adjust to preference Contrast Narrows the gap between brightness and darkness Broadens the gap between brightness and darkness Adjust for maximum visibility ...

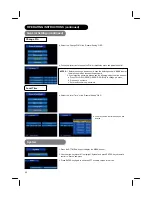
Page 38: ...and press the W X buttons to choose the sound system AUTO M BG I DK NOTE If the SOUND SYSTEM setting for a TV channel is incorrect it may proven the sound from being issued Fine Tune Decrease number Increase number If the channel reception is poor select FINE TUNE and press the W X buttons to fine tune the program Channel Manual Search Use to add the channel by manual Store Storing the manual sett...

Page 39: ...nsert This function changes a programmed number of a TV channel 1 Press the S T and W X buttons to choose a program number for which you want Every time you press the S T and W X buttons the programmed number changes and the picture of the TV channel stored in the programmed number appears on the screen 2 Press the green button to start the INSERT function 3 Press the S T and W X buttons to choose...

Page 40: ...to the last page press EXIT to quickly exit from the menu HDTV Main Menu Edit Channel TV Main List This is used to edit the channel from the TV channel list No Block Block G and above Block PG and above Block M and above Block MA and above Block AV and above Block R and above Parental Guidance Block All Blocks selected HDTV rating and all ratings below it Enter the password to change setting Manua...

Page 41: ...h TV Favorite List 1 and TV Favorite List 2 Make sure all the channels you want to copy to the favorite channel list are correctly selected d Press the green key to copy the channel to the favorite channel list DELETE You can delete a channel from the TV channel list if you do not want it a Select the channel from the TV channel list using the or arrow keys b Press yellow key and X mark appears c ...

Page 42: ... lock rating A pop up message will say that the channel is locked To see the channel you have to enter a password in the Check Password Menu before viewing the channel The default password is 0000 2 This option will allow you to set the Parental Guidance Level for the receiver You could use or arrow keys to scroll between different ratings On selecting this option 3 check password menu will pop up...

Page 43: ...NTER to lunch the auto scan A Manual Scan window will show b You can use the or keys to highlight a single channel and just simply fill in all information which are inquired on the screen by remote control and then press ENTER button on the remote control to start manually scanning this single channel s signal a Press or buttons to highlight the Quick Scan and then press ENTER to lunch the auto sc...

Page 44: ...ill show the SCAN status b Once the digital TV signal is scanned the channel number and program name will be shown on the Auto Scan List c When it is complete even in processing you can press EXIT key to leave the window and enjoy watching DTT programs If you want to restore defaults choice OK then all settings will be lost if not choice EXIT Auto Scan Note Current listed cities are for Australia ...

Page 45: ...the Audio setup of the General Setting OSD b You may choice PCM or Dolby then press ENTER key on the remote control c Choice OK then the settings will be saved if not press EXIT a Select the Option setup of the General Setting OSD b Information box timeout by adjust the timeout you may change the time interval of the menu showing when you press DTT menu button on the remote control or doing the ch...

Page 46: ...on to display the MENU banner 2 Use the arrow keys or to highlight System and press ENTER key on remote control to Status sub menu 3 Press ENTER key again to show the DTT software version for service Change Pin Local Time NOTES 1 Before you change the password uses the default password 0000 to enter the Menu item which requires the password 2 If you forget the password please see the following ste...

Page 47: ...o program is received sound mode display will appear and you can press the I II button to select between stereo and mono sound Each time the button is pressed Mono or Stereo appear cyclically on the screen When receiving NICAM signals NICAM display will appear as below Sound multiplex signal received Monaural sound broadcast When a monaural program is received sound mode display will appear NOTE I...

Page 48: ... signal does not match the monitor specifications or is in an unstable status A guide displays No Input Signal Recheck the input signal specifications Signal Check TV Video mode Changes in the signal status are displayed on the screen as they arise Mode Status Display Action TV When the TV signal is no longer detected A guide is displayed for searching and counting down 2 minutes If the TV signal ...

Page 49: ...s not being used to reduce power consumption by this unit Horizontal Yes No Yes No RGB sync signal Vertical Yes Yes No No PC signal Active normal display Blank no display Operation mode On Off Indicating lamp Lights green Lights orange Power consumption 350 W 3W 100V 240V Returning to operating status Operate the personal computer or press either the INPUT button of the main unit or the PC button ...

Page 50: ...signal cable is connected 21 30 The display image appears flowing slantwise Text displayed across the screen appears vertically streaked with the characters in vertical columns blurred Adjust the dot clock frequency and phase Adjust the dot clock frequency first the dot clock phase next PC RGB input 31 51 Text displayed across the screen appears blurred A fine pattern flickers when displayed on th...

Page 51: ...ly If the direct frequency from the computer is below 85Hz try a higher frequency upper limit 85Hz There may be a slight attenuation of the current image 51 The top of the monitor heats up When used for long periods of time the top of the monitor may heat up This is not a malfunction Text characters are displayed with varying thicknesses The thicknesses of characters and lines may vary if images w...

Page 52: ...the W or X buttons and search for clear characters over the entire screen 10 Perform adjustment for symptom 2 below when the characters are blurred on the entire screen The display image may be momentarily disturbed during clock adjustment but this is not a failure Symptom 2 Text displayed across the screen appears blurred in its entirety Figure 2 A fine pattern flickers when displayed on the scre...

Page 53: ...commended signal 17 modes 51 Video input Input terminals Composite video input terminal RCA Composite video L R audio input terminal RCA S Video input terminal S Video L R audio input terminal RCA Component YCBCR YPBPR video input terminal RCA Component YCBCR YPBPR L R audio input terminal RCA HDMI input terminal Input signals Composite video PAL SECAM NTSC Component YCBCR YPBPR video 480i 576i 48...

Page 54: ...26 4 480p 480 59 94 31 47 5 1080i 50 1080 50 00 28 13 6 1080i 60 1080 60 00 33 75 7 720p 50 720 50 00 37 00 8 720p 60 720 60 00 45 00 With HDMI input Signal mode No Signal Name Resolution Vertical frequency Hz Horizontal frequency kHz Dot clock frequency MHz Remarks 1 VGA 640 x 480 59 94 31 47 25 18 VESA 2 576i 720 1440 x 576 50 00 15 63 27 00 EIA 861B 3 480i 720 1440 x 480 59 94 15 73 27 00 EIA 8...

Page 55: ... 03 60 02 78 75 14 XGA 1024 x 768 85 00 68 68 94 50 15 XGA 1280 x 720 60 00 45 00 74 30 16 XGA 1280 x 960 60 00 60 00 108 00 17 XGA 1280 x 1024 60 02 63 98 108 00 The type of video board or connecting cable used may not allow for correct displays adjustment of Horizontal Position Vertical Position Horizontal Clock and Clock Phase The monitor may fail to display an animation image correctly when a ...

Page 56: ...52 ...

Reviews: