


-19-
MN1-1014 Rev. 14
3. Preparations for Use
3-1. Start up check of the probe
3-1-1. Visual check
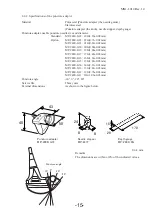
Visually check the probe tip, ultrasonic irradiation area, cable and connector.
If any holes, indentations, abrasion, cracks, deformation, looseness, discoloration, or other
abnormalities are found, do not use the equipment.
3-1-2. Verification of washing, disinfection and sterilization
Verify that washing, disinfection and sterilization are conducted according to the intended use.
3-1-3. Verification of operation
Connect to the ultrasound diagnostic instrument by following the instructions in section 4-6
“Connecting to the ultrasound diagnostic instrument" and check that the selected probe match the
convex display and the displayed frequency and check the image for errors.
Remarks
For details on the displayed screens, see the documentation supplied with the ultrasound diagnostic
instrument.
Warning
Be sure to preparations for use.
Using the equipment without noticing an abnormal condition can result in injury to the operator or
patient. If an inspection finds an abnormal condition in the
equipment, immediately stop use and
contact one of our offices and/or distributor's offices listed on the back cover.
Caution
Do not use the probe if the selected probe and image do not match the frequency.
An incorrect acoustic output can result in burns or other injuries to the patient. Contact one of our
offices and/or distributor's offices listed on the back cover.
Summary of Contents for UST-9113P-3.5
Page 2: ...MN1 1014 Rev 14 ii ...
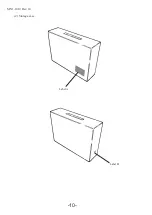
Page 16: ... 10 MN1 1014 Rev 14 2 Storage case Label A Label B ...
Page 18: ... 12 MN1 1014 Rev 14 ...
Page 24: ... 18 MN1 1014 Rev 14 ...
Page 46: ... 40 MN1 1014 Rev 14 ...
Page 48: ... 42 MN1 1014 Rev 14 ...
Page 52: ... 46 MN1 1014 Rev 14 ...
Page 54: ... 48 MN1 1014 Rev 14 ...