©2020 Hinkley Lighting, Inc.
|
hinkley.com
|
09
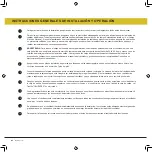
FINISHING THE INSTALLATION
1
2
3
4
5
2
1
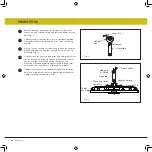
Tuck connections neatly into ceiling outlet box.
Slide the canopy up to mounting bracket and place the
key hole on the trim ring the screw on the mounting
bracket, turn canopy until it locks in place at the narrow
section of the key holes.
Align the circular hole on canopy with the remaining
hole on the mounting bracket, secure by tightening the
two set screws.
NOTE:
Adjust the canopy screws as necessary until the
canopy and trim ring are snug.
Loosen the buckles at one end of the chain and attach to
the chain support loops of the fixture.
Loosen the remaining buckles of the chain ends and install
the chain to the C-Ring on the fan downrod. Slide the
C-Ring up the downrod until the chains are taunt. Secure
the C-Ring into position on the downrod by securing the
two set screws.
WARNING:
Make sure the hook on the hanging bracket properly sits in the groove in the hanger ball before
attaching the canopy to the bracket by turning the housing until it drops into place.
Ceiling Fan
Outlet Box
Hanger
Bracket
Groove
Canopy
Trim Ring
Screws
Allen
Screws
Secure
Ring
Allen Wrench
Chain Support Loops.


