Video Intercom Master Station
·
User Manual
2
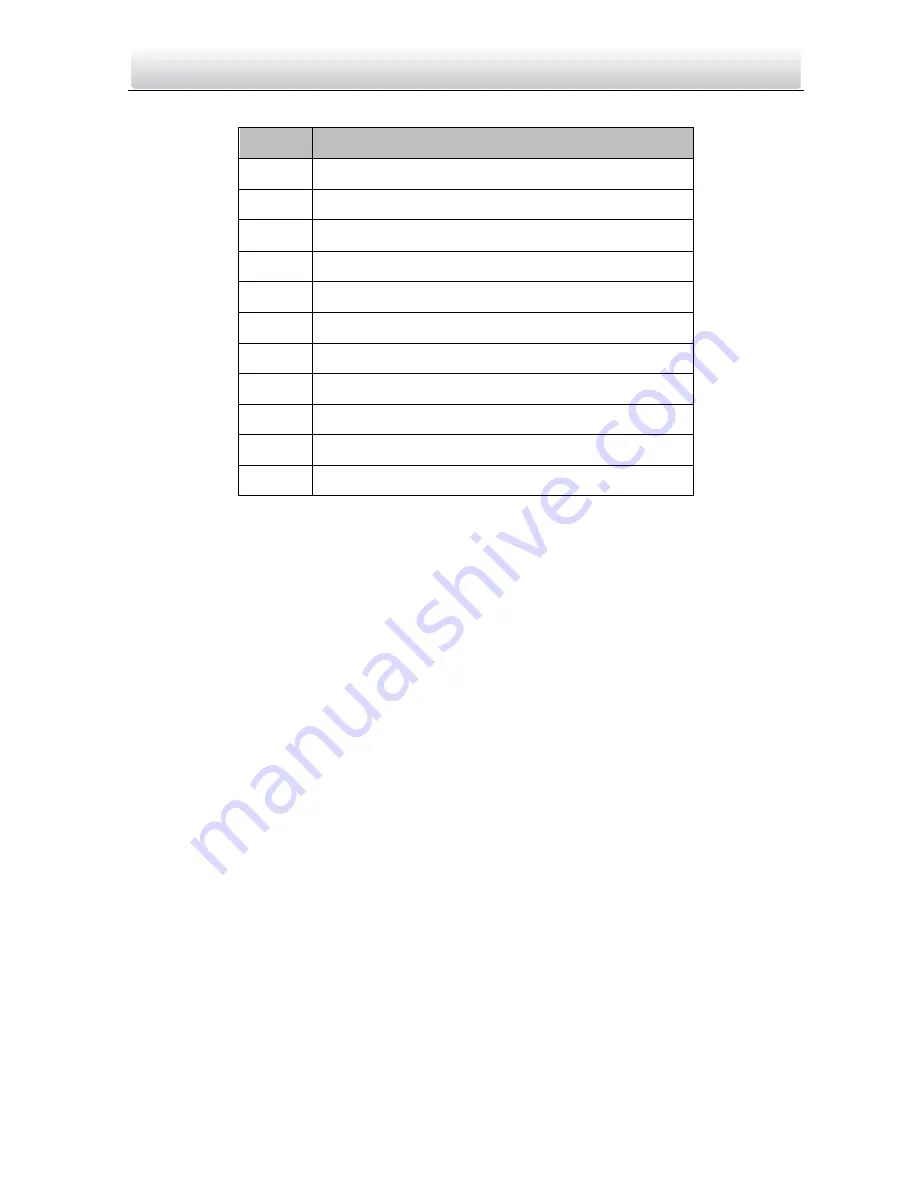
Table 1-1
Descriptions
No.
Description
1
Phone
2
Camera
3
Display
4
Dial Keyboard
5
Power Indicator
6
Information Indicator
7
Alarm Indicator
8
Microphone
9
Call/End Call Button
10
Unlock Button
11
Speaker Button


