3 Front fixing
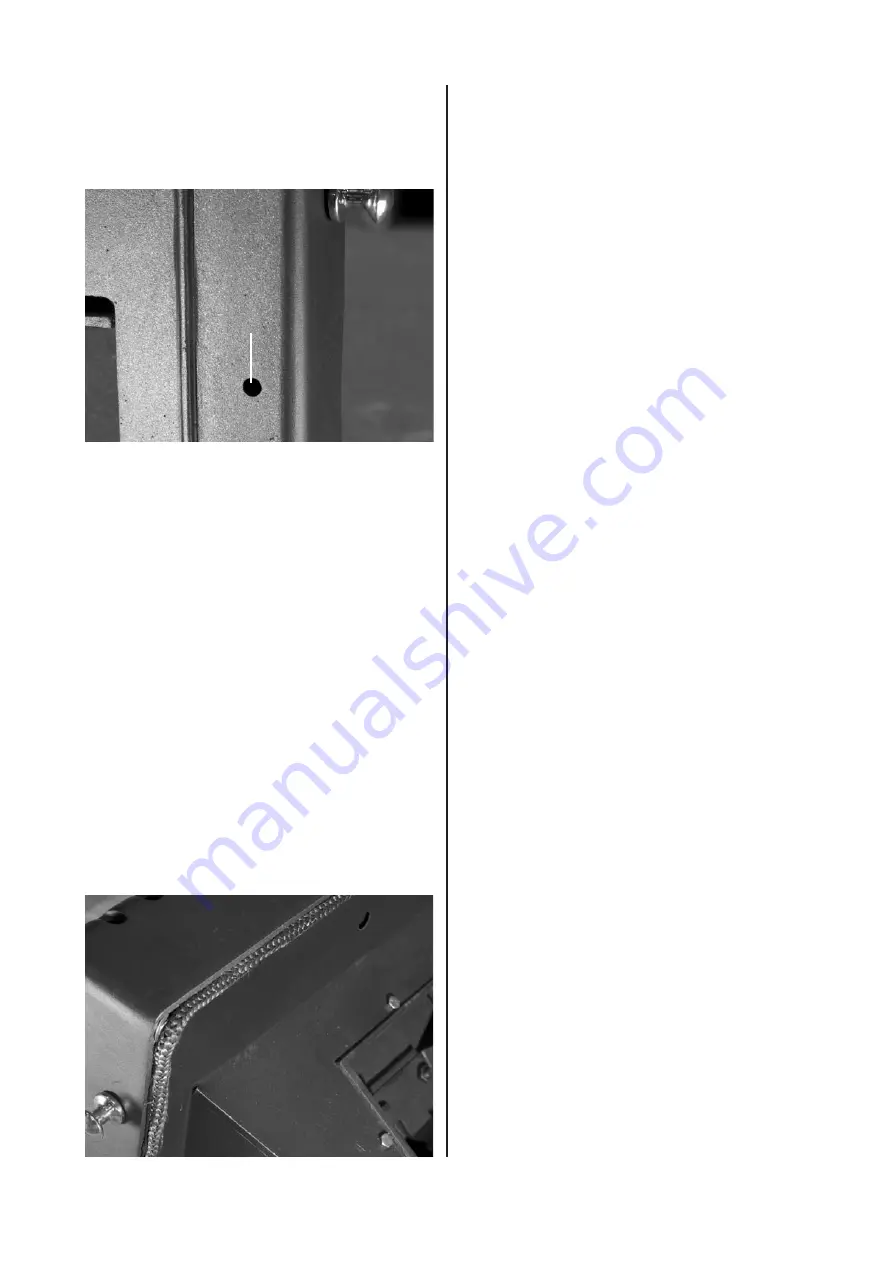
There are also two additional pre-drilled fixing holes
on either side of the stove fire chamber opening that
can be used to attach the stove to the fireplace (
see
below)
.
Carefully position the stove within the fireplace
opening and mark the two holes on to the fireplace
front. Remove the stove and carefully drill the holes
using the appropriate drill bit and insert the screw
plugs. Re-position the stove and insert and tighten
both screws.
Remember,
if you are fitting a liner then the liner,
attached to the spigot, should already be dropped and
positioned inside the chimney before the stove is fixed
in place.
Creating an air-tight seal
You must ensure a good seal between the back of the
stove and the face of the fireplace. This is especially
important if you are not using a liner since any air
leaks here could impair the performance of the stove
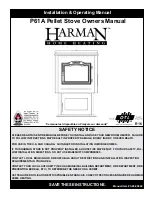
and also render it unsafe. Fire rope has already been
attached at the back of the stove (allow for this in the
base fixing method). Uneven surfaces such as stone
may need additional sealing. Front fixing and clamp
methods will increase the security of this seal by
drawing the stove tight against the fireplace face and
these are therefore the preferred fixing methods when
a liner is not used.
Front fixing: Use the two
pre-drilled fixing holes on either side
of the fire chamber frame
Fire rope seal: Rough surfaces
such as stone may require
additional sealing
COMMISSIONING
1
Confirm that all internal parts of the stove are
correctly fitted, including the baffle plate
2
Confirm that the door closes correctly and that the
latch mechanism and door seals work to make an
air-tight seal
3
Warm the chimney and carry out a final smoke
draw test
4
Light the stove with a gentle fire, allowing the stove
to increase to an operational temperature level and
check that no combustion products are entering the
room
5
Ensure that the Primary and Secondary air controls
are fully operational
6
Explain the safe operation of the stove to the user
and the importance of using the correct fuel types
7
Explain the requirements of using an approved
fireguard whenever children, the elderly or the
infirm are likely to be in the vicinity of the stove
8
Make sure that the customer receives this copy
of the
Instruction Manual
9
Complete the relevant parts of the
Graphite
Warranty Card
with your Hetas / INFO or competent
persons registration number and contact details
IMPORTANT: FIRST FIRES
Use smaller and shorter ‘gentle’ fires the first five or
six times that you fire up the stove, making these
progressively bigger, as this will avoid any potential
thermal shock and allow the cast iron components to
‘acclimatise’ with each other. Allow the stove to fully
cool down between these fires.
When first using the stove it is normal to experience
paint fumes or see light smoke rising from some of
the stove’s painted surfaces. During this stage ensure
that the room has additional ventilation by opening
doors and windows to minimise any adverse
effects. The hotter you burn the stove the more
intense these fumes will be, which is one of the
reasons that we advise that you use smaller fires to
start with. Every time the stove reaches a new higher
temperature it may still be possible to smell these
fumes or see some gentle smoke until the paintwork
is fully cured.
If smoke and fumes persist do not use the stove and
immediately consult your installer, as this may indicate
that there could be a possible problem with the
installation.
17


