


3
Helvar 434 EnOcean Gateway: Installation Guide
Set up EnOcean Gateway using Toolbox
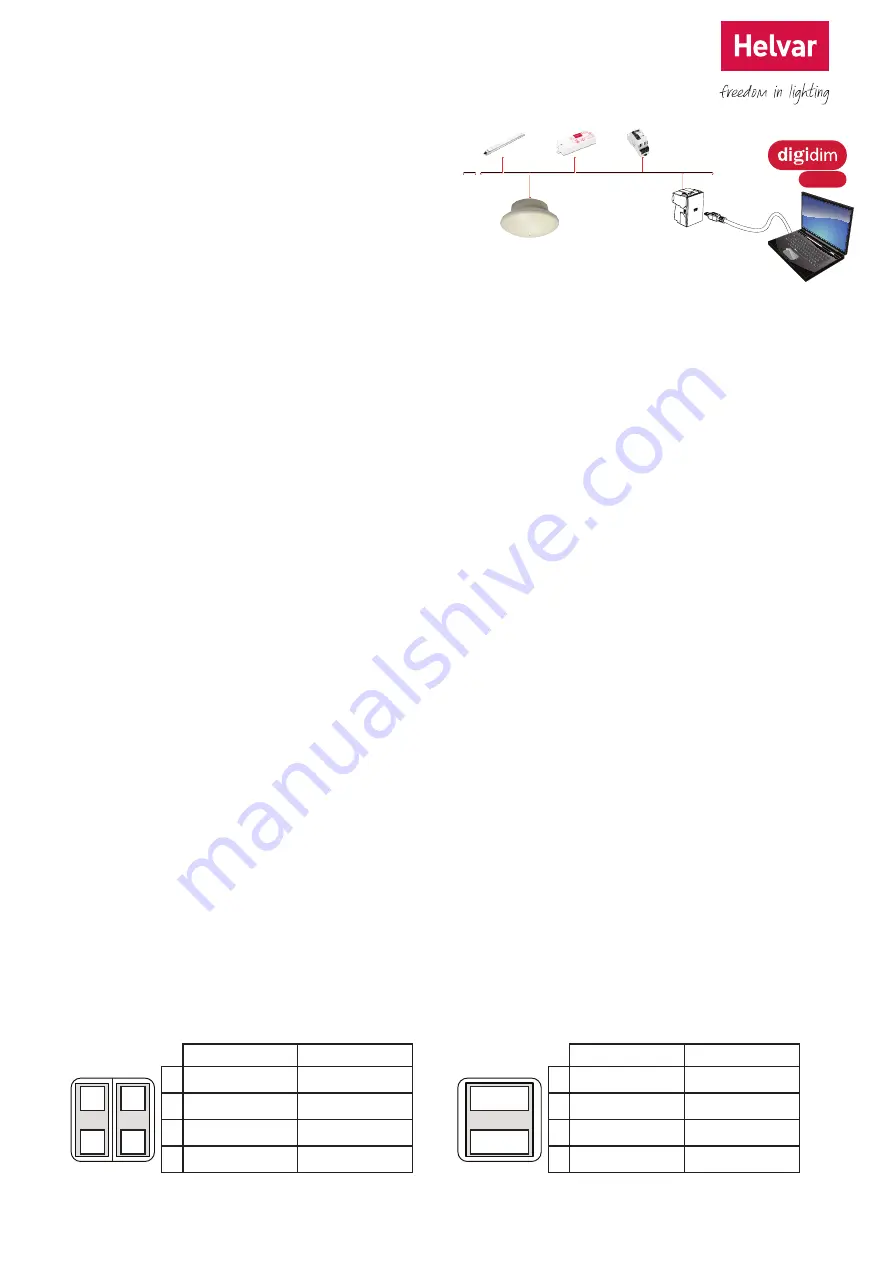
DALI network (configured with Toolbox software)
You need a Windows PC (running Helvar’s Toolbox software,
v. 2.3.2 or later) connected via USB or serial cable to the
DALI network. Use a 510 USB interface, or other Helvar
serial interface.
1. Discover the Gateway in Toolbox
• Ensure the PC is connected to the DALI network.
• Run Toolbox software and connect to the DALI network.
• In the Device Layout tab, you should now see ‘EnOcean
Gateway 434’.
Note:
You cannot put the Gateway in a group. You can
group the buttons of the switch units, when the switch unit
is paired with the Gateway.
2. Put the Gateway in Learning Mode
• In Toolbox’s Device Layout tab, right-click ‘EnOcean
Gateway 434’ and select ‘Properties’.
• Set ‘Learning Mode’ either to ‘Top is Off’, or to ‘Top is On’.
If you are not going to use these default settings, choose
either mode.
• In Learning Mode, the status LED will flash red at
intervals of 1.25 s.
Note:
The Gateway cannot be used to control the lights
while in Learning Mode.
3. Pair the Switch Unit with the Gateway
• In Toolbox, open DALI History (Tools > History). This lets
you check DALI network activity.
• On the EnOcean switch unit, press the left button up
or down (dual rocker switch) or the up or down button
(single rocker switch). Make sure the switch is within
signal range of the Gateway unit.
• The status LED flashes green. To confirm that the
Gateway has detected the switch, check that a new
row appeared in DALI history, assigned to the Gateway
address. One press is enough to pair the switch with
the gateway. You can press the buttons more times, to
check the signal range limits of the switch unit.
Note:
Paired Switch Units will appear in the device layout
tab at the end of Step 5.
ToolBox
Default EnOcean switch unit settings (Toolbox)
Dual Rocker Switch
Single Rocker Switch
Top is On
Top is Off
Top is On
Top is Off
1
2
3
4
1:
On / Up
Off / Up
3
4
1:
NOT USED
NOT USED
2:
Off / Down
On / Down
2:
NOT USED
NOT USED
3:
On / Up
Off / Up
3:
On / Up
Off / Up
4:
Off / Down
On / Down
4:
Off / Down
On / Down
Note:
On = Maximum Level
DALI power
DALI devices
To pair other switches (maximum 20 per Gateway), repeat
step 3.
4. Turn off Learning Mode
• In Toolbox’s Device Layout tab, right-click ‘EnOcean
Gateway 434’ and select ‘Properties’.
• Set ‘Learning Mode’ to ‘OFF’. The status LED will stop
flashing red.
• The Gateway, now out of Learning Mode, can send
commands to the lighting network.
5. Discover the Switch Unit in Toolbox
• In Toolbox Device Layout tab, press F5, (or View > Refresh).
The switch buttons now appear in the device tree.
6. Group Buttons and Configure Button Actions
If you are not going to use the default switch unit settings,
configure the button actions using Toolbox (see the “Device
Configuration” section of the Toolbox Help files).
The Gateway and switches should now be operational.