Helmer Scientific i.Series
®
- Platelet Agitator
Operation Manual
360390/A
6
2.3
Mounting Brackets
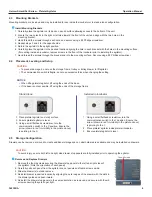
Mounting brackets are included and may be installed for use inside the incubator or in stand-alone configuration.
Install Mounting Brackets
1. Carefully place the agitator on its back on a solid surface allowing access to the bottom of the unit.
2. Locate the two nutserts in the right or left side toward the front of the unit and align with the two holes in the
mounting bracket.
3. Hand thread the screws through each hole, and secure using a #2 Phillips screwdriver.
4. Repeat steps 2 and 3 for the opposite side.
5. Return the agitator to the upright position.
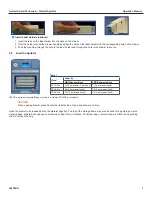
6. Carefully place the agitator in the desired location aligning the hole in each bracket with the holes in the mounting surface.
(If mounting inside an incubator, remove screws in the floor of the incubator prior to installing the agitator).
7. Hand thread the screws through the bracket and into the mounting surface. Secure using a #2 Phillips screwdriver.
2.4
Placement, Leveling and Setup
CAUTION
• To prevent damage, do not use the storage frame, trolley or trolley drawer to lift agitator.
• The communication switch is fragile, do not use excessive force when changing the setting.
NOTICE
• When lifting platelet agitator, lift using the ends of the base.
• If the base is not accessible, lift using the ends of the storage frame.
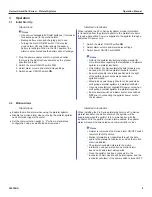
Stand Alone
Installed in Incubator
1. Place platelet agitator on sturdy surface.
2. Ensure platelet agitator is level.
3.
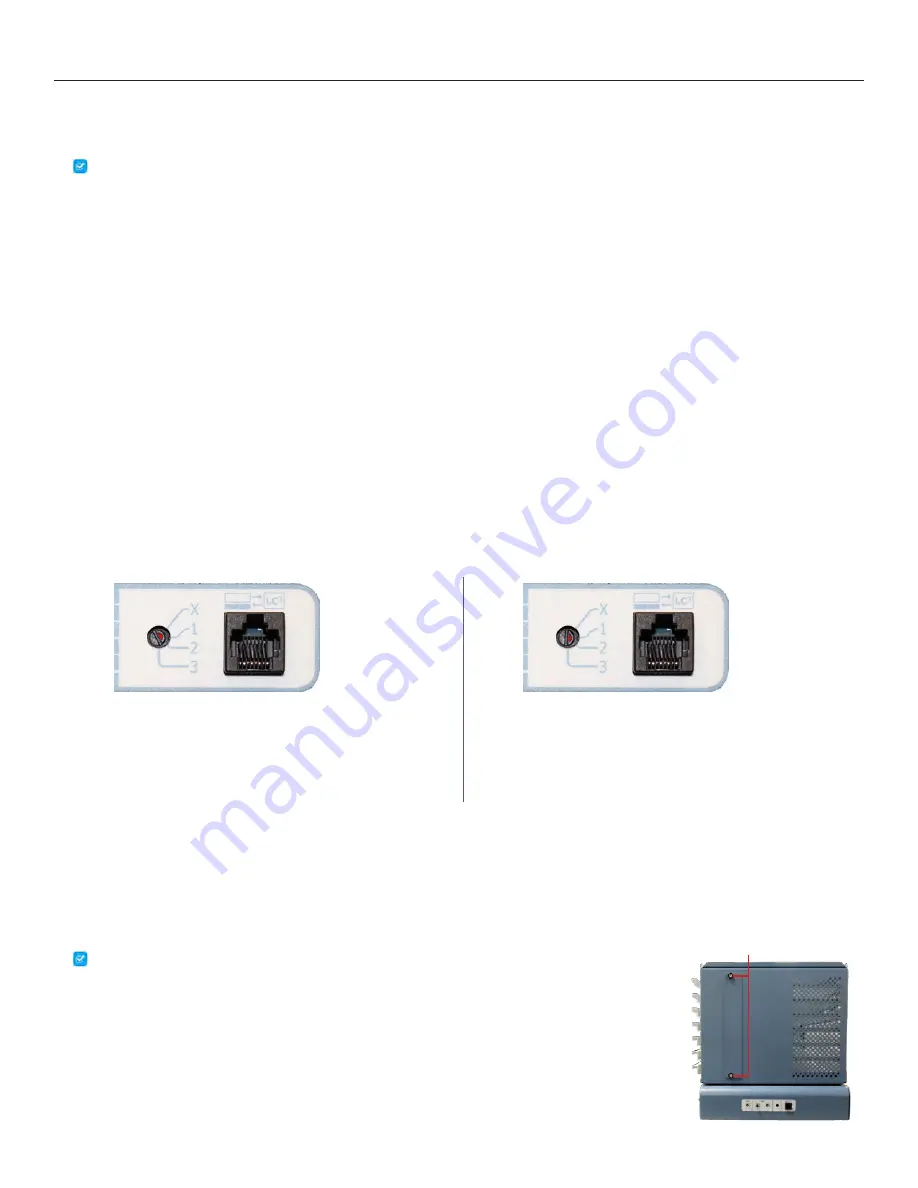
Using a small flathead screwdriver, turn the
communication switch to the X position. Ensure the
arrow
(shown in red for visibility in the picture above)
is pointing to the X.
1.
Using a small flathead screwdriver, turn the
communication switch to the 1 position. Ensure the
arrow
(shown in red for visibility in the picture above)
is pointing to the 1.
2. Place platelet agitator inside platelet incubator.
3. Ensure platelet agitator is level.
2.5 Storage Configuration
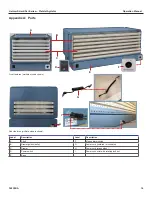
Drawers can be removed or moved to create additional storage space. Label holders are available and may be installed on drawers.
CAUTION
To avoid injury, ensure both left and right side drawer stop panels are fully installed prior to operating the agitator.
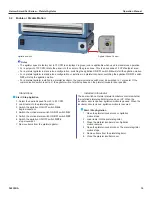
Remove and Replace Drawers
1. Remove the thumb screws securing the drawer stop panels to the left and right sides of
the agitator. (Note the orientation of each panel)
2. Carefully pull each panel from the agitator and set panels and thumb screws aside.
3. Slide the drawer(s) out and remove.
4. Reinstall drawer in desired location by aligning the outer edges of the drawer with the slots in
the drawer guides and push inward.
5. Reinstall the drawer stop panels in the same orientation as removed, and secure with thumb
screws ensuring they are finger tight.
Thumb Screws


