12
DIAGNOSTICS
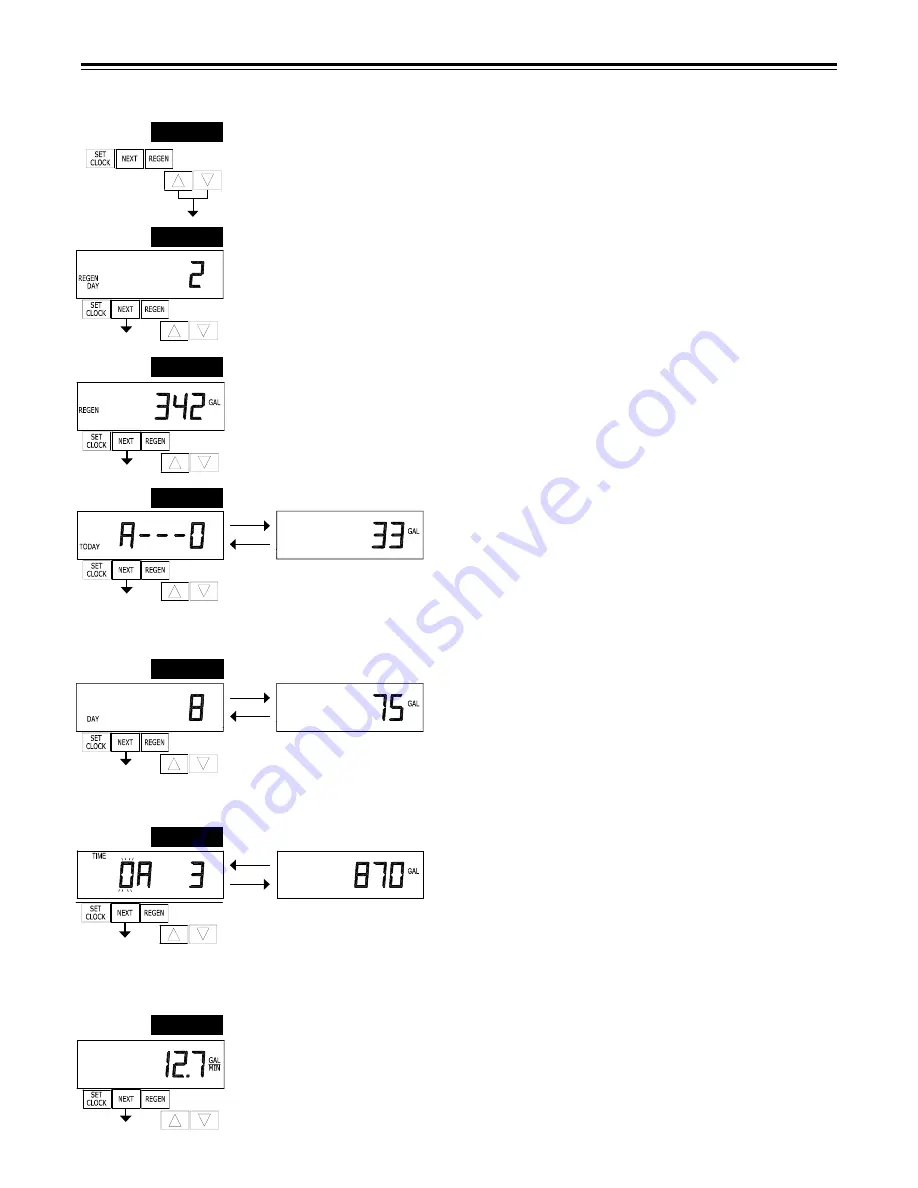
STEP 1D
STEP 2D
STEP 3D
STEP 1D
– Press
and
simultaneously for three seconds. If screen in step 2D does not appear in 5
seconds the lock on the valve is activated. To unlock press
, NEXT,
, and SET CLOCK in sequence,
then press
and
simultaneously for 3 seconds.
STEP 2D
– Days, since last regeneration: This display shows the days since the last regeneration
occurred. Press NEXT to go to Step 3D. Press REGEN to exit Diagnostics.
STEP 3D
– Volume, since last regeneration: This display shows the volume of water that has been
treated since the last regeneration. This display will equal zero if a water meter is not installed. Press
NEXT to go to Step 4D. Press REGEN to return to previous step.
STEP 7D
STEP 7D
– Flow rate, maximum last seven days: The maximum flow rate in gallons per minute that
occurred in the last seven days will be displayed. This display will equal zero if a water meter is not
installed. Press NEXT to go to Step 8D. Press REGEN to return to previous step.
STEP 5D
- Volume, 63-day usage history: This display shows day 1 (for
yesterday) and flashes the volume of water treated yesterday. Pressing
will show day 2 (which would be the day before yesterday) and flashes
the volume of water treated on that day. Continue to press
to show
the maximum volume of water treated for the last 63 days. If a regenera-
tion occurred on the day the word “REGEN” will also be displayed. This
display will show dashes if a water meter is not installed. Press NEXT at
any time to go to Step 6D. Press REGEN to return to previous step.
STEP 5D
STEP 4D
– Volume, reserve capacity used for last 7 days: If the valve is
set up as a softener, a meter is installed and Set Volume Capacity is set
to “Auto,” this display shows 0 day (for today) and flashes the reserve
capacity. Pressing
will show day 1 (which would be yesterday) and
flashes the reserve capacity used. Pressing
again will show day 2
(the day before yesterday) and the reserve capacity. Keep pressing
to show the capacity for days 3, 4, 5 and 6.
can be pressed to move
backwards in the day series. Display does not appear if 1.0T is selected
in Step 2CS. Press NEXT at any time to go to Step 5D. Press REGEN to
return to previous step.
STEP 6D
– Twin Tank Valve Transfer History only displays when
1.0T was selected in Step 2CS. Use
or
to scroll through the last
10 tank transfers.
The first position in the display ranges from 0 to 9 with the lowest
number being the most recent transfer. The second position in the
display will be either “A” or “b”. If “A” then the tank with the valve on
it was in service, if “b” the tank with the in/out head on it was in service. The next three digits represent
the number of hours ago that the transfer occurred. The display alternates with the volume that was
treated before the tank transferred. Press NEXT at any time to go to Step 7D. Press REGEN to return to
previous step.
STEP 6D
STEP 4D


