


Installation Instructions and Instructions for Use
Subject to technical modifications
–
Date of issue December,
2021
9
Configuration
Configuration of ONYX.SWITCH without ONYX.CENTER
Open the "ONYX" app. Now press the group button (3) and the heart
button (4) together on the wall-mounted radio transmitter for 3 seconds.
The wall-mounted radio transmitter appears in the app and can be
selected. Then follow the instructions on the screen. “Settings for moto
r
and pushbuttons” can usually be adopted. When using a weather sensor
you should activate the respective sensor for each taught-in control unit.
As soon as the first control device/the first weather sensor has been
taught in, you can add additional control devices with "+". Only after the
connection of all control devices/ sensors, go to "
←
" on the top left. Now
tap on one of the 5 groups and assign the devices as you like. The
configuration is completed with “Done”. You can close the app now.
If, after the configuration of the ONYX.SWITCH, your shading elements
move into the wrong direction, connect the wall-mounted radio transmitter
with the app “ONYX” as described above. Under “Configure devices” you
now can tap on the pencil symbol of the respective device (top right).
Under the menu item “Advanced settings” tap now on “Reverse direction
of rotation”. By tapping on “Done” these settings are adopted.
To actuate your shading unit brightness dependent, tap under “Configure
devices” on the pen
cil symbol of the respective device (top right). Under
the menu item “Advanced settings” you find the item “Brightness range “.
Here two ranges can be adjusted via the two scroll bars. Both ranges can
be assigned the action “Extend” or “Retract”.
These settings can only be made, if a weather sensor ONYX.WEATHER is
available.
You can find additional information regarding the adjusting possibilities at
the control device in the respective “Instructions for use”.
Installation Instructions and Instructions for Use
10
Subject to technical modifications
–
Date of issue December,
2021
Configuration
Configuration of ONYX.SWITCH with ONYX.CENTER
First of all, ONYX.CENTER must be configured completely according to
the “Instructions for use” enclosed. As described in the respective
instructions for use, all control devices and sensors must also be
connected to ONYX.CENTER. Now connect with ONYX.CENTER. The
“Configuration mode” in the app must be activated. You find it under
“Settings”. ONYX.SWITCH can be taught in under "Devices" and "+". Then
follow the instructions on the screen. The configuration is completed with
“Done”.
Wall-mounted radio transmitters ONYX.SWITCH are only visible in the app
“ONYX”, when the “Configuration mode” is active. If you want to adjust the
configuration at the wall-mounted radio transmitter, activate the
“Configuration mode”. You find it under “Settings”. Then tap on the
respective ONYX.SWITCH. The groups can be adjusted under “Advanced
settings”.
Installation Instructions and Instructions for Use
Subject to technical modifications
–
Date of issue December,
2021
11
Operation
With the two pushbuttons UP (1) and DOWN (2) you can extend or retract
your shading element with a click on the relevant latching pushbutton.
Outdoor blinds are tilted with a brief click. If the respective latching
pushbutton is pressed for 2 seconds, the outdoor blind raises or lowers.
With a brief click on the respective pushbutton the lighting is switched off
or on. By pressing the respective pushbutton for 2 seconds, the lighting is
dimmable, if it is combined with the matching ONYX control device.
Successfully transmitted control commands are displayed by a backlight in
the status/channel bar in the corresponding channel colour.
With the group pushbutton (3) you can change over to other channels,
which you
configured earlier in the app “ONYX” (see chapter
Configuration). The fixed assigned channel colour is displayed in the
status / channel bar (5).
With the pushbutton with heart symbol (4), one favourite position per
channel can be saved, which is then ready for later use. Press this
pushbutton for 3 seconds to save the selected position. With a brief click
on this pushbutton, the position saved before can be accessed again.
Successfully transmitted control commands are displayed by a backlight in
the status/channel bar in the corresponding channel colour.
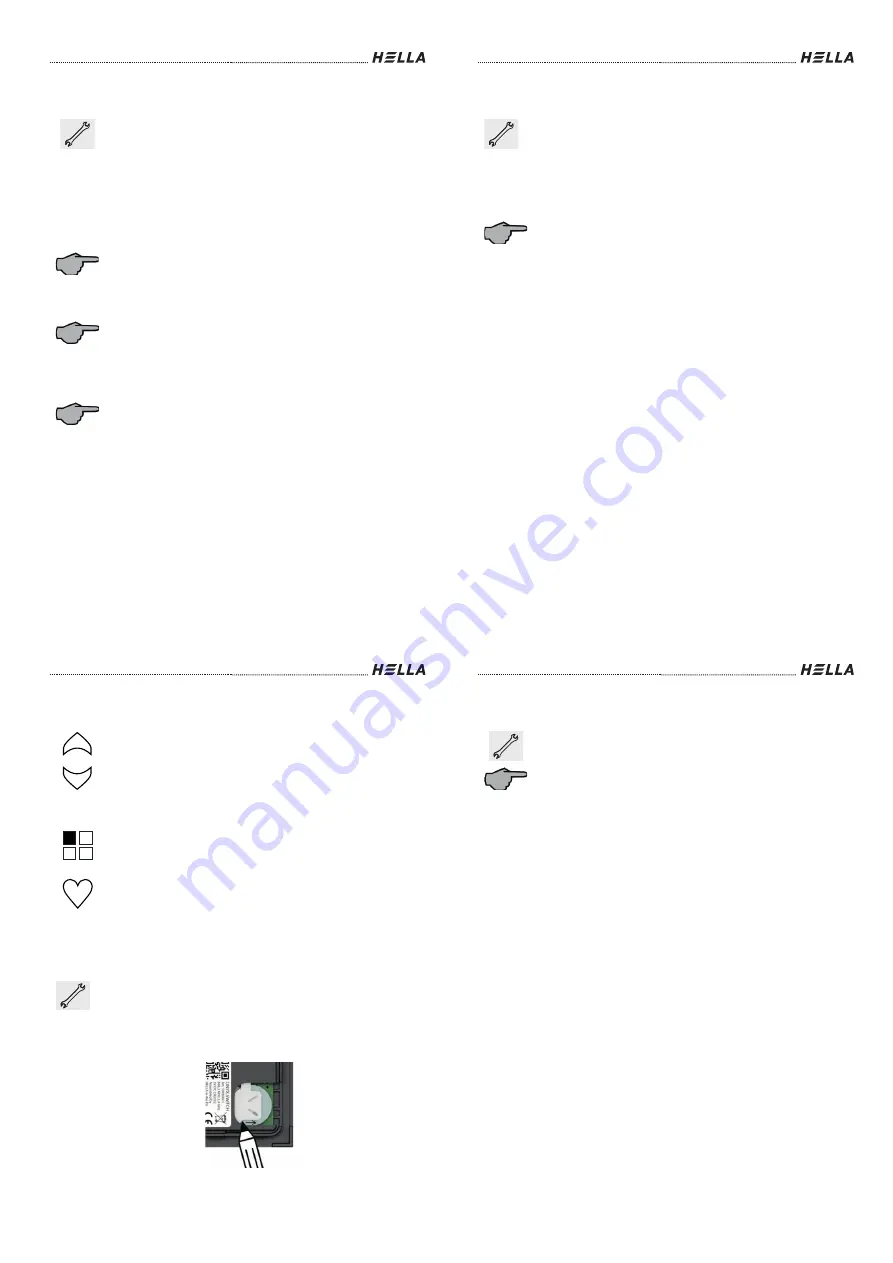
Replacing the battery
To replace the CR2032 button cell, remove the battery from the battery
slot (6) on the back of ONYX.SWITCH.
Use a pointed object (e.g. pencil) to remove the button cell from the
battery slot. When replacing the battery, please observe the correct
alignment of the battery in the battery slot (6) (when inserting the button
cell, the + pole must be aligned towards the top).
Installation Instructions and Instructions for Use
12
Subject to technical modifications
–
Date of issue December,
2021
Ideal use of the radio signal
In case of bad reception, the position of the ONYX.SWITCH must be
changed.
Radio systems that send on the same frequency may cause interference
with reception.
It must be considered that the range of the radio signal is limited by
statutory regulations and structural measures.


