32
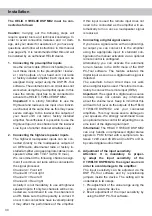
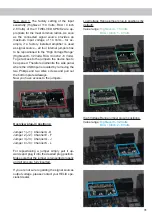
After setting the jumpers to the desired plug-in
positions, you can reassemble the amplifier.
Reg. step 2: Now you can optimally adapt the input
sensitivity to the connected signal source by using
the DSP PC-Tool softw
are.
Note:
Mute all signal outputs of the
V TWELVE DSP MK2 during this setup.
Therefore follow the subsequent steps:
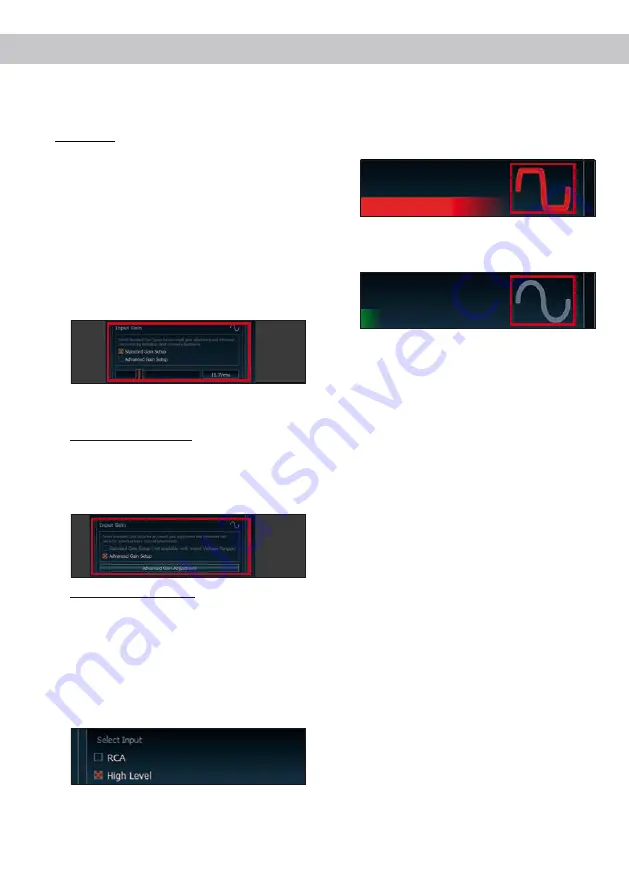
1. Turn on the amplifier and then start the
software. TFind the setting for adjusting
the input sensitivity in the “Signal Manage
-
ment” tab of the DCM menu under the item
“Main Input → Input Gain”.
2. Select the setup method to adjust the input
sensitivity.
Standard Gain Setup: This method allows
go globally set the input sensitivity for all
input channels (only with “Low Voltage
Range” jumper plug-in position – see page
31).
Advanced Gain Setup: With this method,
both a global setting of all channels and
an individual setting for the individual
channel pairs is possible.(Automatically
activated at High Voltage Range jumper
positions)
3. Select the used input (RCA / Cinch or high-
level.
4. Adjust the volume of your radio to approx.
90 % of the max. volume and playback
an appropriate test tone, e.g. pink noise
(0 dB).
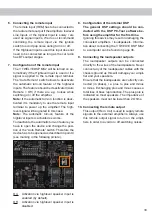
5. If the clipping indicator in the DSP PC-Tool
already lights up (see following picture),
you have to reduce the input sensitivity us-
ing the scroll bar until the indicator turns
off.
6. Increase the input sensitivity until the clipping
indicator lights up. Now turn the control one
step back so the indicator turns off again.
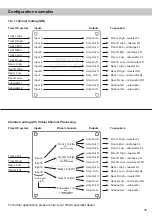
Various adjustment examples of the input sen-
sitivity can be found on page 34. For further ap-
plications please contact your HELIX specialist
dealer.
5. Connection to power supply
Make sure to disconnect the battery before
installing the HELIX V TWELVE DSP MK2!
Connect the +12 V power cable to the positive
terminal of the battery. The positive wire from
the battery to the amplifier power terminals
needs to have an inline fuse at a distance of
less than 12 inches (30 cm) from the battery.
The value of the fuse is calculated from the
maximum total current draw of the whole car
audio system (V TWELVE DSP MK2 = max.
80 A RMS at 12 V power supply). If your power
wires are short (less than 1 m / 40”) then a wire
gauge of 16 mm² / AWG 6 will be sufficient. In
all other cases we strongly recommend gauges
of 25 - 35 mm² / AWG 4 – 2!
The ground cable (same gauge as the +12 V
wire) should be connected to a common ground
reference point (this is located where the neg-
ative terminal of the battery is grounded to the
metal body of the vehicle), or to a prepared
metal location on the vehicle chassis, i.e. an
area which has been cleaned of all paint res-
idues.
Installation

