


EN
EN
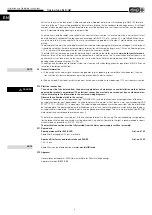
Casing type ELS-GU
Installation and Operating Instructions
12
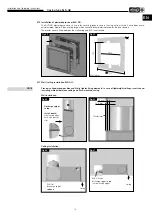
4�9 Install plasterboard adapter ELS-VA and spacer frame ELS-AGR to ELS-GU
Installation:
Plasterboard adapter
ELS-VA
to front-side flush-mounted casing insert in cladded sanitary walls.
Kit consists of plasterboard adapter and four plastic screws.
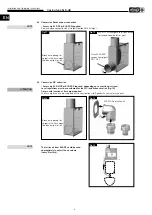
Fig�34
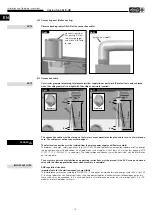
Connect flex-
pipe (DN 80) to
discharge spi-
got and seal�
Fig�35
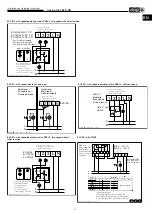
Connect eletrical
line to the con-
nection terminals
in the casing�
(see Fig� 48f)
Do not kink
flexpipe
bend radius
R
>
DN
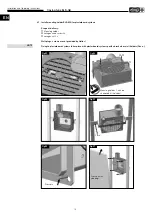
H 255
+5
mm
W 245
+5
mm
Installation opening!
max� 25 mm
Fig�36
Screws not
provided
by Helios
Install perpen-
dicularly�
IMPORTANT:
Casing must
not be distor-
ted by uneven-
ness!
Fig�37
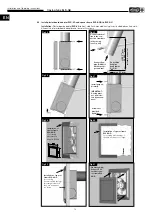
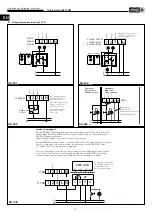
Fig�38
Installation of
spacer frame
ELS-AGR
for covering
plasterboard
adapter ELS-VA.
Installation of spacer frame
ELS-AGR
for covering wall openings if
they are unclean or too large.
Fig�39
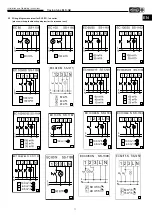
Installation of spacer
frame ELS-AGR
for covering
flush-mounted casings
(discharge to back) if
they are unclean or
too large.
Fig�40
Final assembly:
Connect ELS
facade to spa-
cer frame ELS-
AGR
Fig�41


