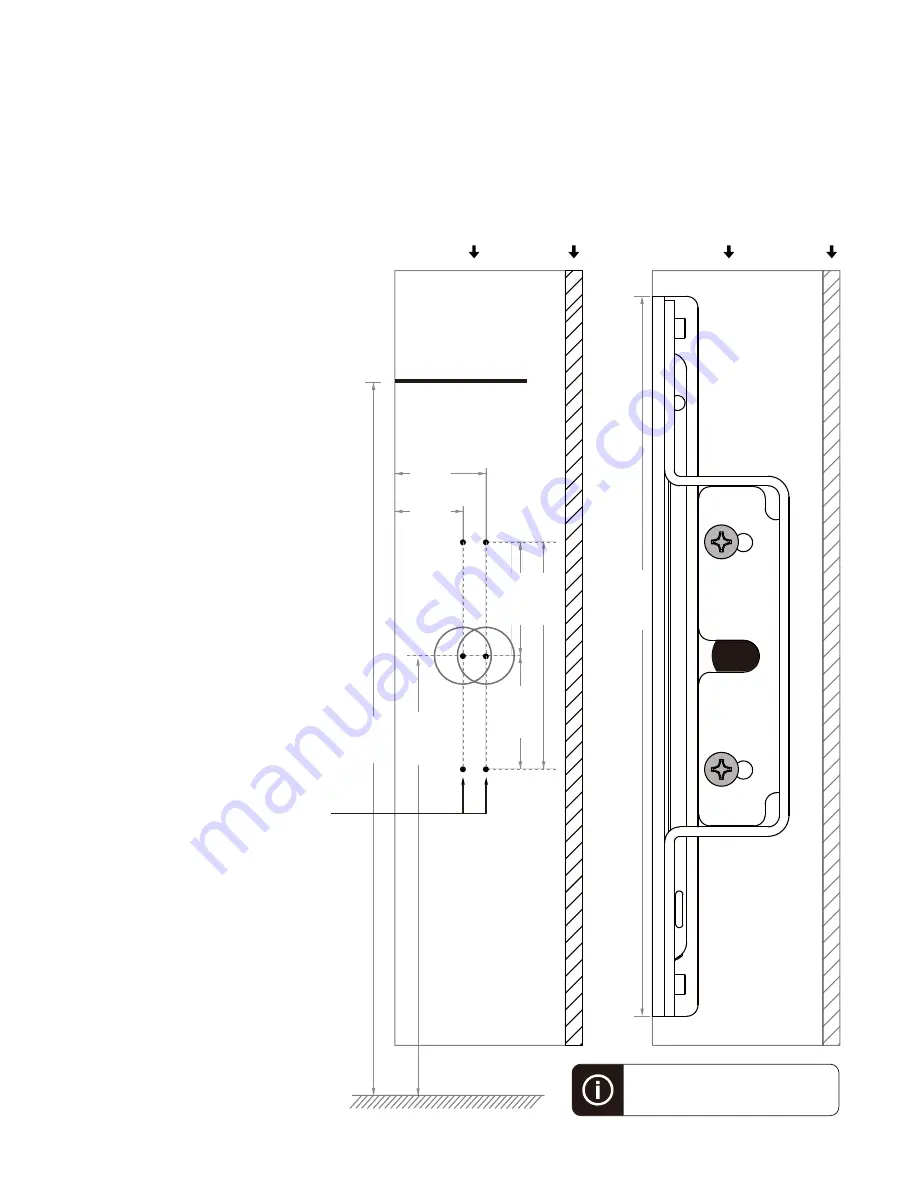
Selecting Your Mounting Screw
Positions
ADA Compliance Guideline
Creating The Ethernet Cable Hole
Installation Instructions and Template
Important Note:
Note: Drawing is not to scale.
3
To accommodate various mullion styles,
multiple screw hole positions are available.
Please select the mounting positions that
work best for your mullion.
You may use any screw you see fit for
mounting the product to the mullion.
If you choose to use the self-tapping
mounting screws provided, we recommend
drilling a pilot hole with a #17 drill bit or a
5/32-inch drill bit.
If your Ethernet cable has an RJ45 connec-
tor installed, drill a 5/8 inch hole in the
position shown.
If you will install an RJ45 connector after the
Ethernet cable is drawn through the mullion,
a smaller hole can be created.
For ADA compliance, the center of the
Ethernet cable hole should be no higher than
45 inches above the ground.
A minimum 1.5 inch (38mm) set back from
mullion face to the glass is required for an
optimal installation in which the front face of
the enclosure is flush with the front face of
the mullion.
WindFall Side Mount for iPad
Mullion Door Frame
Glass
Mullion Door Frame
Glass
BEFORE
INSTALLATION
AFTER
INSTALLATION
1 inch
(55 mm)
0.75 inch
(19 mm)
2.5 inch
(63.5 mm)
1.25 inch
(31.8 mm)
7.91 inch
(201 mm)
1.25 inch
(31.8 mm)
The top of the screen.
Ground
45 inch
48 inch
Summary of Contents for WindFall H604
Page 4: ...1 2 4 Disassemble Side Mount Remove Mounting Bracket From Front Bezel...
Page 7: ...6 7 7 2x F486 Remove Mounting Screws Fasten Mounting Bracket to mullion...
Page 9: ...9 9 10 Install Tablet Install Front Bezel...
Page 10: ...10 F529 11 12 4x Slide Front Bezel Onto Mounting Bracket Tighten Assembly Screws...


