Assembly
7
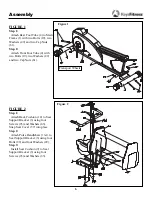
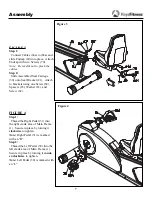
FIGURE 3
Step 1:
Connect Cables (64a) to (66a) and
slide Endcap (80) into place. Attach
Endcap with two Screws (70).
Note: Be careful not to pinch the
cables.
Step 2:
Slide Assembled Seat Carriage
(30) onto Seat Bracket (21). Attach
to brackets using one Screw (84),
Spacers (83), Washer (63), and
Screw (62).
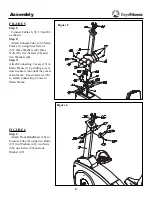
FIGURE 4
Step 1:
Thread the Right Pedal (31) into
the right crank area of Main Frame
(1). Secure in place by turning it
clockwise
to tighten.
Note:
Right Pedal (31) is marked
with an “R”.
Step 2:
Thread the Left Pedal (30) into the
left crank area of Main Frame (1).
Secure in place by turning it
count-
er-clockwise
to tighten.
Note:
Left Pedal (30) is marked with
an “L”
Figure 3
Figure 4
Summary of Contents for HT840R
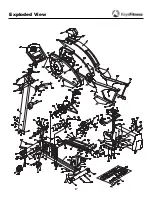
Page 17: ...Exploded View 17...


