background image

5

Congratulations for purchasing the SOFTSTRIDER
S200ª treadmill by HealthRider. The SOFTSTRIDER
S200 offers an impressive array of features that will
help you to achieve your fitness goals in the conve-
nience of your home. From the advanced console to
the ultra-soft walking belt, the SOFTSTRIDER S200 is
designed to make each workout more effective and 
enjoyable. And when youÕre not exercising, the SOFT-
STRIDER S200 can be folded away, taking less than
half the space of conventional treadmills.    

For your benefit, read this manual carefully before
using the SOFTSTRIDER S200 treadmill.

If you have

additional questions, please call our Customer Service
Department toll-free at 1-800-999-3756, Monday
through Friday, 6 a.m. until 6 p.m. Mountain Time 
(excluding holidays). To help us assist you, please
note the product model number and serial number 
before calling. The model number is HRTL08980. The
serial number can be found on a decal attached to the
treadmill (see the front cover of this manual for the 
location). 

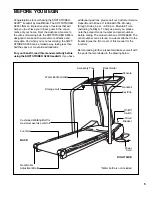
Before reading further, please familiarize yourself with
the parts that are labeled in the drawing below.

BEFORE YOU BEGIN

Handrail

*Water bottle is not included

Storage Latch

Console

Book Holder

Accessory Tray

Water Bottle Holder*

Key/Clip

Circuit

Breaker

On/Off
Switch

Cushioned Walking Belt for
maximum exercise comfort

Foot Rail

Power 

Cord

BACK

RIGHT SIDE

Rear Roller  
Adjustment Bolts

Summary of Contents for HRTL08980

Page 1: ...tted to providing com plete customer satisfaction If you have questions or if there are missing or damaged parts we will guarantee complete satisfaction through direct assistance from our factory TO A...

Page 2: ...S 7 CONSOLE OPERATION 8 HOW TO FOLD AND MOVE THE TREADMILL 14 TROUBLE SHOOTING AND MAINTENANCE 16 CONDITIONING GUIDELINES 18 ORDERING REPLACEMENT PARTS Back Cover LIMITED WARRANTY Back Cover Note An E...

Page 3: ...power cord see page 7 plug the power cord into a surge protector not included and plug the surge protector into a grounded circuit capable of carrying 15 or more amps No other appliance should be on t...

Page 4: ...y exercise program consult your physician This is especially important for persons over the age of 35 or persons with pre existing health problems Read all instructions before using ICON assumes no re...

Page 5: ...additional questions please call our Customer Service Department toll free at 1 800 999 3756 Monday through Friday 6 a m until 6 p m Mountain Time excluding holidays To help us assist you please note...

Page 6: ...n 2 Remove the paper backing from the Wrench Clip 71 Press the Wrench Clip onto the Frame 92 in the indi cated location Press the Allen Wrench 72 into the Wrench Clip Note The use of the Allen Wrench...

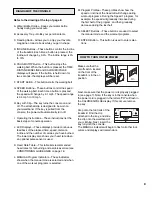
Page 7: ...properly installed and grounded in accordance with all local codes and ordinances This product is for use on a nominal 120 volt circuit and has a grounding plug that looks like the plug illus trated i...

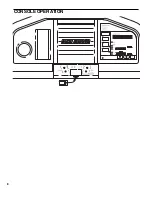
Page 8: ...8 CONSOLE OPERATION...

Page 9: ...er of calories you have burned The lower display also shows your heart rate when an optional pulse sensor is used K Heart Rate Table This table lists recommended heart rates for fat burning and aerobi...

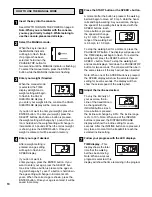
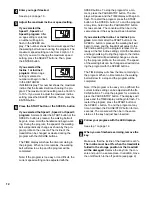
Page 10: ...s the ENTER button Once your age is entered it will be saved in memory Press the START button or the SPEED button A moment after the button is pressed the walking belt will begin to move at 1 0 mph Ho...

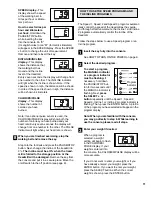
Page 11: ...osition or the treadmill will be damaged Remove the key from the console and put it in a secure place Move the on off switch to the off position see page 9 The Speed 1 Speed 2 and Speed 3 programs aut...

Page 12: ...plays will pause and the TIME display will begin to flash To restart the program press the START button or the SPEED button To end the program at any time hold down the PAUSE STOP button for two secon...

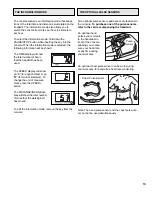
Page 13: ...ange the unit of measure ment press the SPEED button The DISTANCE INCLINE dis play will show the total number of miles that the walking belt has moved To exit the information mode remove the key from...

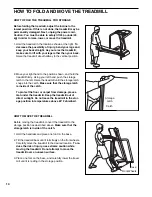
Page 14: ...the treadmill until the storage latch snaps into the catch Make sure that the storage latch is inside of the catch To protect the floor or carpet from damage place a mat under the treadmill Keep the...

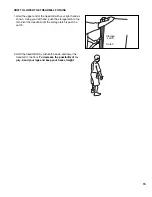
Page 15: ...wn Using your left hand push the storage latch to the left Pivot the treadmill until the storage latch is past the catch 2 Hold the treadmill firmly with both hands and lower the treadmill to the floo...

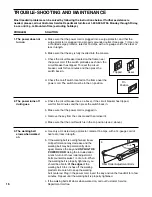
Page 16: ...ed at 15 amps with a 14 gauge cord of five feet or less in length b If the walking belt is overtightened tread mill performance may decrease and the walking belt may be permanently dam aged Remove the...

Page 17: ...wer cord insert the key and run the treadmill for a few minutes Repeat until the walking belt is properly tightened a If error code E1 E2 or E3 appears in the SPEED display remove the key wait for ten...

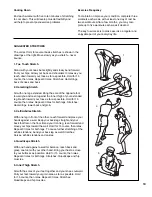
Page 18: ...the middle number in your training zone Aerobic Exercise If your goal is to strengthen your cardiovascular system your exercise must be aerobic Aerobic exercise is activity that requires large amount...

Page 19: ...e of the opposite foot toward you and rest it against the inner thigh of your extended leg Reach toward your toes as far as possible Hold for 15 counts then relax Repeat 3 times for both legs Stretche...

Page 20: ...cket 64 1 Key Clip 65 1 Storage Latch 66 1 Rear Roller Ground Wire 67 1 Incline Warning Decal 68 1 Storage Catch 69 1 Incline Motor Spacer 70 2 Endcap Insert 71 1 Wrench Clip 72 1 Allen Wrench 73 1 Wi...

Page 21: ...23...

Page 22: ...ied by sufficient proof of pur chase All returns must be pre authorized by ICON This warranty does not extend to any product or damage to a product caused by or attributable to freight damage abuse mi...

Reviews: