background image


Split Voice Change for Secondary or Left Hand


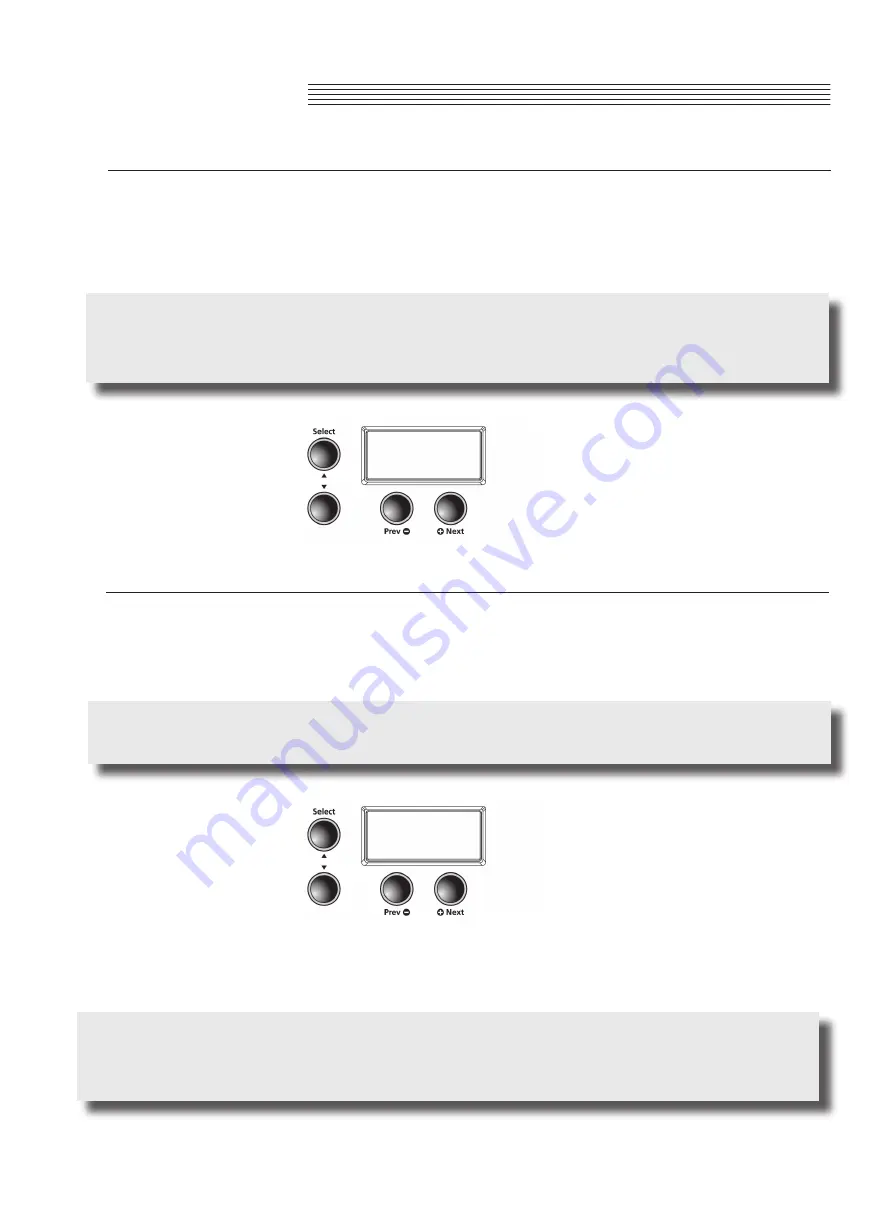
Press the 

[Split]

 button, and the parameter is selected for the primary and the scondary voice. (The default  


factory split is PRG:183, E Bass.) To choose a different voice as the secondary voice, press the category   


voice you desire, then press the 

[Prev -] 

or 

[+Next]

 buttons to scroll to your selected sound. The new sound  


will now become  your default “left hand” or secondary voice.


NOTE:

 Pressing the  

[Prev -] 

or 

[+Next] 

button pair together, will reset to the factory default voice setting.  


Press and hold

 [Favorites] 

buttons 1 - 6 to save your setting. 


Changing Split Key


In 

Split

 mode, press the  Arrow Up 

[Select ]

 button until you arrive at the screen display KEY:F#3 (the factory  


default split). The split key is the highest key of the secondary voice. Press the  

[Prev -] 

or 

[+Next] 

buttons to  


change the position of the split key. Pressing the 

[+Next] 

button


will take you to the next highest key. Pressing  


the


[Prev -] 

button will take you down a step. You can select any split point across all 88 keys from A0 to C8.


NOTE:

 Pressing the  

[Prev -] 

or 

[+Next] 

button pair together will reset the F#3 factory deault split. Press and  


hold 

[Favorites] 

buttons 1-6 to save your setting.


NOTE:

 Changes to the Split Voice, Split Key, Split Volume, and Split Transposition are remembered for the  


next time you want to use a split voice; but are not stored in memory. They return to their default settings    


when you turn off the MP20. Be sure to save your changes as one of the Favorites!

Chapter 7

30

PRG: 183

KEY: F#3


SPLIT MODE

Summary of Contents for Kurzweil MP20

Page 1: ... ...

Page 2: ... is used use caution when moving the cart apparatus combination to avoid injury from tip over 13 Unplug this apparatus during lightning storms or when unused for long periods of time 14 Refer all servicing to qualified service personnel Servicing is required when the apparatus has been damaged in any way such as power supply cord or plug is damaged liquid has been spilled or objects have fallen in...

Page 3: ...the product to rest on or be installed over cords of any type Improper installations of this type create the possibility of a fire hazard and or personal injury WARNING Changes or modifications to the instrument not expressly approved by Kurzweil could void your authority to operate the instrument IMPORTANT When connecting this product to accessories and or other equipment use only high quality sh...

Page 4: ...LEDs and Category Buttons 15 Favorites and Demo Buttons 15 Recording and Play Stop Buttons 16 Variation and Tempo Buttons 16 Mode and Save Buttons 16 Volume Control 16 Rear Panel 17 Front Panel Buttons 18 Single Buttons 18 Double Button Presses 18 Press and Hold Buttons 18 Quick Parameter Buttons 19 Operating Modes 19 Chapter 4 Demo Mode Demo Mode 20 Playing Demo Songs 20 Selecting Demo Songs 20 D...

Page 5: ...plit Mode 28 Split Mode Navigation Buttons 28 Selecting a Voice 29 Split Mode Parameters 29 Split Voice 30 Split Key 30 Split Volume 31 Split Transposition 31 Saving Split Voices 31 Save button 31 Favorite button 31 Changing Split Voices 31 Chapter 8 Function Mode Function Mode 32 Function Mode Parameters 32 Transpose 32 Effect Level 32 Touch 33 Tune 33 MIDI Channel 33 Metronome 34 Rec Rhythm 34 L...

Page 6: ...hm Mode Parameters 37 Rhythm ID 37 Volume 37 Chapter 10 Recording Recording a Song 38 Preparing to Record 38 Recording Track 1 38 Recording Track 2 39 Editing a Song 39 Erasing Recording over Tracks 39 Punch Ins 39 Chapter 11 MIDI MIDI Channels 40 MIDI In and Out Ports 40 USB MIDI Connection 41 Appendices MIDI Implementation Chart 42 Rhythm Patterns 43 Voice List 44 MP20 Features 46 TABLE OF CONTE...

Page 7: ...thm Patterns 10 Drum Kits Scrolling alphanumeric LED display Layering Split Transpose Pitch Tuning Variation Metronome and Tempo buttons 6 user Favorites presets 10 levels of keyboard sensitivity Two track recording with 20 User song presets Dedicated button to select the Grand Piano voice Preset Effects including Reverb Echo Delay and Chorus 51 Built In Demo Songs Voice Demo feature Stereo Audio ...

Page 8: ...ase you need to ship it Before you connect cables and turn on the power place the MP20 on a stable surface Follow the procedure on pages 10 11 for assembly Volume Getting Started Before turning on the MP20 it s always a good idea to set the volume at its minimum setting all the way to the left For a generally comfortable level of volume while playing set the knob at its middle position The Volume ...

Page 9: ...position Connect the power adapter to the DC jack on the rear panel of the MP20 Then connect the power cord to an AC outlet Getting Started Chapter 2 9 DC 19V 3 42A CAUTION All DC power adapters are NOT the same Only use the DC power adapter supplied with the MP20 Connecting the wrong DC power adapter could damage the MP20 If the power adapter is damaged or lost contact your Kurzweil Dealer to ord...

Page 10: ...Place pedal cross pedal assembly 4 with pedals facing forward Align with holes on bottom leg leg 2 and 2 screws 9 and tighten The bottom portion of the piano will now be secure and on its side STEP 2 Figure 2 A Place right leg 3 align with holes on top and bottom of speaker box with 4 7 screws B Align right leg bot tom with cross pedal holes and attach with 2 9 screws Be sure to tighten all screws...

Page 11: ...tighten with 4 Turning bolts 8 B Align 2 screws 10 1 on each side and attach from underneath to secure leg to top unit C Attach headphone holder 6 with supplied screws on the bottom of the piano Align with holes and tighten WARNING THE BODY ASSEMBLY WILL NOT SAFELY SIT UNSUPPORTED ON THE LEGS UNTIL ALL OF THE SCREWS ARE IN PLACE HAVE SOMEONE HOLD THE BODY ASSEMBLY WHILE THE SCREWS ARE BEING SECURE...

Page 12: ...egory listed in the second Voice Bank row press the Voice button 6 The LED at the beginning of the second row should be lit 7 Select a category button and play 8 Press the Voice button again to return to the top row Playing a Rhythm Pattern 1 Press the Rhythm button 2 Select a Rhythm Pattern from one of the categories and press its button 3 There are a number of different rhythm patterns available...

Page 13: ...yle switch Headphone Jacks The MP20 has two 1 4 headphone jacks conveniently located on the left bottom edge of the keyboard cabinet Plugging in headphones provides privacy during practice Both jacks operate the same so two people can play and hear the music together While using headphones the MP20 s speakers are silent Chapter 3 MP20 OVERVIEW HEADPHONE JACKS POWER SWITCH 13 ...

Page 14: ...plit Layer and Rhythm Modes only Prev Button Press this button to select the next lower Voice Rhythm Pattern user song or parameter value When using the metronome or playing a Rhythm pattern use this button to decrease the tempo This button is also used to tune or transpose downward Next Button Press this button to select the next higher Voice Rhythm Pattern user song or parameter value When using...

Page 15: ... and one rhythm Press the Voice or Rhythm button to select a bank A lit LED indicates the active bank Category Buttons Press one of the category buttons to select a voice or rhythm pattern Favorites Button Favorites 1 through 6 Select one of 6 previously stored favorite sounds by pressing its Favorites button Store the cur rently selected sound with its splits and layers by pressing and holding th...

Page 16: ...on to add the preset effects Tempo Button Use the Tempo button to adjust the tempo of the metronome and Rhythm Patterns Mode and Save Buttons Save Button Press this button to save a user song or to save split and layered voices Function Button Press the Function button to enter Function Mode Many additional features are found here Layer Button Press the Layer button to enter Layer Mode and create ...

Page 17: ...al audio equipment such as an outboard mixer powered speakers or recording device MIDI In Out Use the MIDI In and Out ports to connect the MP20 to other MIDI devices to receive and send MIDI data CC Pedal Volume Expression Pedal Use this 1 4 jack to connect a continuous controller pedal and assign it to control volume and expression USB Connect a USB cable to this port to send and receive MIDI or ...

Page 18: ...ev and Next buttons Press and Hold Buttons Some buttons when held perform additional functions Below is a brief description of these buttons Category Buttons In Voice or Rhythm Mode pressing a category button selects the default or first voice for that category You can change the default voice or rhythm To do so select the voice or rhythm you want to use as the default Press and hold the category ...

Page 19: ...y mode except recording Tempo Quick Parameter Button Press the Tempo quick parameter button to change the tempo Use the Prev or Next button to decrease or increase the tempo Press both together to restore the default tempo of 120bpm If no action is performed after pressing the Tempo button the button will time out and the MP20 exits the Tempo quick parameter and returns to its previous state You c...

Page 20: ...orward 10 songs at a time press the Value Jump buttons together 5 Keyboard keys A0 through B4 are assigned to each demo song To select a demo song using a key on the key board press the Record button then press and release its corresponding key See the Demo Song List for the demo songs and their corresponding keyboard keys 6 To exit Demo Mode press either the Demo Voice or Piano buttons See the fo...

Page 21: ...rds F 2 J L F Mendelssohn 23 Venetianisches G2 J L F Mendelssohn 24 Sostenuto G 2 F F Chopin 25 Valse KK A2 F F Chopin 26 5 Mazurkas A 2 F F Chopin 27 Valse Op 69 No 2 B2 F F Chopin 28 Grande Valse C3 F F Chopin 29 Valse Op 64 No 2 C 3 F F Chopin 30 Nocturne No 2 D3 F F Chopin 31 Valse Op 64 No 1 D 3 F F Chopin 32 Preludes in Db E3 F F Chopin 33 Fantaisie Improm F3 F F Chopin 34 F 3 R Schumann 35 ...

Page 22: ...To select the sec ond Voice Bank row press the Voice button again Its LED lights and the second row of categories is active When you turn on the MP20 Voice Mode is active and the Grand Piano voice is already selected and ready to play Grand Piano is the default voice and the first voice in the Piano category In Voice Mode voices are selected first by choosing one of two Voice Banks then a category...

Page 23: ...category is already selected pressing the Value Jump button selects the first voice of the next category This cycles through and wraps back to the first category NOTE A complete list of the Voices by category begins on page 44 Changing Category Default Voices Pressing a category button selects the default or first voice for that category You can change the default voice for that category Follow th...

Page 24: ... or Layer Transposition use these buttons to increase or decrease a value Category Buttons In Layer Voice use this button to select another category it acts the same as it would in Voice Mode If the Layer Volume or Layer Transposition parameter is active pressing a category button returns the MP20 to the Layer Voice parameter Chapter 6 LAYERING In addition to the many presets already available in ...

Page 25: ...ce button must be ON Choose the category you want on Row 1 or Row 2 by toggling the Voice button to either row Select the category sound you desire Scroll with the Prev or Next buttons to find your desired sound NOTE The new sound chosen is now your secondary sound When in Layer mode only the secondary sound can be changed You must start with your primary sound to create your desired combination L...

Page 26: ...to factory default of 0 Press and hold any of the Favorites buttons 1 6 to save your setting Layer Octave Transposition This parameter sets the transposition of the secondary voice left hand relative to the primary voice In LAYER mode press the Arrow Up Select button until you arrive at the LED screen display XPOSE 0 To transpose the secondary voice up an octave press the Next button once The scre...

Page 27: ...he Save button located to the left of the screen The display now shows the first empty location in the favorite section The display shows Save Voice As F1 F6 Press the Save button again to save the layered voice NOTE If you desire to save to another Favorite other than default press the Prev or Next buttons to change to another Favorite location Continuously pressing the Prev or Next button cycles...

Page 28: ...ion buttons Select and Buttons Use these buttons to step through the parameters Prev or Next Buttons For the Split Voice parameter use these buttons to step through the category voices In Split Key Split Volume or Split Transposition use these buttons to increase or decrease a value Category Button In Split Voice use this button to select another category it acts the same as it would in Voice Mode...

Page 29: ...plit Mode press the Split button NOTE The default voice ID is 183 E Bass and the default split key is F 3 Split Mode Parameters There are four parameters available in Split Mode Secondary or Left Hand Voice Split Split Key Position Split Volume Balance Secondary or Left Hand Octave Change In Split Mode use the Select and buttons to step through the parameters Press the Prev or Next buttons to make...

Page 30: ...arrive at the screen display KEY F 3 the factory default split The split key is the highest key of the secondary voice Press the Prev or Next buttons to change the position of the split key Pressing the Next button will take you to the next highest key Pressing the Prev button will take you down a step You can select any split point across all 88 keys from A0 to C8 NOTE Pressing the Prev or Next b...

Page 31: ...n octave The screen will display 12 ST Press the Next button twice to move up 2 octaves The screen will show 24 ST Toggle twice back to 0 for the default setting To lower an octave simply reverse the steps by pressing the Prev button to change octaves for the left hand or the secondary voice NOTE Pressing the Prev or Next button pair together will reset the octave back to factory default to 0 Pres...

Page 32: ...transpose down Press the Prev button to lower the semitone pitch Pressing the Prev Next button pair together will reset the Transposition back to factory default of 0 The transposition has a range of 24 to 24 This offers a two octave transposition range up or down To save the transposition you must first Exit the Function menu then press and hold any of the Favorites buttons 1 6 to Save your setti...

Page 33: ...gether will reset the effect level back to factory default of Linear Tune This parameter allows you to adjust the tuning to other instruments or recordings In Function mode press the Arrow Up or Down Select button until the LED Screen displays TUNE 0 factory default is A 440 To increase the tuning Press the Next button from 0 to 100 cents To lower or reduce the tuning Press the Prev button from 0 ...

Page 34: ...irst exit the Function menu then press and hold any of the Favorites buttons 1 6 to save your setting Local Control This parameter is normally set to On When you play the MP20 keyboard you hear the resident or local voices If you use your MP20 with an external sequencer or computer turn this setting to Off Turning the setting Off avoids creating a MIDI loop stuck notes or echoes Use the Select Arr...

Page 35: ...he rhythm patterns and are grouped by style The eighth button labeled User is for user recorded songs After you select a category press the Prev Next button to scroll through the rhythm patterns When you reach the end of a category The MP20 automatically advances to the next or previous category It will also advance to the User category If there are no user recorded songs it will bypass the User c...

Page 36: ...lad1 Changing the Tempo NOTE To return to the default setting of 120 BPM press the Prev Next buttons together Tempo changes affect all rhythm patterns even Favorites To save your desired Temp setting press and hold any of the Favorites buttons 1 6 to save your setting Chapter 9 RHYTHM MODE You can change the tempo of the MP20 s rhythm patterns The default tempo is 120 BPM beats per minute but it c...

Page 37: ...his cycles through and wraps back to the first category If there are no user recorded songs the display scrolls the song ID U1 and EMPTY Volume Use the Rhythm Mode volume parameter to change the volume of the rhythm pattern for playback or recording The volume range is from 1 minimum to 9 maximum The default volume setting is 9 maximum In Rhythm Mode press the Select and button The display scrolls...

Page 38: ...e but select the METRO off parameter and change its setting to metro rEC This will allow the metronome to play during recording Recording Track 1 Select the voice you want to use for Track 1 To record a song with a rhythm pattern press the Rhythm but ton and select ct a pattern for your recording Press the Record button Its LED lights and the display scrolls RECORD READY The Track 1 button s LED s...

Page 39: ... to scroll through the list of User Presets U1 U20 to find your saved song Press the Play button to preview your saved song You are now ready for editing Erasing Recording over Tracks Select the user recorded song and press the button for the track you need to erase Press the Play Stop button then press the Record button and start playing Press the Play Stop button when you are finished and press ...

Page 40: ...ls of MIDI performance data Typical MIDI instruments can play up to 16 channels at the same time Each channel can be assigned its own voice To change and or assign MIDI channels enter Function Mode and select the MIDI Channel parameter See page 33 for the details MIDI In and Out Ports The MP20 is equipped with the conventional MIDI In and MIDI Out ports If you are new to MIDI the MIDI In port is u...

Page 41: ...s connection but you may need to enable MIDI on your computer s sound and audio control panel To use the MP20 as a MIDI controller with a computer use any Type A to Type B USB cable By default the MP20 acts as a MIDI controller not a hard drive when connected to a computer If you have a sequencer program installed on your computer you can use this USB connection to record and play your music The M...

Page 42: ...hannels True All Notes Off Messages Clock Tune Local Control Song Pos Song Sel Active Sense Reset Manufacturer s ID 07 Device ID default 0 Function Transmitted Recognized Remarks O X X X X X X X X X 1 1 16 Mode 3 12 120 X X X O O O 0 127 0 127 O O O O X O X O X O 1 1 16 Mode 3 All 0 127 12 120 O O O O X O 0 31 32 63 LSB 64 127 O 0 127 0 127 Memorized Use Multi mode for multi timbral applications C...

Page 43: ...Beat Modern 71 Syncopath Modern 101 Latin1 Latin 102 Latin2 Latin 103 Latin3 Latin 104 Latin4 Latin 105 Latin5 Latin No Rhythm Pattern Button 106 Latin6 Latin 107 Cha Cha Latin 108 Salsa Latin 109 Rumba Latin 110 Samba Latin 111 Samba 2 Latin 112 Bossa Nova Latin 113 Son Clave Latin 114 Calypso Latin 115 Songo Calypso Latin 116 Songo Latin 117 Mambo 1 Latin 118 Mambo 2 Latin 151 Jazz1 Jazz 152 Jaz...

Page 44: ...Harpsi Clav 53 Celeste Clav No Voice Button 54 Mellow Organ Organ 55 Perc Organ Organ 56 Gregg s B Organ 57 Perc Organ 2 Organ 58 Melvin s Gospel Organ 59 Thick Gospel Organ 60 Prog Perc B3 Organ 61 Traffic B3 Organ 62 Warmer B3 Organ 63 Blues Gospel Organ 64 David s B3 Organ 65 Growler B Organ 66 Rock B3 Organ 67 Boston B Organ 68 Sweet Organ Organ 69 Gimmie B3 Organ 70 Doors Vox Organ 71 Farfisa...

Page 45: ...r Synth Synth 152 Mini Pulse Synth 153 BPM Lead Synth 154 Gated Sweep Synth 155 Cars Synth Synth 156 Dive Bomb Synth 157 Heaven Earth Pad 158 Slow Pad Pad No Voice Button 159 String Pad Pad 160 Spider Web Pad 161 Wispy One Pad 162 Airy Pad Pad 163 Innervate Pad Pad 164 Lush Pad Pad 165 Class Pad Pad 166 Bladerunner Pad 167 Fairlight Pad Pad 168 Airy Impact Pad 169 Deep Pad Pad 170 UFO Pad Pad 171 ...

Page 46: ...ecorder with accompanying rhythm track Sound System 50 watt 4 speaker stereo sound system Headphones 2 1 4 stereo headphone outs Jacks MIDI In and Out connectors 2 RCA Stereo Input 2 RCA Stereo Output Jacks USB 1 Port Plug and Play USB functionality allows MIDI over USB for connecting to from an external computer sequencer no software driver needed Pedals 3 Pedals Soft Sostenuto Sustain Polyphony ...

Page 47: ... 30 J Jacks Audio In Out 17 DC Power 17 Headphone 7 13 Pedal 17 L Layer Mode 24 Layer Mode Parameters 25 LEDs Bank 15 22 35 LED Display 14 List Demo Song 21 Rhythm Patterns 43 Voice 44 Local Control Function Mode parameter 34 M Metronome Function Mode parameter 34 MIDI Channel Function Mode parameter 33 Channels 40 Implementation Chart 42 MIDI In and Out Ports 17 40 Mode button 16 Modes Demo 20 Fu...

Page 48: ...31 Split Key 28 29 30 Split Mode 28 Split Mode Parameters 29 Stand Assembly 11 Storing a Favorite Voice 23 Switch Pedal 17 T Tempo button 16 19 36 Tempo Quick Parameter button 19 Touch Function Mode parameter 33 Track 1 and Track 2 buttons 16 38 39 Transpose Function Mode parameter 32 Transposition Parameter Layer Mode 26 Split Mode 31 Tune Function Mode parameter 33 U USB 17 USB MIDI Connection 4...

Page 49: ......

Page 50: ...910542 001 www kurzweil com ...

Reviews: