Please run the vehicle in a slow speed when you are not a skilled driver.
Once you become conformable driving the vehicle, perform driving practice on the tracks as shown in the figure
above. Keep practicing until you feel comfortable with the steering, throttle and brake at low speeds. Once you
are feeling comfortable , try operating the vehicle on another track. When you have mastered the basics, you will
be able to drive the vehicle at higher speeds in a more controlled fashion.
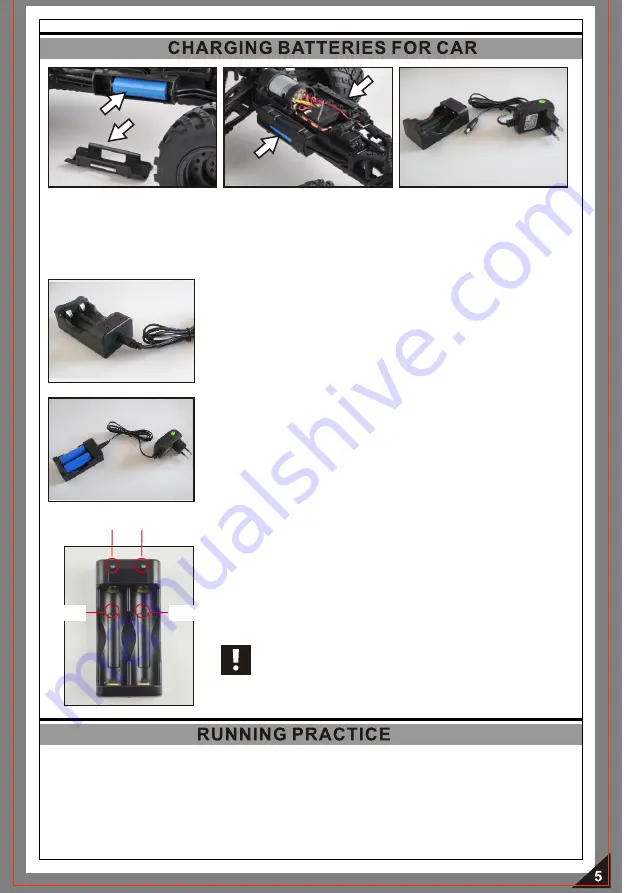
Open the battery compartment and remove the batteries from the car.
Use Only the provided charger and charger box to charge the batteries for your car.
Connect the charger box with the charger, and load the batteries onto the charger box.
Always observe correct polarity (plus/+ and minus/-) . The polarity is indicated in the charger box.
Plug the charger into a proper mains socket of the public
mains. (Wall Outlet).
One LED per charging tray will indicate charging.
LED is lit red: The battery is being charged.
LED is lit green: Charging is completed.
Charging time is approx. 3.5-4 hours (for 2pcs of 3.7V,
1500mAH Li-ion batteries)
TIP: The LEDs flash alternately when no battery is loaded.
For the sake of safety , this charger will NOT charge the batteries
which are over-discharged.
(Battery voltage is very low which is damaged).
Once you confront the situation below, you must replace with new
batteries.
After the batteries are properly loaded:
1) LED (A )flashes: The battery in the tray A is over-discharged
and damaged.
2) LED (B )flashes: The battery in the tray B is over-discharged
and damaged.
3) Both LED (A) and LED (B) flash: Both batteries are
over-discharged and damaged.
LED A
LED B
Tray B
TrayA
To prolong battery life ,do not allow the vehicle to be used to a
standstill resulting in the battery being completely over-
discharged. Always stop use with power remaining to preserve
battery life.


