w w w . h a w k e y e e l e c t r o n i c s . c o m
N
OTICE
:
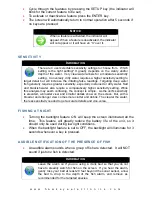
The ice MUST be clear (usually
referred to as black ice), free from
air bubbles, voids, cracks, etc.
2. Place a small amount of liquid water on the ice and set the sonar sensor on
the water allowing the unit to freeze to the ice.
3. If there are any air pockets between the sonar sensor and ice, or the water
below the ice, the unit will not work properly and will require you to try
another spot, or cut a hole in the ice to use. You can also use the
instructions in the “To Shoot-Thru the Hull of a Boat” section. Be certain not
to allow the water to freeze around the sensor if you use the “plastic bag”
method.
4. To remove the sonar sensor from the frozen ice, gently tap the sonar sensor
at the base with your hand. If it will not come loose, spray a small amount of
water on the ice surface around the base and repeat step 4 until the sonar
sensor is easily removed.
I
MPORTANT
:
Never use a blunt object to strike the
sonar sensor as this may cause damage
to the sensitive internal electronics.
I
NFORMATION
:
Use the fishing tip in the “Using the Sonar
Sensor from a Boat” section while ice
fishing. This method will give you an
accurate indication of where the best
fishing location within 99.9 ft (30.4 M).
UNDERSTANDING HOW THE FISH FINDER FINDS FISH
Greatly simplified, this fish finder is just a combination of a speaker, microphone
and stopwatch. It transmits a sound pulse from the sonar sensor, and then
measures the time it takes for the “echoes” to return to the sonar sensor (The fish
finder "knows" that the speed of sound through water is about 4800 feet per
second).
Fish, rocks, logs, weed, debris, the bottom, etc all “echo” the pulse at a different
intensity. A built-in computer then organizes all of this information and shows it
on a display screen in a manner that is easy for the user to understand.

