HART HPGG01 Operator'S Manual Download Page 7

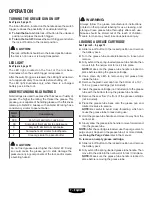
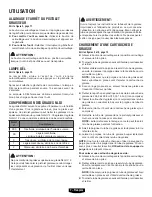
TURNING THE GREASE GUN ON/OFF

See Figure 3, page 11.

The lock-off button, located on the handle above the switch 
trigger, reduces the possibility of accidental starting.

  To turn the tool on: 

Slide lock-off button to the unlocked 

position, and press the switch trigger.

  To turn the tool off: 

Release the switch trigger and return 

the lock-off button to the locked position.

 CAUTION:

The lock-off button should be in the locked position when 
the tool is not in use or is being transported.

LED LIGHT

See Figure 4, page 12.

The  LED  light,  located  on  the  front  of  the  tool  base, 
illuminates when the switch trigger is depressed.
After the switch trigger is released, the LED light will remain 
on for approximately 15 seconds before shutting off.
The  LED  light  illuminates  only  when  there  is  a  charged 
battery pack in the tool.

UNDERSTANDING NLGI RATINGS

NLGI ratings are used to express the thickness or fluidity of 

grease. The higher the rating, the thicker the grease. This 

grease gun is capable of handling grease with a thickness 
rated up to NLGI #2. Grease with an NLGI #2 rating has a 
consistency similar to peanut butter.

NLGI 

No.

Consistency

000

Very fluid; similar to cooking oil

00

Somewhat fluid; similar to applesauce

0

Very soft; similar to mayonnaise

1

Somewhat soft; similar to toothpaste

2

Creamy; similar to peanut butter

 CAUTION:

Do not load grease rated higher than NLGI #2. Doing 
so  could  cause  the  grease  gun  to  stall,  damage  the 
pressure-carrying components of the tool, and/or create 
a bursting hazard.

 WARNING:

Always  follow  the  grease  manufacturer’s  instructions 
printed on their product labeling for use, cleaning, and 

storage. Clean grease tube thoroughly after each use. 

Grease should be stored out of the reach of children. 
Failure to do so may result in serious personal injury. 

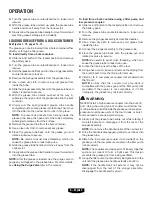
LOADING A GREASE CARTRIDGE

See Figures 5 - 6, page 12.


Slide lock-off button to the locked position and remove 
the battery pack.


Turn  the  grease  tube  counterclockwise  to  loosen  and 
remove.


Fully extend the spring-loaded grease tube handle, then 
move it into the narrow slot to lock it into place.


NOTE:

 Make sure the grease tube handle is locked in 

place before adding the grease cartridge.


Use  a  clean  dry  cloth  to  remove  any  old  grease  from 
inside the tube.


Remove the plastic end cap from the bottom of a 13.7 - 
14.5 oz. grease cartridge (not included).


Insert the grease cartridge (not included) into the grease 
tube with the bottom facing the grease tube handle.


Remove the seal from the front of the grease cartridge 
(not included).


Place  the  grease  tube  back  onto  the  grease  gun  and 

rotate clockwise to secure.


NOTE:

 Be careful to avoid cross-threading, which can 

cause the grease tube to leak during use.


Hold the grease tube handle and move it away from the 

narrow slot.


Slowly allow the grease tube handle to move forward and 

into the grease tube.

NOTE:

 After the cartridge is loaded, use the purge valve to 

purge any air trapped in the grease tube. For more details, 

see 

Using the Purge Valve

 later in the manual.

To remove an empty grease cartridge:


Slide lock-off button to the locked position and remove 
the battery pack.


Fully extend the spring-loaded grease tube handle. Then 
move it to the side into the narrow slot to lock it into place.


NOTE:

 Make sure the grease tube handle is locked in 

place before removing the grease tube.

OPERATION

7 – English

Summary of Contents for HPGG01

Page 1: ...olos 5 Caracter sticas 6 Armado 6 Funcionamiento 6 9 Mantenimiento 10 Illustraciones 11 13 Pedidos de piezas y servicio P g posterior THIS INSTRUCTION BOOKLET CONTAINS IMPORTANT SAFETY INFORMATION PLE...

Page 2: ...reduces the risk of electric shock If operating a power tool in a damp location is unavoidable use a ground fault circuit interrupter GFCI protected supply Use of a GFCI reduces the risk of electric...

Page 3: ...performed Use of the power tool for operations different from those intended could result in a hazardous situation Keep handles and grasping surfaces dry clean and free from oil and grease Slippery h...

Page 4: ...n seek medical attention immediately Do not treat as a simple cut Always be aware that misuse and improper handling of grease or this tool can cause injury to yourself and others DANGER Certain grease...

Page 5: ...n cause severe burns or death Risk of Fire Do not add grease to machinery while it is in operation or still hot Fire can cause severe burns or death Recycle Symbol This product uses lithium ion Li ion...

Page 6: ...n the battery pack snaps into place and the battery pack is secured in the product before beginning operation Depress the latch and pull to release and remove the battery pack For complete charging in...

Page 7: ...printed on their product labeling for use cleaning and storage Clean grease tube thoroughly after each use Grease should be stored out of the reach of children Failure to do so may result in serious...

Page 8: ...n the manual To load from a bulk container using a filler pump and low pressure coupler Slide lock off button to the locked position and remove the battery pack Turn the grease tube counterclockwise t...

Page 9: ...or component being lubricated NOTE Gently pull on the grease coupler to make sure it is secure If it does not hold on to the fitting or component the coupler could be damaged and may need to be repla...

Page 10: ...clean the check valve area Slide lock off button to the locked position and remove the battery pack Remove the check valve bolt washer spring and ball from the check valve area Use a clean dry cloth...

Page 11: ...e Pour les travaux l ext rieur utiliser un cordon sp cialement con u cet effet Utiliser un cordon con u pour l usage extr rieur pour r duire les risques de choc lectrique S il est n cessaire d utilise...

Page 12: ...age d un outil motoris pour des applications pour lesquelles il n est pas con u peut tre dangereux Gardez les poign es et les surfaces de prise s ches propres et exemptes d huile et de graisse Des poi...

Page 13: ...des soins m dicaux sans d lai Ne pas traiter la blessure comme une simple coupure Avoir toujours conscience qu une mauvaise utilisation et une manipulation inad quate de la graisse ou de l outil peuv...

Page 14: ...isation avant d utiliser ce produit Protection oculaire Toujours porter une protection oculaire avec crans lat raux certifi e conforme la norme ANSI Z87 1 Avertissement concernant l humidit Ne pas exp...

Page 15: ...t s dans les yeux et causer des l sions graves AVERTISSEMENT Toujours porter une protection oculaire avec crans lat raux certifi e conforme la norme ANSI Z87 1 Si cette pr caution n est pas prise des...

Page 16: ...apr s chaque utilisation La graisse doit tre entrepos e hors de port e des enfants Ne pas respecter cette consigne peut causer des blessures graves CHARGEMENT D UNE CARTOUCHE DE GRAISSE Voir les figur...

Page 17: ...ge et enlever le bloc piles Tourner le tube de graisse en sens antihoraire pour desserrer et retirer Enlever l ensemble de piston comme il est d crit plus haut Avec un linge propre et sec enlever l an...

Page 18: ...assurer qu il est s curis S il ne reste pas en place sur le raccord ou le composant le coupleur peut tre endommag et doit tre remplac Glisser le bouton de verrouillage en position d verrouill e et app...

Page 19: ...one du clapet antiretour Glisser le bouton de verrouillage vers la position verrouillage et enlever le bloc piles Enlever le boulon du clapet antiretour la rondelle le ressort et la bille hors de la z...

Page 20: ...mienta en lugares h medos use un suministro protegido por un interruptor de circuito con p rdida a tierra GFCI El uso de un GFCI reduce el riesgo de descargas el ctricas Usar este producto nicamente c...

Page 21: ...erentes de las indicadas podr a originar una situaci n peligrosa Mantenga los mangos y superficies de agarre limpias y libres de aceite y grasa Los mangos y superficies de agarre resbalosas no permite...

Page 22: ...ma expuestas de la manguera En caso de inyecci n en la piel busque atenci n m dica de inmediato No haga como si hubiese tenido un simple corte Tenga siempre en cuenta que el uso y la manipulaci n inde...

Page 23: ...erador antes de usar este producto Protecci n ocular Siempre p ngase protecci n ocular con protecci n lateral con la marca de cumplimiento de la norma ANSI Z87 1 Alerta de condiciones h medas No expon...

Page 24: ...lmente la unidad lo cual puede causar lesiones serias ADVERTENCIA Siempre p ngase protecci n ocular con protecci n lateral con la marca de cumplimiento de la norma ANSI Z87 1 La inobservancia de esta...

Page 25: ...as instrucciones sobre uso limpieza y almacenamiento del fabricante de la grasa impresas en la etiqueta del producto Limpie bien el tubo de grasa despu s de cada uso Almacene la grasa fuera del alcanc...

Page 26: ...m s adelante en el manual Para cargar grasa de un contenedor a granel utilizando una bomba de llenado y un acoplador de baja presi n siga estos pasos Deslice el bot n del seguro de apagado hasta la p...

Page 27: ...e el acoplador de grasa a la grasera o el componente que desea lubricar NOTA Tire suavemente del acoplador de grasa para asegurarse de que est bien conectado Si no est bien sujetado a la grasera o al...

Page 28: ...e la v lvula de retenci n siga estos pasos Deslice el bot n del seguro de apagado hasta la posici n de bloqueo y retire el paquete de bater as Retire el perno de la v lvula de retenci n la arandela el...

Page 29: ...de bater as A Hose clip clip de tuyau flexible sujetador de manguera B Screw vis tornilllo A Switch trigger g chette de commutateur gatillo del interruptor B Lock off button bouton de verrouillage bot...

Page 30: ...e graisse tubo de grasa C Grease tube handle poign e du tube de graisse mango del tubo de grasa D Narrow slot fente troite ranura estrecha A LED light lampes DEL diodo luminiscente A Grease tube tube...

Page 31: ...zone du clapet antiretour rea de la v lvula de retenci n B Ball bille bola C Spring ressort resorte D Washer rondelle arandela E Check valve bolt boulon du clapet antiretour perno de la v lvula de re...

Page 32: ...e service veuiller transmettre le num ro de mod le et de s rie situ s sur la plaquette de donn es du produit Enregistrer le produit https HARTtools com register Les d tails de la garantie sont disponi...

Reviews: