background image

   GB   15

The power of fIre

As a matter of fact just a few things withstand a real hot fire. Your stove can also be damaged by overheating. Just to prevent this take account of not burning more 
than 2,5 kilograms of wood at the same time. 2,5 kg equals about 2,5 solid logs; ideally, the moisture content of firewood should not be more than 15%. 
The construction and the used materials from the stove are suchlike chosen to control and resist a fire in a considered way. So heat with consideration.

a few TIps

•  Make the fire always on a bed of ash. This is an insulating layer for the fire and an excellent bed for the fuel. 
•  If theDia is overloaded with too much wood and the maximum amount of oxygen is supplied (which happens when the aeration slide is fully open), the fire  
 

may ‘run wild’. If this should occur, close aeration slide by pushing it inwards. Never in such case leave the fireplace unattended.  

•  You also control the temperature by the amount and kind of fuel used for each load.
•  Remove excess ashes using a scoop or an Ash Cleaner. Never remove ashes using a vacuum cleaner because fire may still continue to smoulder for days. 
 

Make sure you leave a layer of ashes (± 3 cm) for the next fire to be made.

•  When the weather is foggy, it is preferable not to use the fireplace since the draught in the flue will be too low.

InITIal fIre-up, a gooD sTarT

You have purchased a brand-new stove, ‘zero on the meter’, has not seen a flame yet. This means you are going to take care of the initial ‘miles’. The ceramic firebricks 
will start evaporating moisture and your woodburning stove will start setting to cure. For this reason, the first few times, do not make your fire too hot because otherwise 
the bricks could crack. You need not worry about any shrinkage cracks. The initial fire-up requires some additional time and attention, as well as the approach we have 
outlined below for you in steps. Before starting, please note the following important points:
•  When starting the fire in the stove, open the aeration slide. This is only the kindling position! 
•  While firing-up the stove the first time some liquid might come down from the ceramic firebrick. Please put some old towels underneath the stove before firing it up.
•  When the stove has reached it’s temperature you can close the aerations slide a little . Now it is easy to regulate the fire by means of closing or opening 
 

the aeration slide a bit.

•  Make sure there is sufficient ventilation.
•  Caution: after installation, make sure there is no inflammable and/or explosion-hazardous material in or on the stove, such as a spray can, packaging material 
 

and the like. Also check the area inside the stove above the baffle. 

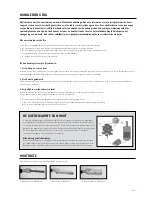
InITIal fIre-up In sTeps

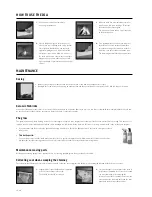
1.

  Open the air-control slide completely


by pulling it towards you.

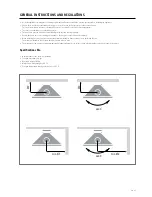
3.

  Fill the stove with a handful of dry and thin 


kindling wood, light it and keep the door open.  

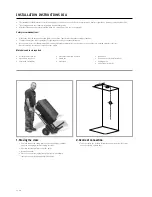
4.

  Allow the fire to go out and the stove to cool 


off for an hour so that the moisture in the 


firebrick can evaporate. Some liquid might come 


free from the ceramic fire-brick. Therefore place


an old towel underneath the stove before 


firing-up.

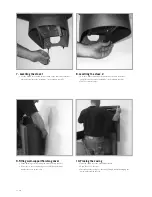
5.

  After an hour, you will start bringing the whole 


stove at the proper temperature using first 


some thin kindling wood. 

6.

  Then use more solid logs, ± 7x7 cm thick and  


30 cm long. At the same time, set the door ajar.  


When the logs are properly catching fire, close  


the door. Allow some time for the stove to 


heat up.

2.

  Light a large ball of dry paper against the back 


plate of the burning chamber and allow this fire 


to go out again.

Summary of Contents for DIA

Page 1: ...Handleiding Installatie instructie Manual Installation instruction Manuel Instruction d installation Anleitung Montageanleitung Manuale Istruzione di montaggio NL GB F D I Dia...

Page 2: ...Typeplaatje Identification plate Plaquette signal tique Typenschild Targhetta di identificazione...

Page 3: ...ions 17 sommaire Parties du Dia 2 Mesures d carts standard 3 Recommandations g n rales 22 Manuel 23 Instructions d installations 26 Inhalt Teile des Dia 2 Anschlu ma e Holz 3 Vorschriften 31 Anleitung...

Page 4: ...ting Closing Fermeture Schlie ung Chiusura 5 Convectiesleuven Convection slots Ouvertures de convection Konventionschlitze Uscite d aria di convezione 6 Achtermantel Back casing Manteau ext rieur Hint...

Page 5: ...3 Maatschetsen in mm Connection sizes in mm Mesures d carts standard en mm AnschluSSmaSSe Holz in Mm Misure per l allacciamento in mm 750 1100 260 170 120 520 760 430 275 350 425 380 520 545...

Page 6: ...t vuur te doven Zorg dat de schoorsteen na een brand eerst wordt geveegd en ge nspecteerd op beschadiging en lekkage Service Het is niet toegestaan modificaties te verrichten aan het toestel zonder au...

Page 7: ...komen blijf erbij in dit stadium en temper het vuur niet te snel Onthoud deze regel u kunt een haard pas temperen als deze op temperatuur is 3 Zorg altijd voor voldoende verse lucht De huidige woning...

Page 8: ...dampen en uw haardkachel gaat zich zetten Stook daarom de eerste keren niet te heet omdat de stenen dan kunnen scheuren Het ontstaan van krimpscheurtjes kan geen kwaad Dat instoken vereist wat extra t...

Page 9: ...nat keukenpapier en de witte as uit de haard of speciale kachelruitenreiniger Even laten inwerken Zorg er altijd voor dat deze middelen niet in contact komen met de lak om vlekvorming te voorkomen 1 T...

Page 10: ...t voldoende draagkracht Zorg voor voldoende toegang voor het reinigen van het toestel de rookgasaansluiting en de schoorsteen Houd bij plaatsing van de haard rekening met de minimale afstanden tot de...

Page 11: ...als spuitbus verpakkingsmateriaal en dergelijke Controleer ook de ruimte in de haard boven het hitteschild en het keerschot Benodigde materialen en gereedschappen Imbussleutel 4 mm Imbussleutel 5 mm I...

Page 12: ...eren Verwijder de 4 bouten uit de transportbeugel met inbussleutel 6 Verwijder beide poten van de transportbeugel 5 Haard hangen Plaats glijnokken onder de transportbeugel Schuif de haard tegen de muu...

Page 13: ...zijde van de muurbeugel om de haard in de breedte waterpas te stellen inbussleutel 5 9 Plaatsen afwerkkap muursteun Plaats de afwerkkap door de nokken in de sleufjes te schuiven Zit de afwerkkap te lo...

Page 14: ...Service deur stellen Verwijder de pijp en mantel van de haard Zet de deur open Stel met steeksleutel s w 10 de deur zodat hij evenwijdig hangt 14 Service sluiting stellen Als de deur gesteld is kan he...

Page 15: ...ntilate the house Never use water to extinguish the fire Ensure that after a fire the chimney is first swept and inspected for any damage and leaks Service It is not allowed to make any modifications...

Page 16: ...on the glass and soils the flue 2 Do not temper the burning process excessively Allow the stove sufficient time to warm up stay with it at this stage and do not temper the fire too quickly Bear this...

Page 17: ...re too hot because otherwise the bricks could crack You need not worry about any shrinkage cracks The initial fire up requires some additional time and attention as well as the approach we have outlin...

Page 18: ...osits Use moist paper towel and the white ashes from the stove or a special stove glass cleaner Allow a moment for this to have its effect Always make sure that these agents do not come into contact w...

Page 19: ...apacity Ensure adequate access for cleaning the appliance the flue gas connection and the chimney When installing the stove take into account the minimum distances from the wall so as to avoid any fir...

Page 20: ...r explosion hazardous material in or on the stove such as a spray can packing material or the like Also check inside the stove the space above the baffles Materials and tools required Socket head wren...

Page 21: ...e Remove the 4 bolts from the transport brace using a socket head wrench 6 Remove both legs from the transport brace 5 Hanging the stove Place sliding pieces underneath the transport brace Push the st...

Page 22: ...the wall bracket to level the stove widthwise socket head wrench 5 9 Fitting wall support finishing cover Fit the finishing cover by sliding the projections into the slots If the cover is not fixed pr...

Page 23: ...ion 12 Rotatable Fixed position leave bolts in place as delivered 2 x 45 rotatable remove bolts no 1 and release bolt no 2 and secure it with the nut 13 Service adjusting the door Remove the pipe and...

Page 24: ...jamais de l eau pour teindre le feu Apr s un feu de chemin e faites proc der au ramonage et l inspection de la chemin e d g ts fuites Service Il est interdit d apporter des modifications l appareil s...

Page 25: ...p le feu Donnez d abord le temps au po le chemin e et son conduit d arriver bonne temp rature Restez pr s du feu lors de la phase de d marrage Gardez la commande de l arriv e d air primaire et seconda...

Page 26: ...p intense quand m me lors des premiers feux pour viter les fissures De l g res fissures de contraction peuvent se constituer dans la pierre et ne pose pas de pas de souci quant au bon fonctionnement d...

Page 27: ...les 2 c t s afin d viter qu elle ne bouge Pendant le nettoyage appliquez une l g re pression sur l autre face de la vitre pour viter qu elle ne bouge D p ts importants Utilisez de l essuie tout humidi...

Page 28: ...sant pour le nettoyage de l appareil du conduit de fum e et de la chemin e Lors du placement tenez compte des distances minimales par rapport au mur risque d incendie Les distances minimales sont repr...

Page 29: ...mables et ou qui pr sentent un danger d explosion tels qu une bombe a rosol mat riau d emballage etc Contr lez aussi l espace dans le po le au dessus du d flecteur en fibre rigide et du d flecteur en...

Page 30: ...evez les 4 boulons des pieds de transport avec une cl six pans 6 Enlevez les deux pieds de transport 5 Fixation du po le Placez les patins sous les pieds de transport Poussez le po le contre le suppor...

Page 31: ...s du support mural pour mettre le po le niveau en largeur cl six pans 5 9 Mise en place du capot de finition Placez le capot de finition en poussant les saillies dans les fentes Si le capot n est pas...

Page 32: ...sition fixe laissez les boulons en place Disposition tournante sur 2 x 45 enlevez les boulons no 1 et desserrez le boulon no 2 et bloquez le l aide de l crou 13 Service Ajustage de la porte Enlevez le...

Page 33: ...s die Wohnung bel ften nie Wasser zum L schen des Feuers benutzen Daf r sorgen dass der Schornstein nach einem Brand zuerst gefegt und auf Besch digung und Leckage inspiziert wird Service Es ist nicht...

Page 34: ...rosseln Sie nicht zuviel w hrend des Heizens Lassen Sie dem Ofen Zeit auf die richtige Temperatur zu kommen bleiben Sie in diesem Stadium dabei und m igen Sie das Feuer nicht zu schnell Behalten Sie d...

Page 35: ...die Steine dann rei en k nnten Schrumpfri bildung ist aber harmlos Das erstmalige Heizen eines brandneuen Ofens erfordert ein wenig extra Zeit sowie die Schritte die wir nachstehend f r Sie beschrieb...

Page 36: ...schiebt Dickeren Beschlag Verwenden Sie feuchtes K chenpapier und die wei e Asche aus dem Ofen oder einen speziellen Ofenglasreiniger Kurz einwirken lassen Sorgen Sie immer daf r da diese Mittel nicht...

Page 37: ...h ngen F r ausreichenden Zugang zum Reinigen des Ger ts des Rauchgasanschlusses und des Schornsteins sorgen Bei Aufstellung des Ofens in Zusammenhang mit der Brandgefahr die Mindestabst nde zur Wand...

Page 38: ...l u dgl in oder auf dem Ofen befinden Kontrollieren Sie auch den Raum ber der Skamol Umlenkplatte und der st hlernen Rauchumlenkplatte Ben tigtes Material und Werkzeug Imbusschl ssel set Gabelschl sse...

Page 39: ...ie 4 Bolzen mit Inbusschl ssel 6 aus der Transportkonsole entfernen Die beiden Beine von der Transportkonsole entfernen 5 Ofen h ngen Gleitst cke unter die Transportkonsole legen Den Ofen an den Wandt...

Page 40: ...er Unterseite des Wandtr gers in der Breite waagerecht stellen Inbusschl ssel 5 9 Abdeckkappe an der Wandst tze anbringen Die Abdeckkappe anbringen indem Sie die Nasen in die Schlitze schieben Wenn di...

Page 41: ...ontrollieren 12 Drehbar Feste Aufstellung Bolzen sitzen lassen 2 x 45 drehbar Bolzen Nr 1 entfernen und Bolzen Nr 2 lockern und mit Hilfe der Mutter sichern 13 Service T r nachstellen Das Rohr und den...

Page 42: ...are l abitazione Non utilizzare per alcun motivo dell acqua per spegnere il fuoco Dopo un incendio fare spazzare e ispezionare la canna fumaria per escludere la presenza di danni e perdite Assistenza...

Page 43: ...lla stufa Date alla vostra stufa caminetto il tempo necessario di entrare in temperatura e non alimentatela troppo in fretta Ricordate bene questa regola non dovete caricare la stufa prima che sia ben...

Page 44: ...entamente quanto riportato di seguito Quando accendete il fuoco estraete la presa d aria comburente Questo l unico momento in cui dovete mantenere la presa completamente estratta Alla prima accensione...

Page 45: ...lizzate un panno carta umido e la cenere di colore bianco proveniente dalla stufa o uno speziale detergente per vetri di stufe Lasciatelo agire per qualche secondo Assicuratevi sempre che questi agent...

Page 46: ...apparecchio del raccordo per lo scarico dei gas di combustione e della canna fumaria Nel posizionare la stufa tenere conto delle distanze minime dal muro per il pericolo di incendio Le distanze minime...

Page 47: ...che controllare lo spazio nella stufa sopra la placca deflettrice di fibra rigida e la placca deflettrice di acciaio Materiali ed utensili necessari Chiave esagonale set Una chiave a tubo con set Un c...

Page 48: ...Rimuovere i 4 bulloni dal supporto di trasporto utilizzando la chiave per viti ad esagono cavo 6 Rimuovere entrambi i piedi del supporto di transporto 5 Appendere la stufa Inserire i pattini sotto il...

Page 49: ...sta esagonale cava M10 situati sul lato inferiore della staffa da muro per posizionare la stufa orizzontalmente in larghezza utilizzando la chiave per viti ad esagono cavo 5 9 Posizionare il coperchio...

Page 50: ...to 12 Girevole Disposizione fissa lasciare i bulloni in posizione Girevole verso sinistra e verso destra di 45 rimuovere i bulloni n 1 svitare il bullone n 2 e bloccarlo con l ausilio di un dado 13 Se...

Page 51: ...49...

Page 52: ...ders nl www leenders nl Ge nstalleerd door Installed by Install par Installiert von Installata da Medewerker van Employee of Collaborateur de Mitarbeiter von Dipendente di Datum Date Date Datum Data H...

Page 53: ......

Page 54: ......

Page 55: ......

Page 56: ...ces Level of finishing unless differently Level of finishing H4 AMERICAN PROJECTION TYPE MM REV SHEET UNITS OF MEASUREMENT of 0 A4 1 2 5 project DRAWN DATE Canta GK SIZE Muurbeluchting Canta Dia SCALE...

Page 57: ...0 HLH LFS norm STATUS WA 26 08 2002 conform of surfaces Level of finishing unless differently Level of finishing H4 AMERICAN PROJECTION TYPE MM REV SHEET UNITS OF MEASUREMENT of 10 A4 1 5 project DRAW...

Reviews: