Server Management
20
Vision
2
Instruction Manual
Server Management
This section provides information on managing multiple Vision
2
servers. Small Vision
2
systems will only have one server, the Master
server. However larger installations will have two or more servers. In this case one server is configured as a Master server and the
other servers are known as
Client
servers as they are subordinate to the Master server. Vision
2
services can run on any server but
are controlled through the master server. The Vision
2
user interface can only be accessed from the master server.
Adding a Server to the Vision2 System
To add a new server to the system, ensure that the machine is powered on and configured with the Vision
2
Server application
running. Before trying to add the new server to the Vision
2
system, ensure that you can access the new server via the LAN. Perform
these steps to add a server to your configuration:
1.
Test access to the new server via the LAN by accessing a Command Prompt using the Ping command. For example:
ping V2AMX-xxxxxxxx
where V2AMX-xxxxxxxx is the
client
server name. If the server responds, continue.
2.
Using IE9 32bit on a PC with network access, navigate to http://
<master server name>/
v2.aspx. Login using the default
administrator username and password (Administrator and Vision2 respectively).
NOTE: AMX recommends changing the default settings.
3.
Select Manage System > Manage Servers using the menu system.
4.
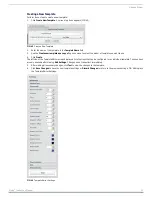
Enter the name of the new server in the Name text box belonging to the Add Server dialogue box.
5.
Select the server type using the type drop down menu from the following options:
Client
Server - FG3106-XXK or FG3107-12 (for the FG3107-12K Master). This is the same hardware as the Master server
but configured as a
client
server to provide additional services including archives.
DVB Gateway - Not supported currently.
Reflector Gateway - Not supported currently.
6.
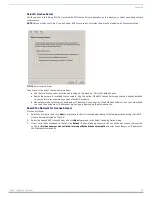
Click Add to System to add the new sever to your Vision2 system (FIG.
7.
The system prompts to reboot the new server. This step must be performed or the new server will not function correctly and
you will not be able to add Licenses to it.
8.
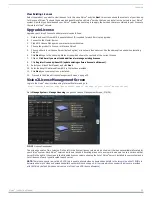
Once the new server reboots, return to the Manage System > Manage Servers screen to see the new
client
server. The
status
area indicates whether the server is offline or online (red or green circle).
1.
Connect a monitor to the VGA port on the front of the server.
2.
Connect a USB keyboard and USB mouse to the 2 USB ports on the front of the server.
NOTE: There is also a 15-pin VGA port and 2 USB ports on the rear of the server. It makes no difference which set of ports used to
connect peripherals.
3.
Power "on" the Vision
2
server. It may take a few minutes to boot.
4.
Enter the username and password for the server. The default settings are:
username: Administrator
password: Vision2
FIG. 33
Adding a
Client
Server to Vision2 System
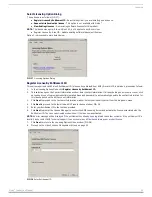
NOTE: If an incorrect server name is entered the system will attempt the connection for a number of seconds and if unsuccessful the
following error message will appear. The server on the address you entered is not responding. Please check the server name and
network and try again.
Accessing a Vision2 Server Directly (Troubleshooting Only)
Perform these steps to access the server directly:

