26
8. Turn the MIN. TEMP. Dial on the control board to
the desired Minimum temperature. This will start the
lighting process if the temperature at the aquastat sensor is
less than the set temperature on the MAX TEMP. dial.
The PB105 is more than just an automatic ignition pellet
boiler. The automatic system will allow the fire size to be
adjusted to match the heating needs and even put the fire
out if necessary. If heat is needed after the fire is out, the
PB105 will automatically re-ignite and adjust the fire size
to match the heating need.
9. Fill hopper with pellets and remove ashes as
required.
Type of Fuel
Use pelletized wood only. The lower the ash
content of the pellets the less cleaning that will be needed
of the heat exchanger surfaces. The cleaner these surfaces
are kept, the more efficient the boiler will be.
NOTE: Do not burn garbage, gasoline, naphtha,
engine oil, or other inappropriate materials in the
PB105.
Store pellets in the manufacturer’s wrapping
until needed to prevent pellets from absorbing
moisture. Do not store fuel within the appliance
installation clearances, or within the space required
for fueling, ash removal, and other routine
maintenance operations.
Operation
Lighting A Fire Manually
Lighting the fire manually will not be necessary unless
the igniter in the burnpot fails.
Follow steps 1 through 5 of the instructions for
automatic lighting.
6. Flip the Igniter Switch Down into the
"MANUAL-LIGHT" position. See Fig. 12.
7. Open hopper swing plate as shown in Fig.
13 (See “NOTE” on page 23.)
8. Fill burnpot with pellets as shown.
See Fig. 14. Only fill level with the front
edge. ( ------- DO NOT OVERFILL ------- )
9. Have matches or other ignition source
ready.
10. Apply starting gel as shown in Fig.15
Fig. 14
Fig. 13
Fig. 12
Summary of Contents for PB 105
Page 2: ......
Page 10: ...10 Venting Fig 3 ...
Page 15: ...15 Installing Duct Installation ...
Page 17: ...17 Installation ...
Page 18: ...18 Installation ...
Page 19: ...19 Installation ...
Page 33: ...33 Feeder Parts ...
Page 35: ...35 Wiring Diagram Wiring Diagram ...
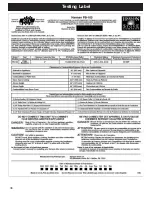
Page 38: ...Testing Label 38 ...
Page 39: ...NOTES 39 ...


