background image

29

INITIAL SETUP

NOTE:

The AVR 3600 will automatically set its master 

volume to – 25dB.

STEP FOUR –

After you select “Continue”, the screen

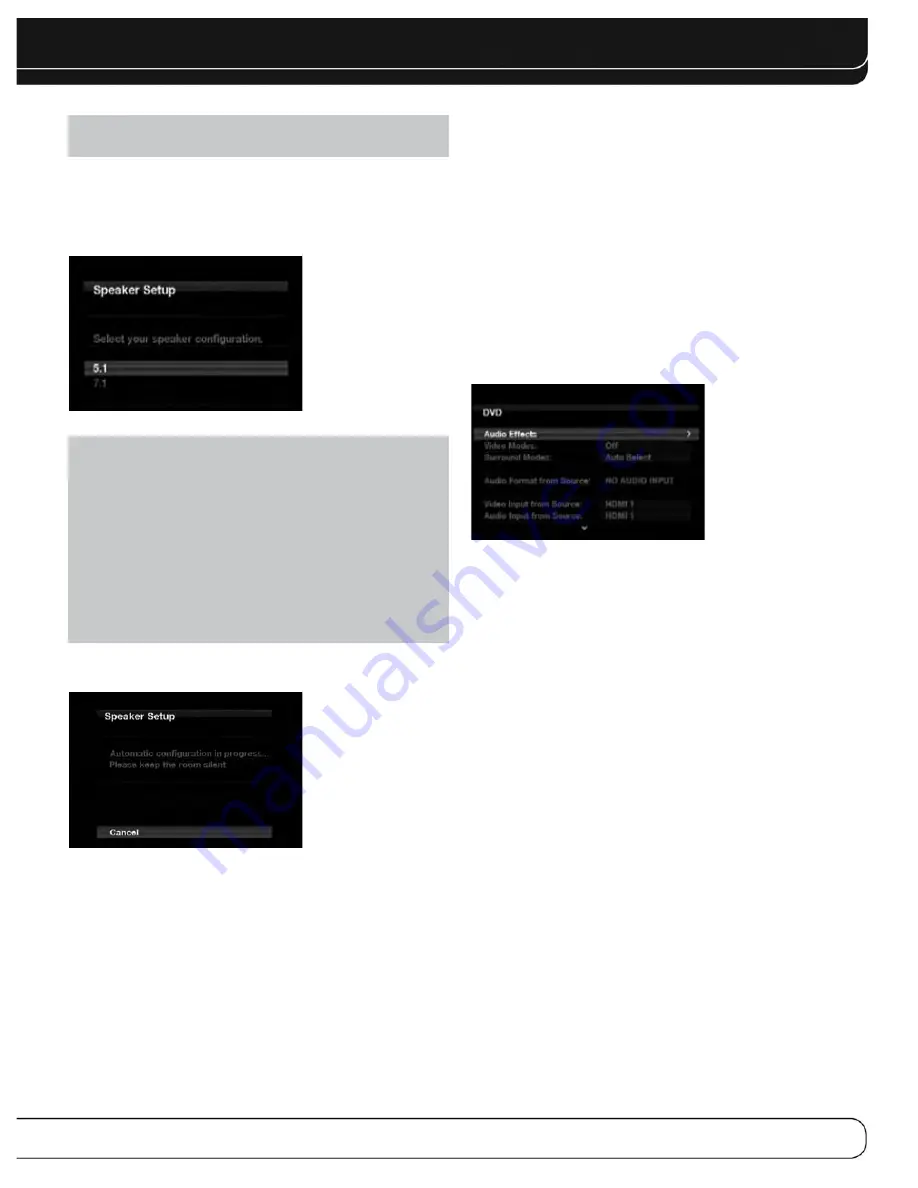
shown in Figure 22 will appear. Select the number of speakers in
your system. Select 5.1 if no surround back speakers are present,
or if the surround back channels will be used for multizone operation.

Figure 22 – EzSet/EQ: Number of Speakers

NOTE:

If there are fewer than five main speakers in your

system, do not use the EzSet/EQ process. Instead, proceed
as described in the Advanced Functions section. If you have
selected a 6.1-channel configuration with a single surround
back speaker, use EzSet/EQ automatic configuration for 
5.1 speakers, connect the single surround back speaker 
to the left Surround Back Speaker Output, then configure 
the surround back speaker manually, as described in the
Advanced Functions section. The 6.1-channel configuration 
is not recommended. If the subwoofer is to be connected to
the Front Speaker Outputs, do not connect the subwoofer until
after running the EzSet/EQ process.

The test will begin, and the screen shown in Figure 23 will appear.
Maintain silence during the EzSet/EQ configuration.

Figure 23 – EzSet/EQ in Progress

As EzSet/EQ tests each speaker, its position will appear on screen.
If the test sweep is heard from a different speaker than the one
indicated on screen, turn off the AVR and check the speaker-wire
connections, then begin again.

When the test is completed, select the Continue option. The results
will be displayed, along with these options:

• The Retest option repeats the EzSet/EQ process. Increase the

master volume manually if some speakers were not correctly
detected.

• Select Cancel to return to the Speaker Setup menu.

See the Advanced Functions section for instructions on how to
manually configure the speakers or manually adjust the settings

established by the EzSet/EQ process.

Set Up Sources

The Info Settings menu is used to assign the correct physical audio
and video connections to each source.

The following settings are not optional and must be adjusted now 
to enable playback of each source: Video Input From Source, Audio
Input From Source and Resolution to Display. The other settings
may be adjusted later.

To display the Info Settings menu, press the Info Settings Button
(front panel or remote). Or, from the Main Menu, select the Setup
Source line and select a source from the slide-in menu. A screen
similar to the one shown in Figure 24 will appear.

Figure 24 – Setup Source Menu

Audio Effects:

Displays the Audio Effects submenu, where 

you may adjust the Dolby Volume setting, the bass and treble tone
controls, the LFE trim and the MP3 enhancement for each source
independently. Leave this submenu at its default settings, and return
to it later if your system requires fine-tuning. See the Advanced
Functions section for more information.

Video Modes:

Displays the Video Modes submenu, where you

may make picture adjustments for each source independently. Leave
the settings at their factory defaults. Picture adjustments should be
made to your video display first, with this menu used only for fine-
tuning. See the Advanced Functions section for more information.

S

urround Modes: 

Displays the Surround Modes submenu,

where you may program surround modes for movies, music and
games for each source independently.

Digital surround signals, such as Dolby Digital and DTS, are auto-
matically played in their native formats, although you may change
the surround mode. See the Advanced Functions section for more
information.

Audio Format From Source:

This line is informational

only. When a digital program is playing, its format will be identified
here. When analog audio programs are playing, this line displays
ANALOG.

Audio and Video Input Selection

See Table A2 in the appendix for the factory default input assignments
for each source. You may assign any available input to any source
using the Info Settings menu.

When a source is selected, the AVR will check the assigned digital
audio input for a signal. If one is present, the digital input will be

Summary of Contents for AVR 3600

Page 1: ...AVR 3600 AUDIO VIDEO RECEIVER OWNER S MANUAL ...

Page 2: ...aratus 11 Only use the attachments accessories specified by the manufacturer 12 Use only with a cart stand tripod bracket or table specified by the manufacturer or sold with the apparatus When a cart is used use caution when moving the cart apparatus combination to avoid injury from tip over 13 Unplug this apparatus during lightning storms or when unused for long periods of time 14 Refer all servi...

Page 3: ...nit on soft woods or other materials that may be damaged by heat or heavy objects Some surface finishes may be particularly sensitive to absorbing such marks due to a variety of factors beyond our control including the nature of the finish cleaning materials used and normal heat and vibration caused by the use of the product or other factors We recommend that caution be exer cised in choosing an i...

Page 4: ...n 35 USB Playback 36 Internet Radio 37 Network Playback 37 Recording 37 Using Docking Station 38 Selecting a Surround Mode 40 ADVANCED FUNCTIONS 40 Audio Processing and Surround Sound 40 Analog Audio Signals 40 Digital Audio Signals 40 Surround Modes 41 Dolby Surround Settings 42 Manual Speaker Setup 45 Audio Effects 45 Video Adjustments 45 Video Modes 46 How to Adjust the Custom Picture Settings ...

Page 5: ...iliar with its features and their operation If you have any questions about this product its installation or its operation please contact your Harman Kardon retailer or custom installer or visit the Web site at www harmankardon com Harman Kardon AVR 3600 7 1 Channel Audio Video Receiver Audio Section 85 Watts x 7 seven channels driven at full power at 8 ohms 20Hz 20kHz 0 07 THD 595 watts total Hig...

Page 6: ...ated in high definition video Two line dot matrix front panel display Color coded connections Programmable learning seven device main remote control includes AVR control over The Bridge III Source input renaming Lip Sync Delay up to 180msec USB port for system upgrades Switched accessory power outlet Remote infrared IR input and output Zone 2 IR input Carrier IR Output and A BUS IR Output IEC deta...

Page 7: ...ont Remote IR Sensor USB Port Video Front Input Analog Audio Front Inputs Surround Modes Audio Effects Setup Standby On Switch Info Settings Volume Message Display Power Indicator NOTE To make it easier to follow the instructions throughout the manual that refer to this illustration a copy of this page may be downloaded from the Product Support section at www harmankardon com ...

Page 8: ...s menu will appear on screen and the menu line will appear in the front panel display See the Advanced Functions section for more information on surround modes Source List Press this button to select a source device which is a component where a playback signal originates e g DVD Back Exit Press this button to return to the previous menu or to exit the menu system 1 57 3 Navigation These buttons ar...

Page 9: ... Speaker Outputs Zone 2 Audio Outputs AM Antenna FM Antenna Carrier IR Output Analog 2 4 Audo Outputs Surround Speaker Outputs A BUS Port Component Video Monitor Output AC Power Input Video 2 Output A BUS IR Output Subwoofer Output Coaxial Digital Audio Output Coaxial 1 2 Digital Audio Inputs Optical 1 3 Digital Audio Inputs Preamp Outputs Fan Vents NOTE To make it easier to follow the instruction...

Page 10: ...I to DVI adapter Make sure the display is HDCP compliant If it isn t do not connect it to an HDMI Output use an analog video connection instead Always make a separate audio connection Analog 1 5 Inputs Connect the left and right analog audio outputs of a source device to any of these inputs These inputs may be paired with any video inputs NOTES The Analog 2 and 4 inputs are each associated with a ...

Page 11: ...mplifier to power the remote zone of a multizone system A BUS Port Use a Category 5 5e cable to connect this port to optional A BUS equipment for multizone operation When the A BUS system is used it is possible to have a full 7 1 channel system in the main listening room at the same time the multizone system is in use Front Center and Surround Speaker Outputs Use two conductor speaker wire to conn...

Page 12: ...s OK Navigation Activity Menu Disc Menu Channel Sleep Settings Learn Transport Controls IR Transmitter Lens Last Back Exit Light Record Info Settings Setup Zone Selector LEARN SETUP INFO SLEEP NOTE To make it easier to follow the instructions throughout the manual that refer to this illustration a copy of this page may be downloaded from the Product Support section at www harmankardon com ...

Page 13: ...or turn off the receiver AVR Power Off Button Press to turn off the AVR 3600 Source Selectors Press one of these buttons to select a source device e g DVD CD cable TV satellite or HDTV tuner This will also turn on the receiver and switch the remote s device mode to operate the source The first press of the Radio Selector switches the AVR to the last used tuner band AM FM or SIRIUS Each suc cessive...

Page 14: ...fo Menu which contains the settings for the current source Source Settings Button Press a Source Selector and then this button to display a source device s settings menu Zone Selector Use this switch to select whether AVR commands will affect the main listening area Zone 1 or the remote zone of a multizone system Zone 2 For normal operation leave the switch in the Zone 1 position Track Skip These ...

Page 15: ... Transport Controls Zone Indicator Volume Controls Back Exit Menu Source Selectors Sleep Settings Info Settings AVR OFF ZR60 NOTE To make it easier to follow the instructions throughout the manual that refer to this illustration a copy of this page may be downloaded from the Product Support section at www harmankardon com ...

Page 16: ...r the main room but not different tuner bands If you select the same source as that for the main room then any commands sent to the source will affect both zones The first press of the Radio Selector switches the AVR to the last used tuner band AM FM or SIRIUS Each successive press changes the band The DVD Source Selector may be used to operate either a Harman Kardon Blu ray Disc player or a Harma...

Page 17: ...where the surround back channels power loudspeakers located in another room Many people expect the surround speakers to play as loudly as the front speakers Although all of the speakers in the system will be calibrated to sound equally loud at the listening position most artists use the surround speakers for ambient effects only and they program their materials to steer very little sound to these ...

Page 18: ... in source devices including your Blu ray Disc or DVD player CD player DVR digital video recorder or other recorder tape deck game console cable or satellite television box or MP3 player The AVR s tuner also counts as a source even though no external connections are needed other than the FM and AM antennas and the SIRIUS tuner module Separate connections are required for the audio and video portio...

Page 19: ...member to comply with all copy right laws if you choose to make a copy for your own personal use Figure 7 Analog Audio The 6 8 Channel Inputs are multichannel analog connections that are used with high definition sources that decode the copy protected digital content such as some DVD Audio SACD Blu ray Disc and HD DVD players See Figure 8 The multichannel analog audio con nection is not required f...

Page 20: ...r the included FM and AM antennas The FM antenna uses a 75 ohm F connector See Figure 12 Figure 12 FM Antenna The AM loop antenna needs to be assembled Connect the two leads to the spring terminals on the receiver The AM antenna leads have no polarity and you may connect them to either terminal See Figure 13 Figure 13 AM Antenna To enjoy SIRIUS satellite radio purchase a SIRIUS Ready tuner module ...

Page 21: ...peaker or directly facing the opposite side front speaker See Figure 15 Figure 15 Speaker Placement 7 1 Channel System NOTE Some speaker manufacturers offer 6 1 channel speaker systems for 6 1 channel surround sound formats such as Dolby Digital EX DTS ES Discrete and Matrix modes and DTS Neo 6 mode Using the AVR 3600 in a 6 1 channel configuration is not recommended The 6 1 channel formats will s...

Page 22: ...r than the system best connection Leave blank audio only sources such as a CD player 4 Best audio connection for each source For each source device write down the best available type of audio connection See the note below and if the HDMI connection may be used for audio it is the best option The other options in order of preference are optical digital audio coaxial digital audio 2 channel analog a...

Page 23: ...For any source whose best audio connection is optical or coaxial digital audio assign one of the four Optical or three Coaxial Digital Audio Inputs Do not connect both types of digital audio to the same source device You may assign one of the 2 Channel Analog Audio Inputs to a digital source You may also assign the 6 8 Channel Analog Audio Inputs if available to a digital source See page 30 Assign...

Page 24: ...njoy content stored on a compatible iPod or iPhone not included connect The Bridge III dock included to its proprietary connector STEP FIVE Connect FM Antenna Connect the included FM antenna to the 75 ohm FM antenna terminal STEP SIX Connect AM Antenna Assemble the included AM antenna see Figure 16 and connect it to the AM and Ground antenna terminals The antenna is not polar ized and either lead ...

Page 25: ...mpatible IR input on the source This avoids having conflicting control commands sent to a source intended for the A BUS system IR commands received from the A BUS system are also distributed to the AVR s other IR outputs Visit the Web site at www harmankardon com for information on available Harman Kardon hubs the ABH 4 and ABH 4000 and amplified in wall modules the AB 1 and AB 2 Connect IR Contro...

Page 26: ...and the remote will exit Program mode 5 Check that other functions control the device correctly Sometimes manufacturers use the same Power code for several models while other codes vary Repeat this process until you ve pro grammed a satisfactory code set that operates most functions 6 Find out which code number you have programmed by pressing and holding the Source Selector to enter the Program mo...

Page 27: ...e you press one of the Source Selectors on the remote the remote will switch device modes To control the receiver press the Setup Button Some AVR functions are available in all device modes Volume Controls including Mute Audio Effects Video Modes Surround Modes Setup Info Settings Sleep Settings and AVR Power On and Off If you do not see a picture within about 1 minute refer to the Video Troublesh...

Page 28: ...press the Setup Button If necessary reread the Installation Section and the begin ning of this section before continuing Configure the AVR 3600 Using EzSet EQ Technology One of the most important steps in setting up a home theater system is to calibrate the receiver to match the loudspeakers optimizing sound reproduction Until recently most receivers required manual calibration and configuration a...

Page 29: ... assign the correct physical audio and video connections to each source The following settings are not optional and must be adjusted now to enable playback of each source Video Input From Source Audio Input From Source and Resolution to Display The other settings may be adjusted later To display the Info Settings menu press the Info Settings Button front panel or remote Or from the Main Menu selec...

Page 30: ... Depending on the capabilities of the player and your video display you may need to use a composite video connection instead Connect the player s digital audio output to a digital audio input on the AVR Connect the player s multichannel audio outputs to the AVR s 6 8 Channel Analog Audio Inputs Assign the correct digital audio and analog video inputs to the Audio and Video Input From Source settin...

Page 31: ...gain to leave a blank space When you have finished press the OK Button The name will appear on the front panel and next to its original name e g DVD throughout the on screen menu system To clear the entry without making any changes scroll to the blank character before A Adjust Lip Sync Resynchronizes the audio and video signals from a source to eliminate a lip sync problem Lip sync issues can occu...

Page 32: ...he recording studio at typically high reference volumes are lost at the lower volumes used by many listeners The AVR 3600 uses two Dolby Volume techniques to address these issues The Leveler module maintains a consistent listening volume within a source e g while watching commercial television or while listening to different tracks on a data CD The Modeler module endeavors to re create the referen...

Page 33: ... headphones into the front panel jack for private listening The default Headphone Bypass mode delivers a conventional 2 channel signal to the headphones Press the Surround Modes Button on the front panel or the remote to switch to Harman Headphone virtual surround processing which emulates a 5 1 channel speaker system No other surround modes are available for the headphones SOURCE SELECTION Press ...

Page 34: ...RIUS Ready module uses the special connector on the AVR and is controlled by the AVR s internal tuner including its 40 preset station locations and remote control Although you may use a car and home module with standard audio connections you will not be able to enjoy the AVR s ease of control The SIRIUS Connect SC H1 tuner module is compatible with the AVR 3600 Other modules that have standard ana...

Page 35: ...d Use the screen and controls on the iPod The AVR remote may also be used To view photos on a video monitor connected to the AVR select the photo and press the Play Button on the iPod or press the OK Button on the remote three times Videos Select this line to view videos stored on an iPod that supports video browsing or an iPhone NOTES ON VIDEO PLAYBACK As of this writing video browsing is only su...

Page 36: ...tent has been selected for playback To search within a track not in Manual Mode press and hold the indicated button Press the Previous Track Button once to skip to the beginning of the current track Press the Previous Track Button twice to skip to the beginning of the previous track When a slideshow is being displayed some controls have different effects To pause the slideshow including any audio ...

Page 37: ... follows the same scheme as 5 CH STEREO but adds the surround back speakers This mode is only available when the surround back speakers are present and have not been reassigned to multizone operation See page 47 for more information Movie Use when a surround mode is desired for movie playback Logic 7 Movie DTS Neo 6 Cinema or Dolby Pro Logic II IIx when seven main speakers are present Music Use wh...

Page 38: ...und channel information directly into the signal The result is improved sound quality and startling directionality since each channel is reproduced discretely Even when only two channels are encoded the digital signal allows for a higher sampling rate that delivers greater detail High resolution recordings sound extraordinarily distortion free especially at high frequencies Surround Modes Surround...

Page 39: ...e select the surround mode category Virtual Surround Stereo Movie Music or Video Game Press the OK Button to change the mode Each category is set to a default surround mode Virtual Surround Harman Virtual Speaker Reference Stereo 7 channel stereo Movie Logic 7 Movie Music Logic 7 Music Video Game Logic 7 Game You may select a different mode The choice of surround modes depends on the number of spe...

Page 40: ...ition at the center However you may have had to place some speakers a little further away from the listening position than others Sounds that are supposed to arrive simultaneously from different speakers may blur due to different arrival times Use the AVR s delay adjustment to compensate for real world speaker placements Measure the distance from each speaker to the listening position and write it...

Page 41: ...quency the subwoofer setting will always be SUB All low frequency information will always be sent to the subwoofer If you don t have a subwoofer either upgrade to full range speakers or add a subwoofer at the earliest opportunity If you set the front speakers to LARGE select one of the three settings for the subwoofer L R LFE This setting sends all low frequency information to the subwoofer includ...

Page 42: ...channel and then moving to the next channel several seconds later as indicated by the highlight bar Adjust the level for any channel when the test tone is paused there using the 7 3Buttons Use the 1 5Buttons to move the cursor to another line and the test tone will follow the cursor When this setting reads Manual the test tone will not move to the next channel until you use the 1 5Buttons Individu...

Page 43: ...rn in when the same image such as the horizontal or vertical bars is left on screen for a long period of time Adjust the picture so that it fills the display s screen Highlight this setting and press the OK Button Each press of the 1 5Buttons changes the setting Press the OK Button when the desired setting appears Auto Fit The AVR automatically adjusts the image as required to fit the display s ca...

Page 44: ...te yellow cyan turquoise green magenta red blue black The color transition seen as sharp separation of the bars The performance of the color circuits in your TV with Video signals bar edges should show no vertical crawling dots Use the gray scale and the black white fields in the test pattern to adjust the brightness and contrast Brightness Adjustment 1 Turn down the color control on your TV until...

Page 45: ... used 2 In the Info Settings menu leave the Audio Input from Source setting at the digital audio input Scroll down to the Zone 2 Audio setting and select the analog audio input Volume The volume is controlled separately for the remote zone Surround Back Amps Reassign the surround back channels to the multizone system When this line is set to Zone 2 you may only configure the main listening room fo...

Page 46: ...grades that improve performance or add features If you are experiencing diffi culties with the AVR a customer service representative may ask for the software version of your product to determine whether a later upgrade is available Upgrade Software If a software upgrade is released for the AVR 3600 installation instructions will be available in the Product Support section of the Web site or from H...

Page 47: ... remote and find that some functions are missing the AVR 3600 remote may learn individual codes from the product s original remote See page 26 Resetting the Remote To reset the remote to its factory defaults simultaneously press and hold the TV Source Selector and the 0 Alphanumeric Key When the TV Button re lights enter the code 333 When the TV Button goes out and all of the Source Selectors flas...

Page 48: ... or antenna away from computers fluorescent lights motors or other electrical appliances Surround Back Speaker settings Multizone system has been turned Use the menu system to access the Zone 2 menu and reassign cannot be accessed and test tone on and the surround back channels the surround back channels to the main room does not play through Surround were reassigned to multizone Back Speakers ope...

Page 49: ...ded Source Component Connections Device Type AVR 3600 Source Digital Audio Connection Analog Audio Connection Video Connections Cable TV satellite TV HDTV Cable SAT HDMI 2 Analog 1 HDMI 2 or other device that delivers television programs DVD Audio Video SACD DVD HDMI 1 Analog 2 HDMI 1 Blu ray Disc HD DVD player Media Server including Media Server HDMI 4 Analog 5 HDMI 4 Harman Kardon DMC 1000 TV TV...

Page 50: ...ur Settings Analog Audio Inputs Analog Audio Inputs Position 1 Position 2 Left Right Speakers ON ON Center Speaker ON ON Left Right Surround Speakers ON ON Left Right Surround Back Speakers OFF OFF Subwoofer 1 ON ON Subwoofer 2 ON ON Left Right Speakers Crossover 100Hz Large Center Speaker Crossover 100Hz Large Left Right Surround Speakers Crossover 100Hz Large Left Right Surround Back Speakers Cr...

Page 51: ...idge III Audio Input The Bridge III Resolution to Display Adjust Lip Sync Change Name N A Audio Auto Polling N A Zone 2 Audio The Bridge III Dolby Volume Table A6 Audio Effects Settings Default Cable Sat DVD Media Server Radio TV Game AUX The Bridge Dolby Volume See Source Tone Control Off Treble 0dB Bass 0dB LFE Trim 0dB MP3 Enhancer Off ...

Page 52: ... Music mode has been selected Access these settings by selecting the Edit option 52 Table A7 Video Modes Settings Default Cable Sat DVD Media Server Radio TV Game AUX The Bridge Video Mode Off Brightness 50 Contrast 50 Color 50 Sharpness 50 Picture Adjust Auto Fit Overscan On Noise Reduction Low MPEG Noise Reduction Low Cross Color Suppressor On Black Level Off Deinterlacing On Film Mode Detect 3 ...

Page 53: ...e Units dB Volume Default Off Volume Default Level 25dB Unit of Measure Feet Language English HDMI Audio to TV Off Dolby Volume Calibration 0dB Transparency Medium Volume Status Messages 3 seconds Menus 1 minute Setup and Slide In Menus 15 minutes Screen Saver 10 minutes Software Version Check your product Table A11 Zone 2 Settings Source Input Default Your Settings Status Off Source FM Radio Volu...

Page 54: ...nnel downmix of Dolby Digital materials Dolby Digital 1 0 0 or 1 2 0 0 or 1 3 0 0 or 1 2 1 0 or 1 2 2 0 or 1 3 2 0 or 1 Dolby Digital EX Dolby Pro Logic II Analog decoder that derives five full range discrete main audio channels See below Mode Group from matrix surround encoded or 2 channel analog sources Four variants are available Dolby Pro Logic II Variant of Dolby Pro Logic II that is optimize...

Page 55: ...and right speakers varies by number of channels in signal Analog 2 channel Tuner PCM 32kHz 44 1kHz or 48kHz DTS Digital Using a different encoding decoding method than Dolby Digital it also DTS 1 0 0 or 1 2 0 0 or 1 3 0 0 or 1 provides up to five discrete main channels plus an LFE channel 3 1 0 or 1 2 2 0 or 1 3 2 0 or 1 DTS ES Matrix played as 5 1 DTS ES Discrete played as 5 1 DTS HD DTS HD is a ...

Page 56: ...variants are available Logic 7 Especially suited to 2 channel sources containing Dolby Surround or matrix Analog 2 channel Movie encoding Logic 7 Movie mode increases center channel intelligibility Tuner PCM 32kHz 44 1kHz 48kHz 96kHz Logic 7 The AVR 3600 is programmed at the factory to default to this mode for Analog 2 channel Music 2 channel signals Logic 7 Music mode is well suited to convention...

Page 57: ...25 37 38 39 40 26 27 28 29 30 35 31 32 33 36 34 4 5 6 7 8 9 10 11 12 13 14 15 41 42 43 44 45 46 47 48 50 51 52 55 53 54 56 49 Refer to the numbered buttons in Figure 40 when using the Function List Figure 40 Remote Control Function List Reference ...

Page 58: ... Last Prev Ch Last 26 0 0 0 0 0 0 0 0 0 27 Activity Activity Activity Activity Activity Activity Activity Activity Activity 28 Back Exit Back Exit Back Exit Back Exit Back Exit Clear Back Back Exit 29 Menu Menu Menu Menu Menu Menu Menu Menu Menu 30 Up Up Tune Up Tune Up Channel Preset Up Up Up Up Up 31 Left Left Preset Down Preset Down Preset Category Down Left Left Left Left 32 OK OK OK OK OK Ent...

Page 59: ...Last 26 0 0 0 0 0 0 0 0 27 Activity Activity Activity Activity Activity Activity Activity Activity 28 Back Exit Bypass Clear Exit Cancel Exit Exit Cancel 29 Menu Menu Start Menu Menu Menu Menu 30 Up Up Up Up Up Up Up 31 Left Left Left Left Left Left Left 32 OK OK Select Enter Setup Select Enter 33 Right Right Right Right Right Right Right 34 Light Light Light Light Light Light Light Light 35 Down ...

Page 60: ...mber LG GOLDSTAR 101 110 122 128 132 LLOYTRON 172 173 LODGENET 069 LOGIK 069 LUXMAN 128 LXI 077 145 148 MAGNAVOX 030 123 128 132 145 148 MARANTZ 115 123 148 MATSUI 148 MEMOREX 069 128 METZ 084 MGA 115 123 128 MINERVA 084 MITSUBISHI 077 115 123 128 160 167 168 MTC 175 176 NATIONAL 148 177 179 180 181 182 NEC 115 121 123 125 NIKEI 045 ONKING 045 ONWA 045 OPTONICA 077 ORION 207 208 209 210 211 PANASO...

Page 61: ...N KARDON 302 303 318 349 HITACHI 340 348 JC PENNEY 318 345 Table A16 Remote Control Product Codes AUX VCR VCR Manufacturer Brand Setup Code Number JENSEN 348 JVC 318 348 411 432 KENWOOD 320 348 LG GOLDSTAR 318 407 LLOYD 340 LXI 320 340 MAGIN 345 MAGNAVOX 340 MARANTZ 318 MEMOREX 317 320 340 352 353 354 376 MGA 349 MITSUBISHI 349 431 MULTITECH 340 NAD 439 NATIONAL 440 NEC 318 348 NORDMENDE 348 OPTIM...

Page 62: ...215 PROTON 210 QUASAR 109 RADIO SHACK 126 166 213 RCA 024 081 093 150 RCX 169 REALISTIC 058 093 095 104 105 108 164 166 CD Manufacturer Brand Setup Code Number SANSUI 047 081 134 157 172 SANYO 033 082 095 SCOTT 108 SHARP 058 105 114 151 159 167 180 181 SHERWOOD 003 041 058 105 133 SONY 103 115 116 118 132 139 163 205 206 207 208 212 217 SOUNDSTREAM 124 SYMPHONIC 059 110 TAEKWANG 177 TEAC 011 058 0...

Page 63: ...er ALPHASTAR 472 ALPHASTAR DBS 450 ALPHASTAR DSR 442 BIRDVIEW 425 CHANNEL MASTER 320 321 325 361 CHAPARRAL 315 316 451 CITOH 360 DRAKE 313 317 318 413 481 DX ANTENNA 331 352 379 483 ECHOSTAR 395 397 452 453 463 477 478 484 485 ELECTRO HOME 392 FUJITSU 324 329 334 GENERAL INSTRUMENT 303 311 323 365 403 454 468 474 HITACHI DBS 455 HOUSTON TRACKER 463 HUGHES 437 489 JANIEL 366 JERROLD 454 468 484 KAT...

Page 64: ...umber HARMAN KARDON 002 Table A22 Remote Control Product Codes AUX MEDIA SERVER Table A21 continued Table A23 Remote Control Product Codes AUX Cable SAT RECORDER PVR Manufacturer Brand Setup Code Number DAEWOO 701 704 ECHOSTAR 714 715 716 EXPRESSVU 714 HUGHES 717 727 HYUNDAI 718 KEEN 709 PANASONIC 710 723 PHILIPS 711 717 724 727 PROSCAN 719 RCA 719 727 REPLAYTV 708 710 712 725 726 SONICBLUE 710 71...

Page 65: ...trademarks of Apple Inc registered in the U S and other countries iPhone is a trademark of Apple Inc iPod and iPhone not included Made for iPod means that an electronic accessory has been designed to connect specifically to iPod and has been certified by the developer to meet Apple performance standards Works with iPhone means that an electronic accessory has been designed to connect specifically ...

Page 66: ...250 Crossways Park Drive Woodbury New York 11797 www harmankardon com 2009 Harman International Industries Incorporated All rights reserved Part No CQX1A1431Z ...

Reviews: