


OPERATION
channel number and preset location. Press the Tuning Mode Button
repeatedly to display the category, current artist or song title.
For traffic and weather channels, the current city’s name will appear
instead of the channel name, and pressing the Tuning Mode Button
repeatedly will display the local weather and temperature.
Press the Set Button to search all channels. Press it again to search by
category, using the
⁄
/
¤
Buttons to change the category. Press the
Set Button again to tune the lowest-numbered station available in that
category, or without using the arrow keys, press the Set Button to
change the preset bank, using the
⁄
/
¤
Buttons to change the bank
letter. Press the Set Button again to return to the all-channel search.
To store a channel in one of the 40 preset locations:
1. Press the Set Button repeatedly until PRESET SEARCH appears, then
use the
⁄
/
¤
Buttons until the desired bank of presets (A through E)
appears in the upper line of the Message Display.
2. Press the Memory Button, and a line will appear next to the preset
bank letter.
3. Use the Numeric Keys to enter the preset location (1 through 8) you
wish to store the channel in.
Recording
Two-channel analog and digital audio signals, as well as composite
and S-video signals, are normally available at the appropriate recording
outputs. Thus, to make a recording, you need only make sure to con-
nect your audio or video recorder to the appropriate output jacks, as
described in the Installation section, insert blank media and make sure
the recorder is turned on and recording while the source is playing.
NOTES:
1. Analog audio signals are not converted to digital form, and
digital audio signals are not converted to analog audio form.
However, you may record a coaxial or optical digital audio
source using either type of digital audio output.
2. Only PCM digital audio signals are available for recording.
Proprietary formats such as Dolby Digital and DTS may not
be recorded using the digital audio connections, although if
the source is connected to the AVR using the analog audio
connections, an analog recording may be made.
3. HDMI and component video sources are not available for
recording.
4. Please make certain that you are aware of any copyright
restrictions on any material you record. Unauthorized duplica-
tion of copyrighted materials is prohibited by federal law.
Using
The Bridge is an optional dock that may be used with a compatible
iPod (not included). When The Bridge is connected to its proprietary
input on the AVR 247 and the iPod is docked, you may enjoy the audio,
video and still-image materials on your iPod through your high-quality
audio/video system, operate the iPod using the AVR remote or the
AVR’s front-panel controls, view navigation messages on the AVR’s
front panel or a connected video display, and charge the iPod.
Either press the front-panel Source Selector repeatedly until the mes-
sage “DMP/The Bridge is CONNECTED” scrolls across the front panel
and semi-OSD displays, or press the DMP Button on the remote to
select The Bridge as the input source.
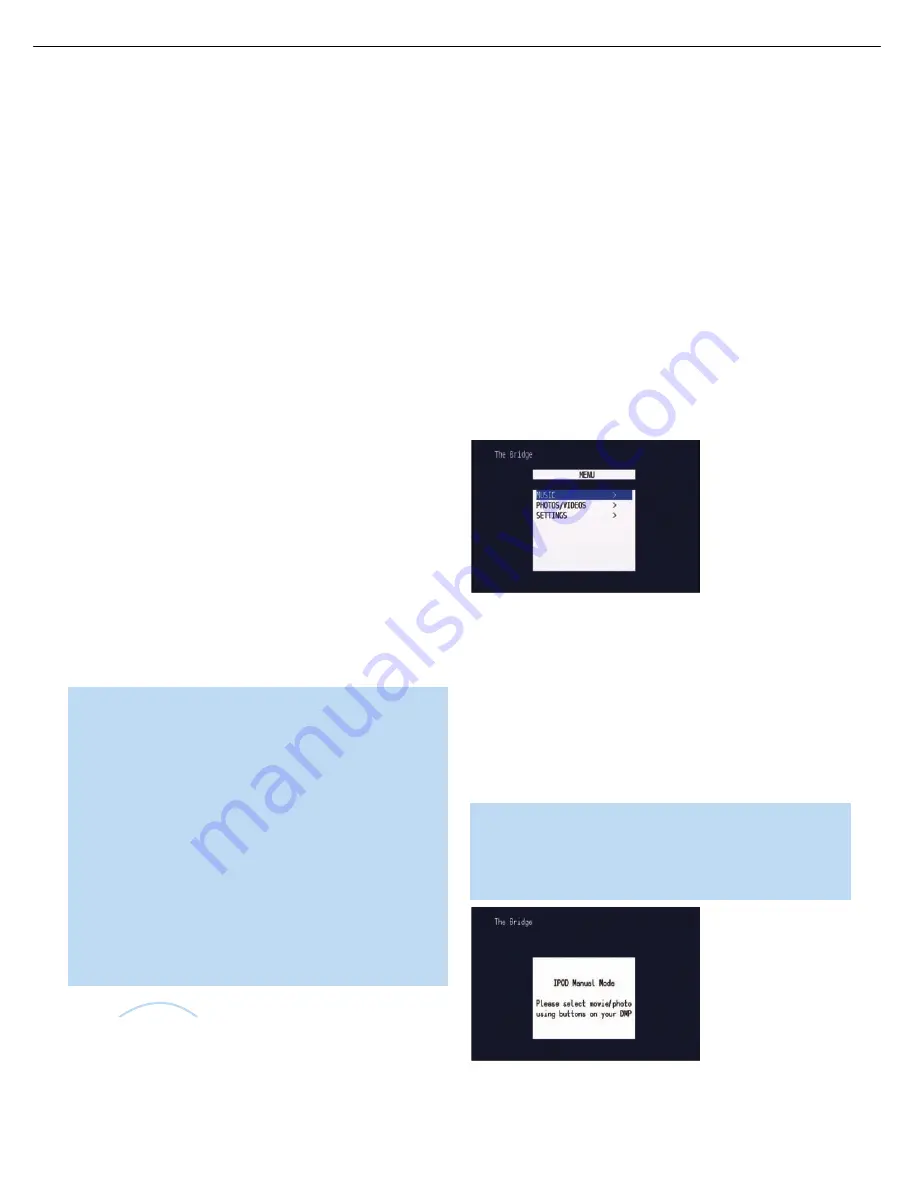
When an iPod is docked in The Bridge, the screen shown in Figure 74
will appear on a video display connected to the AVR. Navigate The
Bridge’s screens by using the
‹
/
›
Buttons to highlight a line and
pressing the Set Button to select the line. The
›
Button scrolls down,
and the
‹
Button scrolls up. Press the Menu Button to return to the
previous level of The Bridge’s menu system. Remember to set the
remote in The Bridge device mode by pressing the Tape/The Bridge
button. If it lights in red, press it again quickly so that it lights in green,
indicating it is in The Bridge mode.
Figure 74 – The Bridge: Main Menu Screen
MUSIC:
This line allows you to navigate the audio materials stored on
your iPod.
PHOTOS/VIDEOS:
Selecting this item allows you to play still images or
videos stored on the iPod. The screen shown in Figure 75 will appear,
directing you to operate the iPod’s own controls directly to play images
and videos. You may use the AVR 247 remote instead of the iPod’s
controls to navigate it, but the iPod’s menu will only be displayed on
its internal screen. Visual materials will be displayed on a video display
connected to the AVR.
NOTE:
After selecting video/photo viewing, the AVR may remain
in iPod Manual Mode, even after undocking the iPod or switch-
ing to another source input and back again. To return to normal
operation, with the AVR remote in The Bridge mode, press and
hold the Menu Button.
Figure 75 – The Bridge: Playing Images and Videos
The
Bridge
TM
31
AVR247
harman/kardon
Summary of Contents for AVR 247
Page 42: ...AVR247 harman kardon 42 ...
Page 44: ...44 AVR247 harman kardon ...
Page 45: ...45 AVR247 harman kardon ...
Page 46: ...46 AVR247 harman kardon ...
Page 47: ...47 AVR247 harman kardon ...
Page 48: ...48 AVR247 harman kardon ...
Page 49: ...49 AVR247 harman kardon ...
Page 50: ...50 AVR247 harman kardon ...
Page 51: ...51 AVR247 harman kardon ...
Page 52: ...52 AVR247 harman kardon ...
Page 53: ...53 AVR247 harman kardon ...
Page 99: ...99 AVR247 harman kardon IC51 XM IC ...
Page 100: ...100 AVR247 harman kardon ...
Page 101: ...101 AVR247 harman kardon ...
Page 102: ...102 AVR247 harman kardon ...
Page 103: ...103 AVR247 harman kardon ...
Page 104: ...104 AVR247 harman kardon ...
Page 105: ...105 AVR247 harman kardon ...
Page 106: ...106 AVR247 harman kardon ...
Page 107: ...107 AVR247 harman kardon ...
Page 108: ...108 AVR247 harman kardon ...
Page 109: ...109 AVR247 harman kardon ...
Page 110: ...110 AVR247 harman kardon ...
Page 111: ...111 AVR247 harman kardon ...
Page 112: ...112 AVR247 harman kardon ...
Page 113: ...113 AVR247 harman kardon ...
Page 114: ...114 AVR247 harman kardon ...
Page 115: ...115 AVR247 harman kardon ...
Page 118: ...118 AVR247 harman kardon ...
Page 119: ...119 AVR247 harman kardon ...
Page 127: ...127 AVR247 harman kardon ...
Page 129: ...129 AVR247 harman kardon ...
Page 130: ...130 AVR247 harman kardon ...
Page 131: ...131 AVR247 harman kardon ...
Page 132: ...132 AVR247 harman kardon ...
Page 133: ...Technology SiI 9031 HDMI PanelLink Cinema Receiver Data Sheet 133 AVR247 harman kardon ...
Page 152: ...152 AVR247 harman kardon ...
Page 153: ...153 AVR247 harman kardon ...
Page 154: ...154 AVR247 harman kardon ...
Page 155: ...155 AVR247 harman kardon ...
Page 156: ...156 AVR247 harman kardon ...
Page 157: ...157 AVR247 harman kardon ...
Page 163: ...163 AVR247 harman kardon ...
Page 164: ...AVR347 harman kardon 164 AVR247 harman kardon ...
Page 186: ...186 AVR247 harman kardon ...
Page 187: ...187 AVR247 harman kardon ...
Page 188: ...188 AVR247 harman kardon ...
Page 189: ...189 AVR247 harman kardon ...
Page 190: ...190 AVR247 harman kardon ...
Page 196: ...sch 1 Wed Mar 14 21 03 09 2007 196 AVR247 harman kardon ...
Page 197: ...197 AVR247 harman kardon ...
Page 198: ...198 AVR247 harman kardon ...
Page 199: ...5 sch 3 Thu Mar 15 10 03 09 2007 199 AVR247 harman kardon ...
Page 200: ...5 sch 2 Thu Mar 15 10 02 34 2007 200 AVR247 harman kardon ...
Page 201: ...5 sch 1 Thu Mar 15 10 02 06 2007 201 AVR247 harman kardon ...
Page 202: ...5 sch 4 Thu Mar 15 10 03 34 2007 202 AVR247 harman kardon ...
Page 203: ...203 AVR247 harman kardon ...
Page 204: ...ch 1 Wed Mar 14 21 40 29 2007 204 AVR247 harman kardon ...
Page 205: ... sch 1 Thu Mar 15 10 45 34 2007 205 AVR247 harman kardon ...
Page 206: ...4 sch 1 Wed Mar 14 12 11 57 2007 206 AVR247 harman kardon ...


