EN
29
NOTE:
Use only M6 x 15 mm screws. The motor will be damaged if the
wrong screws are used, and this will invalidate the warranty.
5. Mark out the mounting height for the rail so that it can
be fastened to the roof and in the wall over the door. The
distance between the roof and the open door must be at
least 40 mm for the rail to fit in place. If the roof/rafters are
so low that the rail can be mounted without an extension
(9), this is to be preferred. This means that the lifting arm
(including the curved part) reaches down to the top edge of
the door. If in doubt, fit the lifting arm and measure. This will
work in most garages. The rail must always be horizontally
centred to the door.
6. Fit the wall bracket on the wall over the door with the 2
wood screws M6 x 40. Carefully put the front part of the rail
(opposite end to the motor) in the bracket and lock in place
with a locking screw through the bracket and rail.
FIG. 7
7. Lift up the motor end so that the rail is horizontal and
fastened to the roof with the last U-bracket and wood screws.
When mounting in material other than wood use suitable
parts (sold separately).
FIG. 8
8. If an extension is used it must be bent to suit the actual
distance. When using an extension, first put the U-bracket
round the rail and fasten the extension with screws and nuts.
Now fasten the extension to the roof with the screws.
9. Put the middle roof bracket on the rail so that it grips round
the edges and so that the lifting can move freely. Screw the
bracket to the roof with the screws.
FIG. 9
NOTE:
The roof fittings are flat on delivery. They are bent on assembly.
10. Pull the red line to release the runner/lifting arm from the
chain and push forward the lifting arm to the door. Fit the
fixed and curved parts of the lifting arm together with at
least 2 screws and nuts and adjust the length so that the
arm comes at the correct angle to the top edge of the door.
11. Fit the door bracket about 1 cm from the top edge of the
door with the screws M6 x 15. Fasten the lifting arm to the
door bracket with locking pin and cotter.
FIG. 10
12. Lift the door by hand to the point where the runner (the
grey plastic piece that runs along the rail) relocks in the
chain. Tug in both directions to check that they have locked
together.
13. The door opener is now fully installed and ready to be
programmed.
USE
CONTROL PANEL
Description of button functions
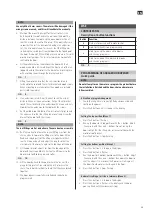
Button
Function
S
Only use for pairing with remote control.
P
Used to start/end/store programming.
+
Used to run up the door and to browse
and change programs.
–
Used to run down the door and to browse
and change programs.
FIG. 11
PROGRAMMING OF GARAGE DOOR OPENER
Quick guide
NOTE:
Do not attempt to run the motor or program the product before
the installation is finished and the door, chain and motor are
fully assembled.
Activation of programming mode
1. Check that all parts are correctly fitted and connected and
switch on the power.
2. Press the P button until 1 is shown in the display.
Setting the top position (Menu 1)
1. Press the P button. 1 flashes.
2. Run up the door to its top position with the + button. Adjust
if necessary with the + and – buttons. Do not run up the
door so high that the lifting arm or runner collides with the
motor or roof bracket.
3. Press the P button. 1 stops flashing.
Setting the bottom position (Menu 2)
1. Press the + button. 2 is shown in the display.
2. Press the P button. 2 flashes.
3. Run the door to its bottom position with the + button. Adjust
if necessary with the + and – buttons. Run down the door so
that the edge is 1–3 mm over the floor or just resting on it.
The door should not press hard against the floor.
4. Press the P button. 2 stops flashing.
Automatic setting of resistance tolerance (Menu 3)
1. Press the + button. 3 is shown in the display.
2. Press the P button. 3 flashes in the display and the door
goes up. Wait until the movement stops.
Summary of Contents for 377011
Page 5: ...1 2 1 5 2 3 6 7 8 9 4 4 4 10 5 11 6 12 7 13 8 14 9 15 ...
Page 6: ...3 4 5 15 ...
Page 7: ...7 6 8 9 8 12 10 M6 x 15 mm ...
Page 8: ...10 11 12 13 14 15 10 6 12 7 ...
Page 9: ...16 18 17 20 21 19 22 23 ...

