1 0
Installation Instructions
INSTALLATION WARNINGS
• Do not modify this appliance.
• This appliance must be installed by an authorised technician or installer.
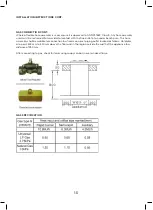
• Prior to installation, ensure that the local distribution conditions (nature of the gas and gas pressure) and
the adjustment of the appliance are compatible.
• The adjustment conditions for this appliance are stated on the label (or data plate)
• This appliance is not connected to a combustion products evacuation device. It should be installed and
connected in accordance with current installation regulations. Particular attention should be given to the
relevant requirements regarding ventilation.
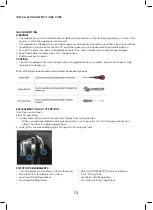
• Before installing, turn off the gas and electricity supply to the appliance.
• All appliances containing any electrical components must be earthed.
• Ensure that the gas pipe and electrical cable are installed in such a way that they do not touch any parts
of the appliance which may become hot.
• Gas pipe or connector shouldn’t be bent or blocked by any other appliances.
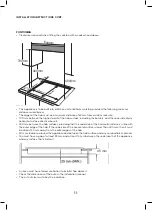
• Check the dimensions of the appliance as well as the dimensions of the gap to be cut in the kitchen unit.
• The panels located above the work surface, directly next to the appliance, must be made of
non-flammable material. Both the stratified surfacing and the glue used to secure it should be heat
resistant, to prevent deterioration.
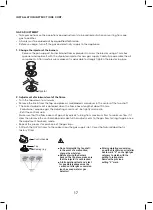
• Turn on appliance tap and light each burner. Check for a clear blue flame without yellow tipping and if
burners show any abnormalities check the following;
- Burner lid is on correctly
- Flame spreader is positioned correctly
- Burner vertically aligned with injector end
• A full operational test and test for possible leakages must be carried out by the installer after installation.
• The flexible hose shall be fitted in such a way that it cannot come into contact with a movable part of the
housing unit and does not pass through any space susceptible of becoming congested.
• Grease cranes produced at the factory to meet the requirement of all life hob.

