background image

SKU 90725

    Page 2

Specifications

Save This Manual

You will need the manual for the safety warnings and precautions, assembly
instructions, operating and maintenance procedures, parts list and diagram.  Keep
your invoice with this manual.  Write the invoice number on the inside of the front
cover.  Keep the manual and invoice in a safe and dry place for future reference.

Safety Warnings and Precautions

WARNING: When using tool, basic safety precautions should always be fol-
lowed to reduce the risk of personal injury and damage to equipment.

Read all instructions before using this tool!

1.

Keep work area clean

.  Cluttered areas invite injuries.

2.

Observe work area conditions

.  Do not use this tool in damp or wet

locations.  Don’t expose to rain.  Keep work area well lighted.  Do not use in
the presence of flammable gases or liquids.

3.

Keep children away

.  Children must never be allowed in the work area.  Do

not let them handle machines, tools, or extension cords.

4.

Store idle equipment

.  When not in use, tool must be stored in a dry location

to inhibit rust.  Always lock up tool and keep out of reach of children.

5.

Use the right tool for the job

. Do not attempt to force a small tool or

attachment to do the work of a larger industrial tool. There are certain
applications for which this tool was designed. It will do the job better
and more safely at the rate for which it was intended. Do not modify this
tool and do not use this tool for a purpose for which it was not intended.

6.

Dress properly

.  Do not wear loose clothing or jewelry as they can be caught

in moving parts.  Protective, electrically non-conductive clothes and non-skid
footwear are recommended when working.  Wear restrictive hair covering to
contain long hair.

Material:

All ABS body with
aluminum end fittings
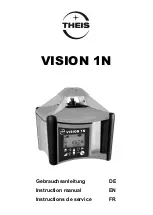
Tripod:

Aluminum swivel head
zinc plated legs
Lockable swivel head

Adjustability:

360 degrees

Features:

On/Off switch

Power:

(3) 1.5v AG13 button
cell batteries included

Dimensions:

7-5/8”l x 1”w x 2-1/8”h

Levels:

(3) Liquid filled vials:
Horizontal, Vertical, and
45 degree

Working Range: Approx.  36’
Laser Dot:

1/4” OD @ approx. 36’
350 nm wavelength

F.D.A. certification number 0310895-00

Laser Class II

90725 Laser Level.P65

10/13/03, 9:06 AM

2

Summary of Contents for CEN-TECH 90725

Page 1: ...Mission Oaks Blvd Camarillo CA 93011 Visit our Web site at http www harborfreight com Copyright 2003byHarborFreightTools Allrightsreserved Noportionofthismanualor anyartworkcontainedhereinmaybereproducedinanyshapeorformwithouttheexpress writtenconsentofHarborFreightTools For technical questions and replacement parts please call 1 800 444 3353 90725 90725 Laser Level P65 10 13 03 9 06 AM 1 ...

Page 2: ... must be stored in a dry location to inhibit rust Always lock up tool and keep out of reach of children 5 Use the right tool for the job Do not attempt to force a small tool or attachment to do the work of a larger industrial tool There are certain applications for which this tool was designed It will do the job better and more safely at the rate for which it was intended Do not modify this tool a...

Page 3: ...rs damaged should be carefully checked to determine that it will operate properly and perform its intended function Check for alignment and binding of moving parts any broken parts or mounting fixtures and any other condition that may affect proper operation Any part that is damaged should be properly repaired or replaced by a qualified technician Do not use the tool if any switch does not turn On...

Page 4: ...ell batteries 1 Instruction booklet If any parts are missing or broken please call Harbor Freight Tools at the number on the cover of this manual Assembly 1 To install batteries unscrew the On Off switch assembly and insert three 3 1 5v batteries included Be sure to install the batteries matching the polarity marked in the battery compartment 2 This level may be used with or without the tripod To ...

Page 5: ...ser illuminates This indicates the desired top surface of that footing This technique can be used for many similar applications for example to align pictures on a wall Using the level to install horizontal or vertical components For example To install a chair rail on an interior wall first mark the desired height of the rail Align the laser level with that point and assure that the liquid level in...

Page 6: ...UT OF HIS OR HER REPAIRS TO THE ORIGINAL PRODUCT OR REPLACEMENT PARTS THERETO OR ARISING OUT OF HIS OR HER INSTALLATION OF REPLACEMENT PARTS THERETO Maintenance 1 Remove the batteries when the laser level will not be used for an extended period of time 2 Prevent sharp impacts to the tool such as dropping it or allowing it to bang around in a tool box 3 Keep the laser level clean and dry Wipe any d...

Reviews: