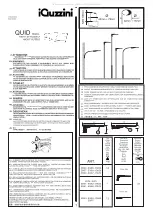
background image

3

 HARDWARE CONTENTS 

(shown actual size)

BB

AA

READ AND SAVE THESE INSTRUCTIONS.

SAFETY INFORMATION

• For your protection and safety, carefully read and understand the information provided 

in this manual 

completely before attempting to assemble, install or operate this product. Failure to do so could lead 
to fire, electrical shock or other injuries that could be hazardous or even fatal.

• If using these light fixtures in a WET location, these light fixtures must be connected to a supply 

circuit that is protected by a Ground Fault Circuit Interrupter (GFCI) to reduce the risk of personal 
injury, electrical shock or death.

• 

DO NOT connect this fixture to an electrical system that does not provide a means for equipment 

grounding. Never use a fixture in a two-wire system that is not grounded. Installing a fixture into an 
electrical system not having a proper grounding means could cause metal parts of the fixture to carry 
electrical currents if any of the fixture wires, wire connections or splices were to become broken, cut 
or loose during the mounting or normal operation of the fixture. Under this condition, anyone coming 
in contact with the fixture would be subject to electrical shock, which could cause serious injury or 
death.


DO NOT connect the bare or green insulation fixture ground wire to the black (HOT) 

current-carrying wire or the white (NEUTRAL) house wire. Connection of the bare or green fixture 
ground wire to the black or white house wires may cause metal parts of the fixture to carry electrical 
currents. Under this condition, anyone coming in contact with the fixture will receive electrical 
shock, which could cause serious injury or death.


DO NOT damage or cut the wire insulation (covering) during installation of fixture. DO NOT permit 

wires to contact any surface having a sharp edge. To do so may damage or cut the wire insulation, 
which could cause serious injury or death from electrical shock.

DANGER

Wire 

Connector


Qty. 3

Machine 

Screw

Qty. 2

• THIS PRODUCT MUST BE INSTALLED IN ACCORDANCE WITH THE APPLICABLE 

INSTALLATION CODE BY A PERSON FAMILIAR WITH THE CONSTRUCTION AND OPERATION 
OF THE PRODUCT AND THE HAZARDS INVOLVED.

• 

All electrical connections must be in agreement with local codes and ordinances, the National 

Electric Code (NEC) and ANSI/NFPA 70-1999. Contact your municipal building department to learn 
about your local codes, permits and/or inspections. 

Risk of 

fire - most dwellings built before 1985 

have supply wire rated for 140 °F. Consult a qualified electrician before installation. 

WARNING

Summary of Contents for WL137MW

Page 1: ...ment at 1 888 251 1003 8 a m 8 p m EST Monday Sunday You could also contact us at partsplus lowes com or visit www lowespartsplus com ITEM 4145468 MODEL WL137MW ATTACH YOUR RECEIPT HERE ADJUNTE SU REC...

Page 2: ...y Information 3 Preparation 4 Assembly Instructions 5 Care and Maintenance 9 Troubleshooting 9 Warranty 9 TABLE OF CONTENTS B C A A Fixture 1 B Mounting Plate 1 preassembled to fixture A C Mounting Pl...

Page 3: ...subject to electrical shock which could cause serious injury or death DO NOT connect the bare or green insulation fixture ground wire to the black HOT current carrying wire or the white NEUTRAL house...

Page 4: ...malfunction install fixture at least 4 ft above the ground floor SAFETY INFORMATION WARNING TURN OFF ELECTRICITY at main fuse box or circuit breaker box before beginning installation by removing the...

Page 5: ...ilure to disconnect power supply prior to installation may result in serious injury or death 1 1 Remove existing fixture and disconnect all electrical wiring 2 2 Outlet Box 3 3 A B C C Remove mounting...

Page 6: ...ears on mounting plate B are level horizontally This will help ensure the fixture A is level when attached Tighten machine screws BB completely to secure mounting plate B CAUTION The fixture must be m...

Page 7: ...lectrical shock or personal injury wire connectors AA are designed to accept only one 12 gauge house wire and two lead wires from the light fixture If your house wire is larger than 12 gauge or there...

Page 8: ...use level to check fixture A adjust if necessary 7 A C Restore power and test fixture A If light does not function please refer to TROUBLESHOOTING on the following page 9 B C 8 Install one 60 watt max...

Page 9: ...ver fixtures becoming defective due to misuse accidental damage or improper handling and or installation and specifically excludes liability for direct incidental or consequential damages improper pac...

Page 10: ...s reservados Preguntas problemas piezas faltantes Antes de volver a la tienda llame a nuestro Departamento de Servicio al Cliente al 1 888 251 1003 de lunes a domingo de 8 a m a 8 p m hora est ndar de...

Page 11: ...e seguridad 12 Preparaci n 13 Instrucciones de ensamblaje 14 Cuidado y mantenimiento 18 Soluci n de problemas 18 Garant a 18 B C A A L mpara 1 B Placa de montaje 1 preensamblada a la l mpara A C Torni...

Page 12: ...l mpara al conductor negro DE CORRIENTE que lleva la corriente o al conductor blanco NEUTRO de la casa Conectar el conductor de tierra desnudo o verde de la l mpara al conductor negro o blanco de la...

Page 13: ...un cable en la casa para conectar los cables conductores de la l mpara correspondientes preg ntele a un electricista cu l es el tama o adecuado de los conectores de cables que debe utilizar Para reduc...

Page 14: ...l suministro de electricidad antes de la instalaci n pueden producirse lesiones graves o la muerte 1 Retire la l mpara existente y desconecte el cableado el ctrico 2 1 2 Caja de salida ON OFF ON OFF 3...

Page 15: ...das horizontalmente Esto ayudar a garantizar que la l mpara A est nivelada al fijarla Apriete los tornillos para metal BB para fijar la placa de montaje B PRECAUCI N la l mpara se debe montar en una c...

Page 16: ...incendios descargas el ctricas o lesiones personales los conectores de cables AA incluidos con esta l mpara est n dise ados para soportar solo un cable de la casa de calibre 12 y dos cables conductor...

Page 17: ...a de montaje C examine la l mpara A con un nivel y aj stela si es necesario 7 A C 9 B C 8 Instale una bombilla incandescente de base est ndar de 60 vatios como m ximo no se incluye o una bombilla CFL...

Page 18: ...e espec ficamente toda responsabilidad por da os directos accidentales o resultantes embalaje incorrecto de productos devueltos y da os por fuerza mayor Debido a que algunos estados no permiten exclus...

Reviews: