background image

SAFETY INFORMATION

WARNING

3

Lowes.com/harborbreeze

WARNING


To reduce the risk of fire, electrical shock or personal injury, mount fan to outlet box                   

            marked "ACCEPTABLE FOR FAN SUPPORT OF 35 LBS. OR LESS" and use 
            mounting screws provided with the outlet box. Most outlet boxes commonly used for the 
support of lighting fixtures are not acceptable for fan support and may need to be replaced. 
Consult a qualified electrician if in doubt. 

When mounting fan to a ceiling outlet box, use a METAL octagonal outlet box; do NOT use a 
plastic outlet box. Secure the outlet box directly to the building structure. The outlet box and its 
support must be able to support the moving weight of the fan (at least 35 lbs.). 


 To avoid personal injury, the use of gloves may be necessary while handling fan parts with


 sharp edges.

To reduce the risk of fire, electrical shock or personal injury, wire connectors provided with this fan 
are designed to accept only one 12-gauge house wire and two lead wires from the fan. If your 
house wire is larger than 12-gauge or there is more than one house wire to connect to the  
corresponding fan lead wires, consult an electrician for the proper size wire connectors to use.

To reduce the risk of fire or electrical shock, do not use the fan with any solid state speed control 
device or control fan speed with a full range dimmer switch.

To reduce the risk of fire, electrical shock or personal injury, do not bend the blade arms when 
installing them, balancing the blades or cleaning the fan. Do not insert objects between the 
rotating fan blades.

To reduce the risk of personal injury, use 

only

 parts provided with this fan. The use of parts 

OTHER 

than those provided with this fan will void the warranty.


 Before proceeding, be sure to shut off electricity at main switch or circuit breaker in order to avoid  


 electrical shock.

WARNING


Be sure outlet box is properly grounded and that a ground wire (green or bare) is present.

Before beginning installation, carefully check all screws, bolts and nuts on fan motor assembly to 
ensure they are secure.

CAUTION


Summary of Contents for TEX52MBK5C1L

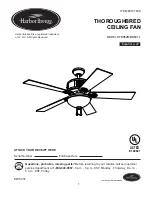
Page 1: ...tions problems missing parts Before returning to your retailer call our customer service department at 1 800 643 0067 8 a m 6 p m EST Monday Thursday 8 a m 5 p m EST Friday ATTACH YOUR RECEIPT HERE Serial Number Purchase Date EB15437 1 Lowes com harborbreeze Español p 22 ITEM 0747609 THOROUGHBRED CEILING FAN ...

Page 2: ...for repairs it must be shipped in its original packaging to ensure proper protection against damage that might exceed the initial cause for return Make sure all electrical connections comply with local codes ordinances the National Electrical Code and ANSI NFPA 70 1999 Hire a qualified electrician or consult a do it yourself wiring handbook if you are unfamiliar with installing electrical wiring M...

Page 3: ... only one 12 gauge house wire and two lead wires from the fan If your house wire is larger than 12 gauge or there is more than one house wire to connect to the corresponding fan lead wires consult an electrician for the proper size wire connectors to use To reduce the risk of fire or electrical shock do not use the fan with any solid state speed control device or control fan speed with a full rang...

Page 4: ...d 1 L Threaded Washer 1 preassembled M Finial preassembled 1 N Blade Arm 5 O Blade 5 DESCRIPTION PART QUANTITY P Pin preassembled 1 Q Clip preassembled 1 R Motor Screw 10 preassembled 1 extra S Lock Washer 10 preassembled 1 extra T Canopy Mounting Screw 2 preassembled U Switch Housing Screw 3 preassembled V Motor Plate Screw 3 preassembled W 60 watt Bulb 3 X Pull Chain Extension 2 Y Hex Nut preass...

Page 5: ... Safety Glasses Stepladder and Wire Strippers Helpful Tools not included AC Tester Light Tape Measure Do It Yourself Wiring Handbook and Wire Cutters PREPARATION Lowes com harborbreeze Blade Washer Qty 15 1 extra CC Blade Screw Qty 15 1 extra Wire Connector Qty 4 AA BB CC HARDWARE CONTENTS shown actual size DD Cap Qty 1 Turn off circuit breakers and wall switch to the fan supply line leads DANGER ...

Page 6: ...o use a longer downrod not included Angle mounting is best suited for angled or vaulted ceilings A longer downrod is sometimes necessary to ensure proper blade clearance Open End 4 B B ANGLE MOUNT STANDARD MOUNT Secure mounting bracket B to outlet box not included using screws spring washers and flat washers provided with the outlet box NOTE It is very important you use the proper hardware when in...

Page 7: ...re plastic motor blocks installed with the motor screws R and lock washers S discard the plastic motor blocks INITIAL INSTALLATION 5 FAN MOUNTING 7 Lowes com harborbreeze 1 1 2 Insert downrod A through canopy C canopy cover D and yoke cover E Thread wires from motor housing G up through downrod A NOTE Canopy cover D must be turned with the smooth side toward the motor housing G 2 R S Set Screws an...

Page 8: ...ed NOTE If you do not cut back the lead wires Steps 4 and 5 are not necessary and you may proceed to Step 6 instead 4 3 Slip downrod A into yoke align holes and re install pin P and clip Q Tighten set screws and then tighten nuts on the set screws Slide yoke cover E down until it rests on top of motor housing G 8 Lowes com harborbreeze 4 3 If you decided to cut back the lead wires in Step 4 strip ...

Page 9: ...n below use one of the wire connectors CC making sure to screw wire connector CC on in a clockwise direction 1a FAN AND LIGHT CONTROLLED BY PULL CHAINS Connect BLACK and BLUE wire from fan to BLACK wire from ceiling Connect WHITE wire from fan to WHITE wire from ceiling Connect all GROUND GREEN wires together from fan on downrod A and mounting bracket B to BARE GREEN wire from ceiling NOTE This fa...

Page 10: ... mounting bracket B to BARE GREEN wire from ceiling NOTE BLACK wire is hot power for fan BLUE wire is hot power for light kit WHITE wire is common for fan and light kit BARE GREEN wire is ground 1b FAN CONTROLLED BY PULL CHAIN LIGHT BY WALL SWITCH If you intend to control the fan light with a separate wall switch connect BLACK wire from fan to BLACK wire from ceiling Connect BLUE wire from fan to ...

Page 11: ... screwheads in bottom of canopy C Turn canopy cover D clockwise until it stops IMPORTANT Using a full range dimmer switch not included to control fan speed will cause a loud humming noise from fan To reduce the risk of fire or electrical shock do NOT use a full range dimmer switch to control fan speed 3 WIRING Dimmer Switch Speed Switch For illustrative purposes only not intended to cover all type...

Page 12: ...other screw Align slotted holes in switch housing plate H with loosened motor plate screws V allowing male plug from motor housing G to come through hole in switch housing plate H Twist switch housing plate H to lock Re insert the motor plate screw V that was removed and securely tighten all three motor plate screws V 5 Partially loosen two switch housing screws U from outer edge of switch housing...

Page 13: ... plugs are connected completely Align slotted holes in switch housing at top of light kit fitter I with loosened screws in switch housing plate H Twist light kit fitter I to lock then re install the switch housing screw U previously removed Step 4 page 12 Tighten all switch housing screws U securely 1 INSTALLING FAN WITH LIGHT KIT 1 13 Lowes com harborbreeze Install 60 watt bulbs W into sockets on...

Page 14: ...le in middle of finial plate K Secure with previously removed finial M CAUTION Do NOT overtighten finial M as glass may crack or break 4 Attach pull chain extensions X or custom pull chain extensions not included to fan and light pull chains Assembly is now complete 5 1 1 If you do NOT wish to use the light kit locate wires in switch housing at top of light kit fitter I labeled FOR LIGHT and gentl...

Page 15: ...witch housing screws U securely Attach pull chain extension X or custom pull chain extension not included to fan pull chain Assembly is now complete Firmly place cap DD in hole in middle of switch housing Connect male plug from motor housing G to female plug from the switch housing matching up the colors on the male plug with the colors on the female plug for a proper fit Make sure plugs are conne...

Page 16: ...DIUM three is LOW and four turns the fan OFF 1 1 2 2 OPERATING INSTRUCTIONS The pull chain located on the switch housing labeled FOR LIGHT has four positions to control light output One pull turns the UPLIGHT ON two pulls turns the UPLIGHT OFF and the DOWNLIGHT ON three pulls turns ALL of the lights ON and four pulls turns ALL of the lights OFF I X I X ...

Page 17: ...everse switch OPERATING INSTRUCTIONS 3 3A In warmer weather setting the reverse switch in the LEFT position will result in downward airflow creating a wind chill effect 3B In cooler weather setting the reverse switch in the RIGHT position will result in upward airflow that can help move stagnant hot air off the ceiling area 3C IMPORTANT Reverse switch must be set either completely to the RIGHT or ...

Page 18: ...ket B and then tighten all screws on fan Clean fan with only a soft brush or lint free cloth to avoid scratching the finish Clean blades O with a lint free cloth You may occasionally apply a light coat of furniture polish to wood blades for added protection IMPORTANT Shut off main power supply before beginning any maintenance Do not use water or a damp cloth to clean the ceiling fan Bulb Replaceme...

Page 19: ...pply to avoid electrical shock 1 Tighten all blade screws 2 Replace blade 3 Replace with an approved speed control device 4 Allow fan a break in period of a few days especially when running the fan at Medium and High speeds Excessive wobbling 1 Blades are loose 2 Blade arms incorrectly attached 3 Fan not securely mounted 4 Fan too close to vaulted ceiling 5 Set screw s on motor housing yoke is are...

Page 20: ...r of this fan or affixing accessories not produced by the manufacturer of this fan are the purchaser s own responsibility The distributor assumes no responsibility whatsoever for fan installation during the limited lifetime warranty Any service performed by an unauthorized person will render the warranty invalid Due to varying climatic conditions this warranty does not cover changes in brass finis...

Page 21: ...m 5 p m EST Friday Printed in China Harbor Breeze is a registered trademark of LF LLC All Rights Reserved 21 Lowes com harborbreeze LI1509 A Downrod B Mounting Bracket C Canopy H Switch Housing Plate I Light Kit Fitter N Blade Arm O Blade PART DESCRIPTION PART 747609 A 747609 B 747609 C 747609 H 747609 I 747609 N 747609 O A C H I N B O ...

Reviews: