background image

14

15

Hardware Used

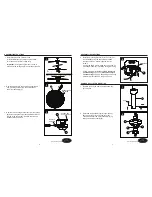
11. Pass fan pull chain through side hole on glass cap (L), 

then place glass cap (L) and finial (M) over pipe and 

securely tighten.

12. Attach fan pull chain extension (CC) and light kit pull 

chain extension (DD) to corresponding chains.

Assembly is now complete.

FINAL INSTALLATION

Light pull chain extensions

CC

DD

1

1

Fan pull chain extensions

H

B

FF

11

H

B

FF

12

L

M

CC

DD

1.  PULL CHAIN:

2.  REVERSE SWITCH:

When the season changes, you may want to change 

the direction your fan spins. To switch between 

clockwise and counterclockwise rotations, flip the fan 

reversal switch.

WARNING:

 Wait for fan to stop before reversing the  

switch.

A.  In cooler weather, clockwise rotation creates an 

upward airflow, which moves hot air from the 

ceiling into the room. Push the switch RIGHT.

B.  In warmer weather, counterclockwise rotation 

creates a downward airflow, which cools the air.  

Push the switch LEFT.

•  The fan pull chain is for motor speed control:  

High, Medium, Low and Off. Pull chain once for 

each position.

• 

The light pull chain controls the light fixture either 

ON or OFF with each pull of the chain.

OPERATING INSTRUCTIONS

Fan pull chain

Light pull

  chain

Lowes.com/harborbreeze

Lowes.com/harborbreeze

Summary of Contents for 00887

Page 1: ...a registered trademark of LF LLC All Rights Reserved Questions problems missing parts Before returning to your retailer call our customer service department at 1 866 473 4537 8 a m 7 p m EST Monday F...

Page 2: ...RIC SHOCK HAZARD To reduce the risk of electric shock do not use this fan with any solid state speed control device ELECTRIC SHOCK HAZARD To reduce the risk of electric shock make sure the electricity...

Page 3: ...strippers Helpful Tools not included Electrical circuit tester PACKAGE CONTENTS A Mounting Bracket preassembled to canopy B Canopy Canopy Cover preassembled to canopy B Yoke Cover Downrod Assembly Mo...

Page 4: ...nd yoke cover D Thread wires from the motor assembly F up through downrod assembly E Outlet box A 4 3 Remove the mounting bracket A from the canopy B by loosening the four preassembled screws on the t...

Page 5: ...e the rubber gasket FF over the remaining screws on motor assembly F Pull wires from motor assembly F through hole in canopy B and attach canopy B using the three screws previously removed Tighten the...

Page 6: ...tach blade H to a blade bracket G using three blade screws BB Repeat for remaining blade assemblies 11 2 Re install the two screws that were previously removed step 3 page 6 to fully secure the canopy...

Page 7: ...n glass K Make sure pull chain hangs clear and is not tangled in light kit J Thread light kit pull chain through center hole on glass K Place previously removed rubber washer and hex nut onto the pipe...

Page 8: ...switch between clockwise and counterclockwise rotations flip the fan reversal switch WARNING Wait for fan to stop before reversing the switch A In cooler weather clockwise rotation creates an upward...

Page 9: ...e or at our option replace the ceiling fan with a comparable or superior model To obtain warranty service present a copy of your sales receipt as proof of purchase All cost of removal and reinstallati...

Reviews: