Training Workbook: HAPPY HCS2-1201 Voyager Operation and Maintenance
Education Department
Chapter 1: Introduction and Basics
14
Embroidery Thread
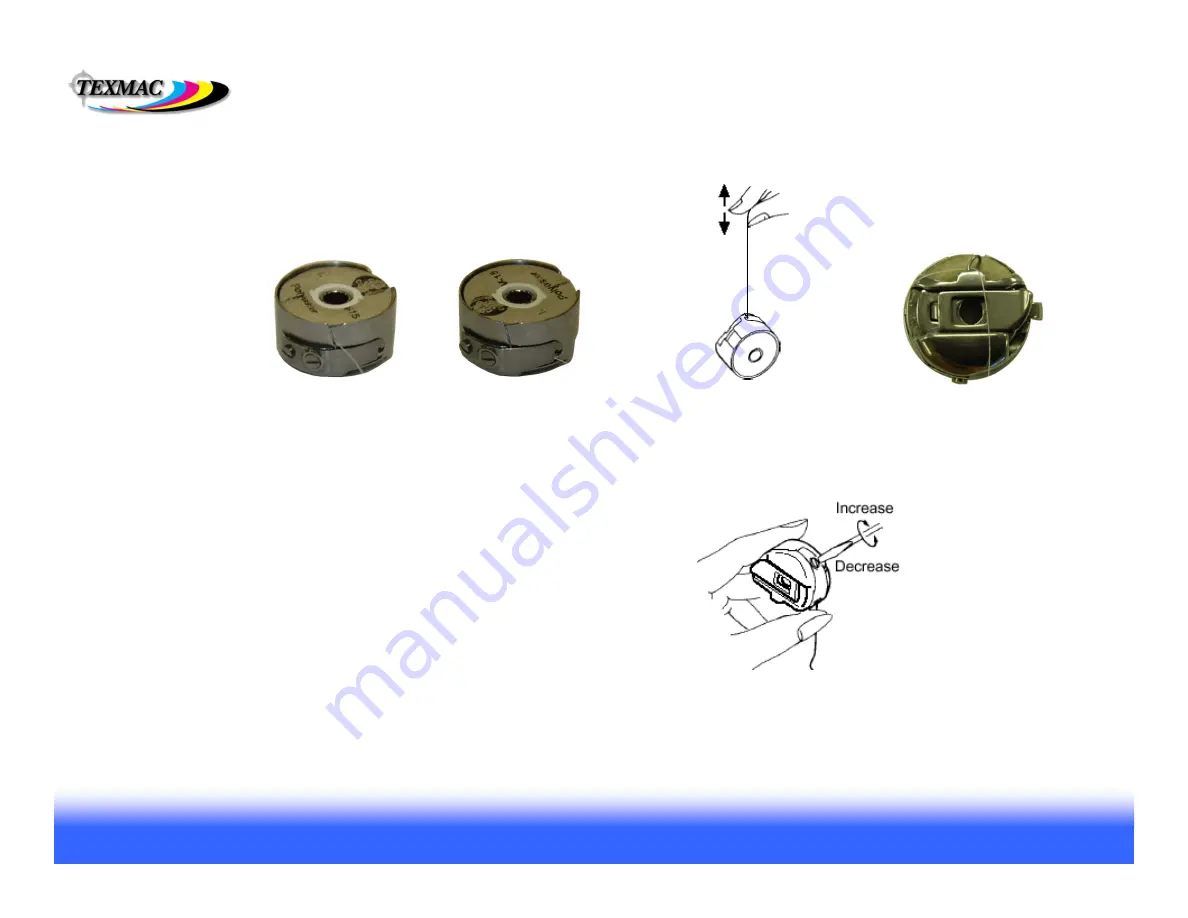
Bobbin Loading and Tension Check/Adjustment
RE-LOADING THE BOBBIN CORRECTLY
The bobbin will need to be replaced frequently, allowing only 30,000 to 60,000 stitches per
spool. This has to be done correctly every time.
1. Ensure bobbin turns
clockwise. Pull thread
through this slit.
2. Feed thread through
eye at the end of the
tension flap.
4. Pass thread through the
wire loop
at the top front of
the bobbin case. Do this
after you’re satisfied with
tension, and before
inserting into the machine.
1.
Hold the bobbin case as shown in step 3,
after feeding the thread through
the eye at the end of the tension flap.
2.
“Cast” the bobbin case downward gently
, very much like throwing a yo-yo.
3.
Good tension:
Upon stopping your hand, the slight downward momentum of
the bobbin case should cause it to unspool and continue downwards slightly
and stop. (If downward motion of your hand causes the bobbin to jump out of
the case, try again but more gently).
4.
Wrong tension:
If the bobbin doesn’t unspool at all, tension is too tight. If the
bobbin unspools on its own when held like in step 3, tension is too loose.
Make adjustments if needed as shown on the right.
With a working bobbin case and a properly loaded bobbin, this test reliably
tests to 25g on a bobbin tension gauge, precise within 1g. Perform this quick
check each time you re-load the bobbin until you are comfortable with tension.
5. TAKE CARE TO RE-INSERT THE RELOADED
BOBBIN CASE FULLY
after re-loading or the machine
will not function correctly.
CHECKING TENSION WITH THE “DROP” TEST.
Make small adjustments
if
you find it necessary. – no
more than a ¼ or ½ turn in
either direction before re-
checking tension.
3. Check tension with the
“drop” test (explained
lower left).


