installation & connection
12_
installation & connection
9.
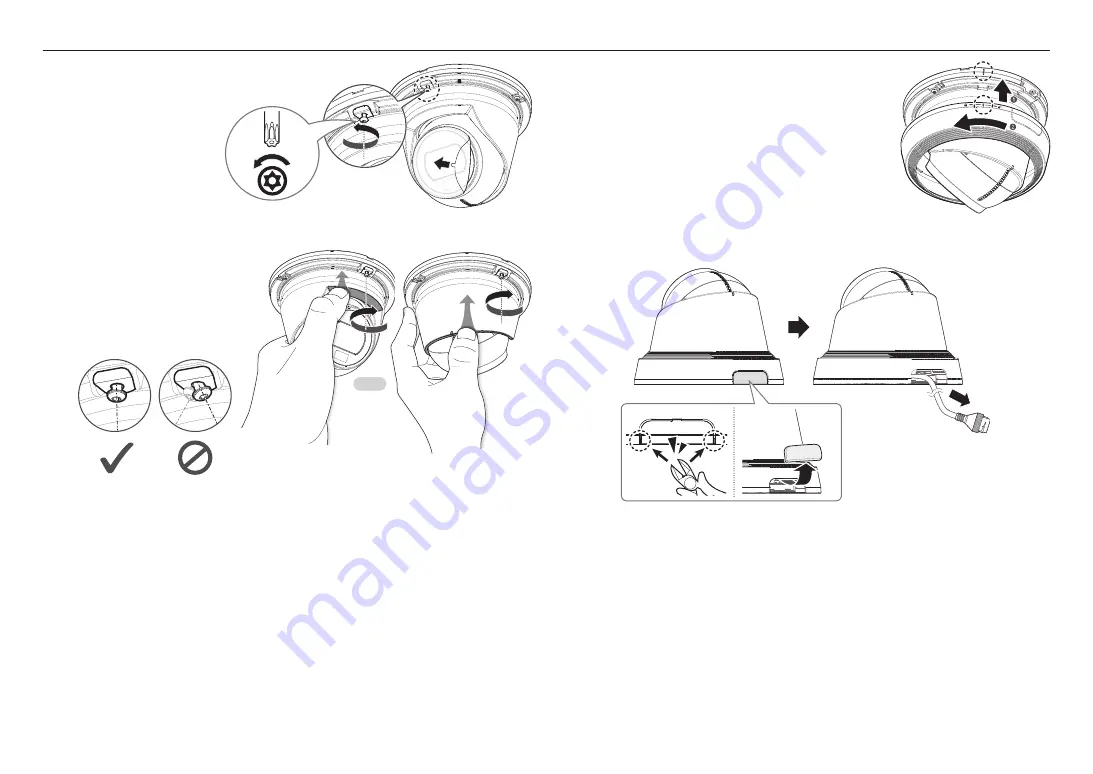
Assemble the middle cover.
`
Align the assembly guide on the middle cover and mount plate, and turn the cover
counterclockwise.
M
`
When connecting the cable through the side, remove the wiring hole cover first before doing so.
5.
Remove all protective films from
the camera windows.
6.
Loosen the screws of the bracket
that fixes the fixing cover.
7.
Adjust the lens in a desired
direction by referring to the
“
Adjusting the monitoring
direction for the camera
”
section. (page 13)
8.
Push the colored camera part
upward in the direction of the
arrow, and tighten the screws in the
direction perpendicular to the ceiling.
J
`
Don’t install the screws at an angle.
OR
PUSH
PUSH
PUSH
PUSH
TR10
Summary of Contents for QNE-C9013RL
Page 1: ...NETWORK CAMERA User Manual QNE C9013RL QNE C8013RL...
Page 24: ......


