Hanwha Techwin Wisenet ANO-L6082R User Manual Download Page 21

English _

21


WEB VIEWER

web viewer

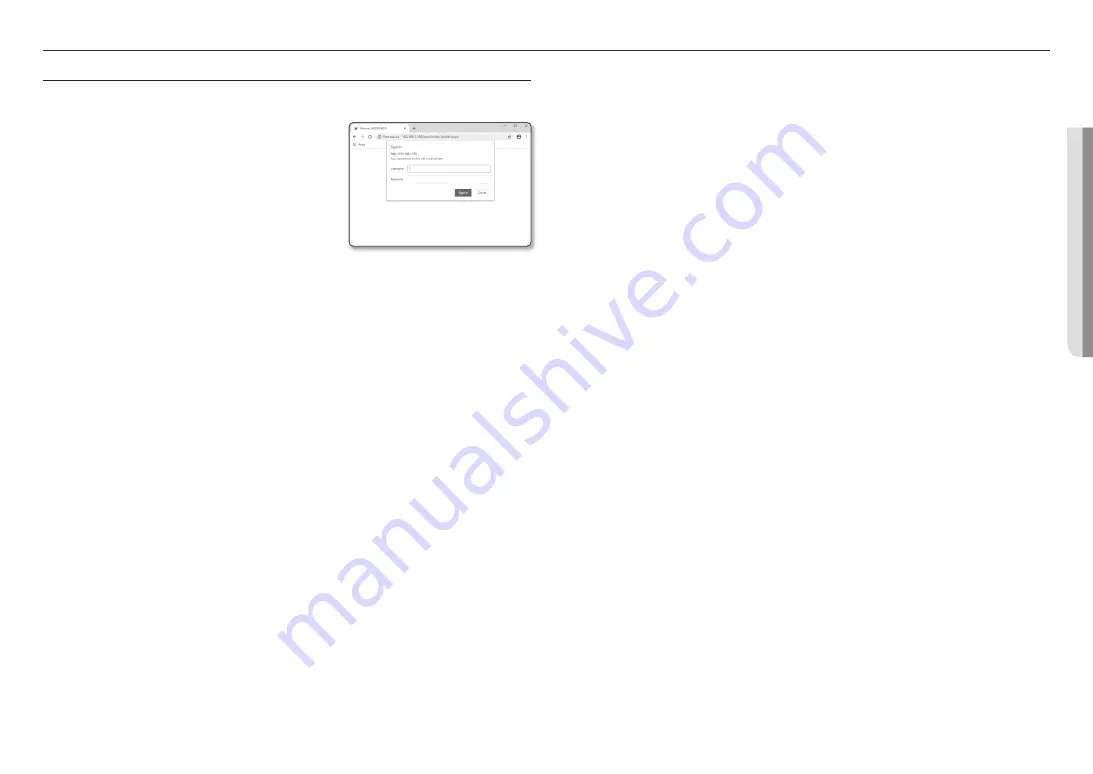
CONNECTING TO THE CAMERA

Normally, you would

1. 

Launch the Internet browser.

2. 

Type the IP address of the camera in the address bar. 

ex) 

 IP address (IPv4) : 192.168.1.100 


http://192.168.1.100 

- the Login dialog should appear. 

 IP address (IPv6) : 2001:230:abcd: ffff:0000:0000:ffff:1111 

 http://[2001:230:abcd:ffff:0000:0000:ffff:1111] - the Login 

dialog should appear.

If the HTTP port is other than 80

1. 

Launch the Internet browser.

2. 

Type the IP address and HTTP port number of the camera in the address bar. 

ex) IP address : 192.168.1.100:HTTP Port number(8080)  

 http://192.168.1.100:8080 - the Login dialog should appear.

Using URL

1. 

Launch the Internet browser.

2. 

Type the DDNS URL of the camera in the address bar. 

ex) URL address : http://ddns.hanwha-security.com/ID 

- the Login dialog should appear.


J


`

Network connection is disabled in the LAN only environment.

Connecting via UPnP

1. 

Run the client or operating system in support of the UPnP protocol.

2. 

Click the camera name for search. 

In the Windows operating system, click the camera name searched from the network menu.

 - The login window is displayed.

Connecting via Bonjour

1. 

Run the client or operating system in support of the Bonjour protocol.

2. 

Click the camera name for search. 

In the Mac operating system, click the camera name searched from the Bonjour tab of Safari.

 - The login window is displayed.

To check the DDNS address

If the camera is connected directly to the DHCP cable modem, DSL modem, the IP address of your network 

will be changed each time you try to connect to the ISP (Internet Service Provider) server. 

If this is the case, you will not be informed of the IP address changed by DDNS.
Once you register a dynamic IP-based device with the DDNS server, you can easily check the changed IP 

when you try to access the device. 

To register your device to the <

DDNS

> server, visit http://ddns.hanwha-security.com and register your device 

first, and then set the Web Viewer’s <

Network

> - <

DDNS

> to <

Wisenet DDNS

>, as well as providing 

<

Product ID

> that had been used for DDNS registration.

Summary of Contents for Wisenet ANO-L6082R

Page 1: ...NETWORK CAMERA User Manual ANO L6082R ANO L7082R ANV L6082R ANV L7082R ...

Page 2: ...d correctness of the contents in this document but no formal guarantee shall be provided Use of this document and the subsequent results shall be entirely on the user s own responsibility Hanwha Techwin reserves the right to change the contents of this document without prior notice Designandspecificationsaresubjecttochangewithoutpriornotice TheinitialadministratorIDis admin andthepasswordshouldbes...

Page 3: ... 0 17A ANO L7082R ANV L7082R 17 This product is intended to be supplied by isolation power 18 If you use excessive force when installing the product the camera may be damaged and malfunction If you forcibly install the product using non compliant tools the product may be damaged 19 Do not install the product in a place where chemical substances or oil mist exists or may be generated As edible oils...

Page 4: ...8 1 Unit is intended for installation in a Network Environment 0 as defined in IEC TR 62102 As such associated Ethernet wiring shall be limited to inside the building Please read the following recommended safety precautions carefully y Do not place this apparatus on an uneven surface y Do not install on a surface where it is exposed to direct sunlight near heating equipment or heavy cold area y Do...

Page 5: ...ANV L6082R L7082R 13 Inserting Removing a Micro SD Card 15 Powering and networking NETWORK CONNECTION AND SETUP 16 16 Connecting the Camera Directly to Local Area Networking 16 Connecting the Camera Directly to a DHCP Based DSL Cable Modem 17 Using Device Manager 17 Automatically searching camera 17 Configuring IP address 18 Manually registering camera 18 Automatically configuring IP 19 Port Range...

Page 6: ... 14 Safari version 11 0 1 or later The video play performance of the web viewer depends on the performance of the user s CPU and GPU RECOMMENDED MICRO SD SDHC SDXC CARD SPECIFICATIONS Recommended capacity 16GB 512GB MLC or 3D TLC type required Recommended Manufacturers SanDisk Transcend Samsung Product Type High endurance Pro endurance The compatibility varies depending on the card manufacturers a...

Page 7: ...082R Please check if your camera and accessories are all included in the product package As for each sales country accessories are not the same Appearance Item Name Quantity Description Camera 1 Quick Guide 1 Template 1 Product installation guide Torx L wrench 1 Used for the assembly and disassembly of dome covers Moisture absorbent Card type 1 Attached when installed Mount plate 1 This is used to...

Page 8: ...run the Device Manager program to change the basic network settings such as IP address Subnet mask Gateway etc before you can connect to the network c PoE connector Supply power through the Ethernet cable and connect to the network c a b OPTIONAL ACCESSORIES FOR INSTALLATION For your easier installation you can purchase appropriate optional accessories available Model name Back Box Corner Mount Ot...

Page 9: ...ork settings will be adjusted so that DHCP can be enabled If there is no DHCP server in the network you must run the Device Manager program to change the basic network settings such as IP address Subnet mask Gateway etc before you can connect to the network e Micro SD card slot This is a slot in which you can insert a Micro SD card f PoE port Supply power through the Ethernet cable and connect to ...

Page 10: ...sert and fasten 3 tapping screws into 3 holes to secure the camera 3 Connect the appropriate cables with camera terminals 4 Adjust the orientation of the camera using a Phillips screwdriver J When you adjust the camera position using a bracket please loosen the bracket screw adjust the camera and tighten it If you attempt to adjust it forcibly while the screw is tight it may result in a scratch or...

Page 11: ...l rubber tape so that more than half of the butyl rubber tape is overlapped J If the cable jacket is not waterproofed properly then it can directly cause leakage Make sure to protect the cable with a dense layer of taping Waterproof butyl tape is made of butyl rubber that can be stretched to twice its normal length Camera Camera Camera System System System A A Hallway view The camera can be rotate...

Page 12: ...remove the cover Installation 1 Consider the direction to be monitored attach the template and drill holes by following the template 2 Using 3 tapping screws fix the camera at 3 holes drilled with a template Set the mark imprinted on the camera to face the direction of camera monitoring 3 Connect and arrange the necessary cables lest that they should be damaged or twisted while installing the came...

Page 13: ...ust the panning angle in consideration of the monitoring direction 2 Set the horizontal angle so that the image is not reversed 3 Adjust the tilt angle so that the camera faces toward the monitoring object INSERTING REMOVING A MICRO SD CARD J Before installing the camera the Micro SD card should be inserted while the power source and the body are separated Do not forcefully insert it in the revers...

Page 14: ...ro SD Memory Card Gently press down on the exposed end of the memory card as shown in the diagram to eject the memory card from the slot ANV L6082R L7082R ANO L6082R L7082R J Before removing the Micro SD card in Setup Event Storage set the device to Off and press the Apply button and turn the camera off If you turn off the camera or remove the Micro SD card that contains data from the product the ...

Page 15: ...t enabled router s PoE connector Use PoE Power over Ethernet equipment that supports the IEEE802 3af standard Network Cable Specification Item Contents Remark Connector RJ45 Ethernet 10 100BASE T 10 100 Mbps Cable Category 5e Max Distance 100 m DC Resistance 0 125 Ω m PoE Support IEEE 802 3af J If you use a cable other than Category 5e standards 100m of transmission distance is not guaranteed ...

Page 16: ... 168 1 100 To change the IP address use the Device Manager For further details on Device Manager use refer to Using Device Manager Page 17 CONNECTING THE CAMERA DIRECTLY TO A DHCP BASED DSL CABLE MODEM 1 Connect the user PC directly with the network camera 2 Run the Device Manager and change the IP address of the camera so that you can use the web browser on your desktop to connect to the camera 3...

Page 17: ...or HTTP Port Used to access the camera using the Internet browser defaulted to 80 RTSP Port A port that controls real time streaming The initial value is 554 If using a Broadband Router IP Address Enter an address falling in the IP range provided by the Broadband Router ex 192 168 1 2 254 192 168 0 2 254 192 168 XXX 2 254 Subnet Mask The Subnet Mask of the Broadband Router will be the Subnet Mask ...

Page 18: ...layed click OK MANUALLY REGISTERING CAMERA If the camera cannot be found using search function the camera can be registered remotely by manually inserting IP information if the camera is connected to external network 1 Click Add Devices Manually Add Device at the main page of device manager 2 Insert the range of IP address that you search 3 Select the Model Name of the camera that you register and...

Page 19: ...setting is an example of setting CISCO IP router The settings may differ depending on the connected Broadband Router model For more information refer to the user manual of the applicable router Setting up Port Range Forward for several network cameras You can set a rule of Port Forwarding on the Broadband Router device through its configuration web page A user can change each port using the camera...

Page 20: ...NTERNET On a remote computer that is not in the Broadband Router s network cluster is not allowed users can access cameras within a Broadband Router s network by using the camera s DDNS URL 1 Before you can access a camera in the Broadband Router network you should have set the port range forward for the Broadband Router 2 From the remote PC launch the Internet browser and type the DDNS URL addres...

Page 21: ...stem in support of the UPnP protocol 2 Click the camera name for search In the Windows operating system click the camera name searched from the network menu The login window is displayed Connecting via Bonjour 1 Run the client or operating system in support of the Bonjour protocol 2 Click the camera name for search In the Mac operating system click the camera name searched from the Bonjour tab of ...

Page 22: ...pad or memorizing it LOGIN Whenever you access the camera the login window appears Enter the User ID and password to access the camera 1 Enter admin in the User name input box The administrator s ID admin can be changed in the Web Viewer 2 Enter the password in the Password input field 3 Click Sign in If you have logged in successfully you will the Live Viewer screen J When you access the camera w...

Page 23: ...n accessing the plug in free webviewer on Safari via HTTPS y On the authentication popup window prompted when initially accessing https click View Authentication Certificate and select the Always trust when connecting to the designated webviewer IP check box y If the webviewer continues failing to display a video after you select Next on the message window below press the command key Q to exit the...

Page 24: ...ntains mercury cadmium or lead above the reference levels in EC Directive 2006 66 If batteries are not properly disposed of these substances can cause harm to human health or the environment To protect natural resources and to promote material reuse please separate batteries from other types of waste and recycle them through your local free battery return system Correct Disposal of This Product Wa...

Page 25: ......

Reviews: