background image

Built-in refrigerator 

User manual

HEKS 12254 A1

Manual/version:
93115_GB_20181017 
Article no.: 325 548
Reproduction, even of excerpts, 
is not permitted!

Summary of Contents for HEKS 12254 A1

Page 1: ...Einbau Kühlschrank Gebrauchsanleitung HEKS 12254 A1 Anleitung Version 93115_DE_20181017 Bestell Nr 325 548 Nachdruck auch auszugswei se nicht gestattet ...

Page 2: ...e DE 13 Transportieren und Auspacken DE 13 Der geeignete Standort DE 13 Das geeignete Möbel DE 14 Grundreinigung DE 15 Türanschlag wechseln DE 15 Gerät einbauen DE 16 Bevor Sie das Gerät benut zen lesen Sie bitte zuerst die Sicherheitshinweise und die Gebrauchsanleitung aufmerksam durch Nur so können Sie alle Funkti onen sicher und zuverlässig nutzen Beachten Sie unbedingt auch die nati onalen Vor...

Page 3: ...t Transport schäden aufweist 4 Sollte die Lieferung unvollständig sein oder das Gerät einen Transportschaden aufweisen nehmen Sie bitte Kontakt mit unserem Service auf siehe Seite DE 20 WARNUNG Gerät nicht in Betrieb nehmen wenn es einen sichtbaren Schaden aufweist Verpackungstipps Sollten es Ihre räumlichen Verhält nisse zulassen empfehlen wir Ihnen die Verpackung zumindest während der Garantieze...

Page 4: ...dienelemente Näheres siehe Seite DE 9 7 3 offene Türfächer 8 Schublade für Obst und Gemüse 9 1 Glasablage als Abdeckung für die Gemüseschublade 10 3 Glasablagen verstellbar 11 Kühlbereich 12 Reinigungsstäbchen 13 Beutel mit Einbaumaterialien Näheres ab Seite DE 13 Geräteteile ...

Page 5: ...ymbol verweist auf nützliche Zusatzinformationen Symbolerklärung Vorsicht Brandgefahr Sicherheitshinweise In diesem Kapitel finden Sie allgemeine Sicherheitshinweise die Sie zu Ihrem ei genen Schutz und zum Schutz Dritter stets beachten müssen Beachten Sie zusätzlich die Warnhinweise in den einzelnen Kapi teln zu Bedienung Reinigung etc Risiken im Umgang mit elektrischen Haushaltsgeräten Stromschla...

Page 6: ...len unerläss lich sind Brandgefahr Ein unsachgemäßer Umgang mit dem Ge rät kann zu einem Brand und zu Sachschä den führen Gerätnuraneineordnungsgemäßinstal lierte Schutzkontakt Steckdose anschlie ßen Der Anschluss an eine Steckdosen leiste oder eine Mehrfachsteckdose ist unzulässig Um ausreichende Luftzirkulation zu ge währleisten Belüftungsöffnungen im Gerätegehäuse oder im Einbaugehäuse nicht ve...

Page 7: ...t lagern da sie zündfähige Gas Luft Gemische zur Explosion bringen können Auf keinen Fall Abtausprays verwenden Sie können explosive Gase bilden Auch keine elektrischen Heizgeräte offene Flammen oder Eiskratzer verwenden Die Isolierung könnte schmelzen oder zer kratzt werden Hochprozentigen Alkohol nur fest ver schlossen und stehend lagern Gesundheitsgefahren Durch falsche Handhabung unzureichende...

Page 8: ...und die Ge frierfachtür schließt eventuell nicht mehr dicht ab Zum Beschleunigen des Abtauvorgangs keine anderen Mittel verwenden als die vom Hersteller empfohlenen Z B keine elektrischen Heizgeräte Messer oder Ge räte mit offener Flamme wie z B Kerzen verwenden Die Wärmedämmung und der Innenbehälter sind kratz und hitze empfindlich oder können schmelzen Beim Reinigen beachten Auf keinen Fall aggre...

Page 9: ...efahr Das Gerät arbeitet eventuell nicht ein wandfrei wenn es über längere Zeit zu ge ringer Umgebungstemperatur ausgesetzt wird Es kann dann zu einem Temperaur anstieg im Inneren kommen Halten Sie die vorgesehene Umgebungs temperatur ein siehe Klimaklasse auf Seite DE 22 Bedienung 2 3 4 5 6 Die Bedienblende bietet Ihnen verschiedene Möglichkeiten um die Innentemperatur zu steuern Mit der Taste Ad...

Page 10: ...d Gemüse in die Gemüseschublade 8 Qualität erhalten Damit Aroma und Frische der Nahrungs mittel im Kühlbereich 11 erhalten bleiben legen oder stellen Sie alle zu kühlenden Lebensmittel nur verpackt in den Kühlbe reich Verwenden Sie spezielle Kunststoff behälter für Lebensmittel oder handelsüb liche Folien Legen Sie die Lebensmittel so in den Kühlbereich dass die Luft frei zirkulieren kann Decken S...

Page 11: ...iedenen Stellen ein Das Papier muss sich an allen Stellen gleich schwer durchziehen lassen 2 Falls die Dichtung nicht überall gleichmä ßig anliegt Erwärmen Sie die Dichtung an den entsprechenden Stellen vorsichtig mit einem Haartrockner und ziehen Sie sie mit den Fingern etwas heraus 3 Reinigen Sie verschmutzte Dichtungen nur mit klarem Wasser Außenwände reinigen Lackierte Oberflächen Verwenden Si...

Page 12: ...rühren von spannungsführenden Teilen zu schweren Verletzungen oder zum Tod führen Vor dem Wechsel der Glühlampe den Netzstecker ziehen Ausschließlich Glühlampen mit einer Leistung von max 15 Watt 230 Volt Sockel E 14 und gleicher Form verwenden 1 Ziehen Sie den Netzstecker aus der Steckdose 2 Lösen Sie mit einem Kreuzschlitz Schrau bendreher die Schraube der Abdeckung und ziehen Sie die Abdeckung ...

Page 13: ...Umgebungs temperatur ein siehe Klimaklasse auf Seite 13 Unsachgemäßer Umgang mit dem Gerät kann zu Beschädigungen führen Das Gerät möglichst nicht in die Hori zontale kippen sondern nur in leichter Schräglage transportieren Gerät nur gegen die Wand lehnen um den Türanschlag zu wechseln Beim Auspacken keine spitzen Gegen stände verwenden Transportieren und Auspacken Transportieren Sie das Gerät mit...

Page 14: ... der Öffnung minde stens 200 cm2 Oben am Küchenmöbel muss ebenfalls eine Öffnung vorhanden sein damit die Luft aus treten kann Größe der Öffnung mindestens 200 cm2 Die Einbaunische muss folgende Bedin gungen erfüllen Höhe H 1220 bis 1230 mm Breite B 560 mm Tiefe T 550 mm Abstand zur Wand 38 mm Netzkabellänge ca 1520 mm Lüftungskamin am hinteren Teil des Einbauschranks mindestens 200 cm2 90 Die Ein...

Page 15: ...enfalls heraus und bewahren Sie sie gut auf C 5 Lösen Sie die drei Schrauben des oberen Scharniers C nehmen Sie sie heraus und bewahren Sie sie gut auf 6 Nehmen Sie die Tür heraus und stellen Sie sie beiseite 7 Schrauben Sie die Schraube B auf der bisherigen Anschlagseite hinein 8 Kippen Sie das Gerät etwas und lehnen Sie es an die Wand D 9 Schrauben Sie die beiden Füße ab 10 Entnehmen Sie den Sti...

Page 16: ...Einbau des Kühl schranks beginnen 1 Schalten Sie vor Einbau und Anschluss des Geräts den betreffenden Stromkreis aus bzw drehen Sie die betroffenen Si cherungen heraus 2 Entnehmen Sie bitte die Türfächer 7 die Gemüseschublade 8 und die Glasabla gen 9 und 10 17 19 3 Schrauben Sie die Winkelstücke 17 mit den Schrauben 19 an die Gerätetür Lö cher mit Nagel Ø 2 5 mm vorstechen 40 mm 4 Setzen Sie das G...

Page 17: ...inbauschranks und prüfen Sie dabei die Gleitführung zwischen Winkelstück 17 und Türmit nehmer 15 auf einwandfreie Funktion 6 mm 6 mm 10 Zwischen Einbauschrank und Einbau schranktür muss ein mind 6 mm breiter Spalt verbleiben damit die Kühlschrank tür einwandfrei schließen kann Um die Spaltbreite einzustellen lösen Sie die Schrauben 19 etwas und stellen manuell den gewünschten Abstand ein Ziehen Si...

Page 18: ...en hinein Sie hören einen kurzen Signalton Das Gerät ist eingeschaltet die Innenbe leuchtung 1 leuchtet der Motor beginnt zu arbeiten das Kältemittel strömt durch die Rohre und Sie hören ein leichtes Rau schen 2 Wie Sie das Gerät bedienen und optimal nutzen erfahren Sie im Kapitel Bedie nung auf Seite DE 9 Fehlersuchtabelle Bei allen elektrischen Geräten können Störungen auftreten Dabei muss es si...

Page 19: ... Seite DE 9 Tür nicht fest verschlossen oder Türdichtung liegt nicht voll auf Siehe Türdichtungen kontrollieren und reini gen auf Seite DE 11 Gerät steht in der Nähe einer Wärmequelle Isolierplatte dazwischen stellen oder Stand ort wechseln Speisen warm eingelegt Nur abgekühlte Speisen einlegen Umgebungstemperatur zu niedrig oder zu hoch Umgebungstemperatur an Klimaklasse an passen siehe Produktda...

Page 20: ...ehör bestellen möchten Reparaturen und Ersatzteile Kunden in Deutschland Wenden Sie sich bitte an unseren Technik Service Telefon 0 18 06 18 05 00 Festnetz 20 Cent Anruf Mobilfunk max 60 Cent Anruf Kunden in Österreich Wenden Sie sich bitte an das Kundencen ter oder die Produktberatung Ihres Ver sandhauses Bitte beachten Sie Sie sind für den einwandfreien Zustand des Gerätes und die fachge rechte ...

Page 21: ...i Austritt von Kälte mittel besteht Brandgefahr Achten Sie darauf dass an einem Kühl gerät bis zur fachgerechten Entsorgung keine Kühlrippen oder Rohre beschädigt werden Unser Beitrag zum Schutz der Ozonschicht In diesem Gerät wurden 100 FCKW und FKW freie Kälte und Aufschäummittel verwendet Da durch wird die Ozonschicht geschützt und der Treibhauseffekt reduziert Unsere Verpackungen werden aus um...

Page 22: ...ltskühlgerätemodells 1 Kühlschrank mit einem oder mehreren Lagerfächern für frische Lebensmittel Energieeffizienzklasse auf einer Skala A höchste Effizienz bis G geringste Effizienz A Energieverbrauch 128 kWh Jahr auf der Grundlage von Ergebnissen der Normprüfung über 24 Stunden Der tatsächliche Verbrauch hängt von der Nutzung und vom Standort des Geräts ab Nutzinhalt Kühlbereich Gefrierbereich St...

Page 23: ...Built in refrigerator User manual HEKS 12254 A1 Manual version 93115_GB_20181017 Article no 325 548 Reproduction even of excerpts is not permitted ...

Page 24: ...of symbols GB 5 Safety notices GB 5 Operation GB 9 Requirements GB 9 Switching on and off GB 9 Thermostat control GB 9 Refrigeration GB 10 Store food correctly GB 10 Maintaining quality GB 10 Saving energy GB 10 Moving glass shelves and door compartments GB 10 Care and maintenance GB 11 Checking and cleaning door seals GB 11 Clean exterior GB 11 Defrosting the fridge compartment GB 11 Cleaning the...

Page 25: ...e was dam aged during transit 4 If the delivery is incomplete or the appli ance has been damaged during transport please contact our Service Centre see page GB 20 WARNING Do not operate the appliance if it has visi ble damage Packaging tips If you have sufficient space we rec ommend keeping the packaging at least during the warranty period If the appliance needs to be sent out for repairs only the...

Page 26: ...s For more information see page GB 9 7 3 open door compartments 8 Drawer for fruit and vegetables 9 1 glass shelf as a cover for the vegetable drawer 10 3 glass shelves adjustable 11 Fridge compartment 12 Cleaning rod 13 Pouch with fittings more information from page GB 13 Appliance parts ...

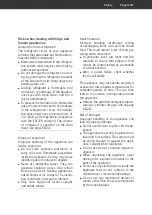
Page 27: ... third par ties Please also observe the warning notic es in the individual chapters on operation cleaning etc Risks in handling household electrical appliances Risk of electric shock The appliance operates with 220 240V 50Hz mains voltage Touching live parts may result in severe injury or death Only use the appliance indoors Do not use in wet rooms or in the rain Do not operate or continue to oper...

Page 28: ...to a multi socket extension cable or a multi socket plug To ensure adequate air circulation the ventilation slots and the entire space above the unit must remain clear of ob structions Do not place the appliance directly against the wall Adhere to minimum distances see The suitable location on page GB 13 Risk of injury The appliance is heavy and bulky Seek the help of another person during trans p...

Page 29: ...ing electric heating appliances naked flames or ice scrapers The insula tion could melt or become scratched Only store high proof alcohol upright and tightly sealed Health hazards Incorrect handling insufficient cooling or overlapping items can spoil the stored food This could lead to a risk of food poi soning when consumed In particular pack raw meat and fish carefully to ensure that adjacent food c...

Page 30: ... any means other than those recommended by the manufacturer to speed up defrosting For example do not use any electric heating equip ment knives or devices with an open flame such as a candle The thermal in sulation and the interior are scratch and heat sensitive and can melt When cleaning please note Never use harsh granular soda acid solvent based or abrasive cleaners These attack the plastic sur...

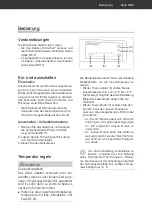
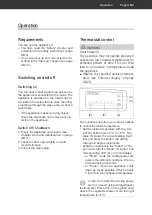
Page 31: ...th hazard The appliance may not operate properly if exposed to low ambient temperatures for extended periods of time This can then lead to an increase in temperature inside the appliance Observe the specified ambient temper ature see Climate category on page GB 22 2 3 4 5 6 The control panel offers you various options to control the inside temperature Set the inside temperature with the Ad just 6 b...

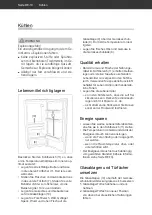
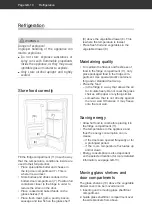
Page 32: ... fresh fruit and vegetables in the vegetable drawer 8 Maintaining quality To maintain the flavour and freshness of food in the fridge compartment 11 only place packaged food in the fridge com partment Use special plastic containers for good or standard food wrap Place the food in the fridge in a way that allows the air to circulate freely Do not cover the glass shelves with paper or anything simil...

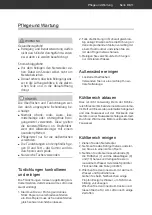
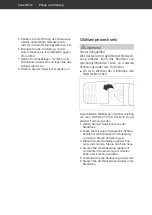
Page 33: ...r and pull it out slightly with your fingers 3 Only clean dirty seals with clean water Clean exterior Painted surfaces Use only light pH neutral soapy water Defrosting the fridge compartment This is not necessary Since the fridge com partment of your appliance has an auto de frost feature Frost and ice are automatically defrosted and the thaw water is collected in a thaw water container on the rev...

Page 34: ...bulb Only use light bulbs of the same shape with an output of max 15 watt 230 volt and Holder E 14 1 Disconnect the mains plug from the socket 2 Loosen the cover screw with a cross headed screwdriver and remove the cover 3 Unscrew the light bulb from the holder and replace with a new one 4 Replace the cover and apply slight pres sure at the rear to snap it into the groove 5 Screw the cover back on...

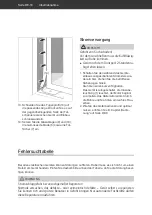
Page 35: ... the specified ambient temper ature see Climate category on page GB 22 Improper handling of the appliance may result in damage If possible do not tip the appliance hori zontally but transport it at a slight an gle Only rest the appliance against the wall to change the door stop Do not use sharp objects to unpack it Moving and unpacking Move the appliance using a trolley or with the help of a second...

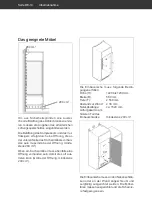
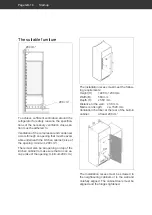
Page 36: ...ng minimum 200 cm2 There must also be an opening on top of the kitchen cabinet to make sure that air can es cape size of the opening minimum 200 cm2 The installation recess must meet the follow ing requirements Height H 1220 to 1230 mm Width B 560 mm Depth T 550 mm Distance to the wall 38 mm Mains cord length ca 1520 mm Ventilation chamber at the rear of the built in cabinet at least 200 cm2 90 Th...

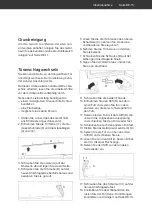
Page 37: ...A onto the top and put it to one side 4 Also unscrew the screw B on the new stop side and keep it in a safe place C 5 Loosen the three screws of the top hinge C remove them and keep them in a safe place 6 Remove the door and set it aside 7 Screw in the screw B on the previous stop side 8 Tilt the device slightly and rest it against the wall D 9 Unscrew both feet 10 Remove the pin D from one foot a...

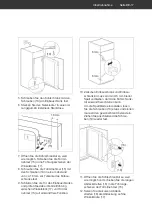
Page 38: ...you start installing the refrigerator 1 Before installing and connecting the appli ance switch off the relevant power circuit and or turn off the relevant fuses 2 Please remove the door compartments 7 the vegetable drawer 8 and the glass shelves 9 and 10 17 19 3 Screw the elbows 17 onto the appliance door with the screws 19 Pre mark the screw holes with a Ø 2 5 mm nail 40 mm 4 Insert the appliance...

Page 39: ...the door of the built in cabinet and check that the sliding guide between the elbow 17 and the door coupler 15 function smoothly 6 mm 6 mm 10 A gap of at least 6 mm must be main tained between the built in refrigerator and the built in cabinet door so that the refrigerator door can close without any problems To set the gap width loosen the screws 19 slightly and manually set the desired dis tance ...

Page 40: ...levant fuses You will hear an brief signal tone The appliance is switched on the inte rior light illuminates 1 the motor starts to work the refrigerant flows through the pipes and you hear a slight noise 2 Please see Chapter Operation on page GB 9 for operating instructions and tips for optimal use Malfunctions can occur in all electrical appliances This does not necessarily mean that there is a d...

Page 41: ... Door not tightly closed or door seal is not completely tight See Checking and cleaning door seals on page GB 11 The appliance is near a heat source Place insulation plate in between or change location Food has been put in warm Only put in cooled foods Ambient temperature too low or too high Adjust the ambient temperature to the cli mate category see Product data sheet and technical specifications...

Page 42: ...able you would like to order further accessories Repairs and spare parts Customers in Germany Please contact our technical service Telephone 0 18 06 18 05 00 landline 20 cents call mobile max 60 cents call Customers in Austria Please contact your mail order company s customer service centre or product advice centre Please note You are responsible for the condition of the appliance and its proper u...

Page 43: ...ation have to be properly disposed of Refrigerant leakage may cause a fire haz ard Until the point of proper disposal ensure that none of the cooling fins or tubes on a cooling appliance are damaged Our contribution to the protection of the ozone layer 100 CFC and HFC free refriger ants and foaming agents were used in this appliance This protects the ozone layer and reduces the greenhouse ef fect Ou...

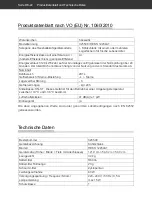
Page 44: ... 1 Refrigerator with one or more fresh food storage compartments Energy efficiency class on a scale from A most efficient to D least efficient A Energy consumption 128 kWh per year based on standard test results for 24 hours Actual energy consumption will depend on how the appliance is used and where it is located Storage volume Refrigerator Freezer Star rating 201 L L Stars Power cut safe h Freez...

Reviews: