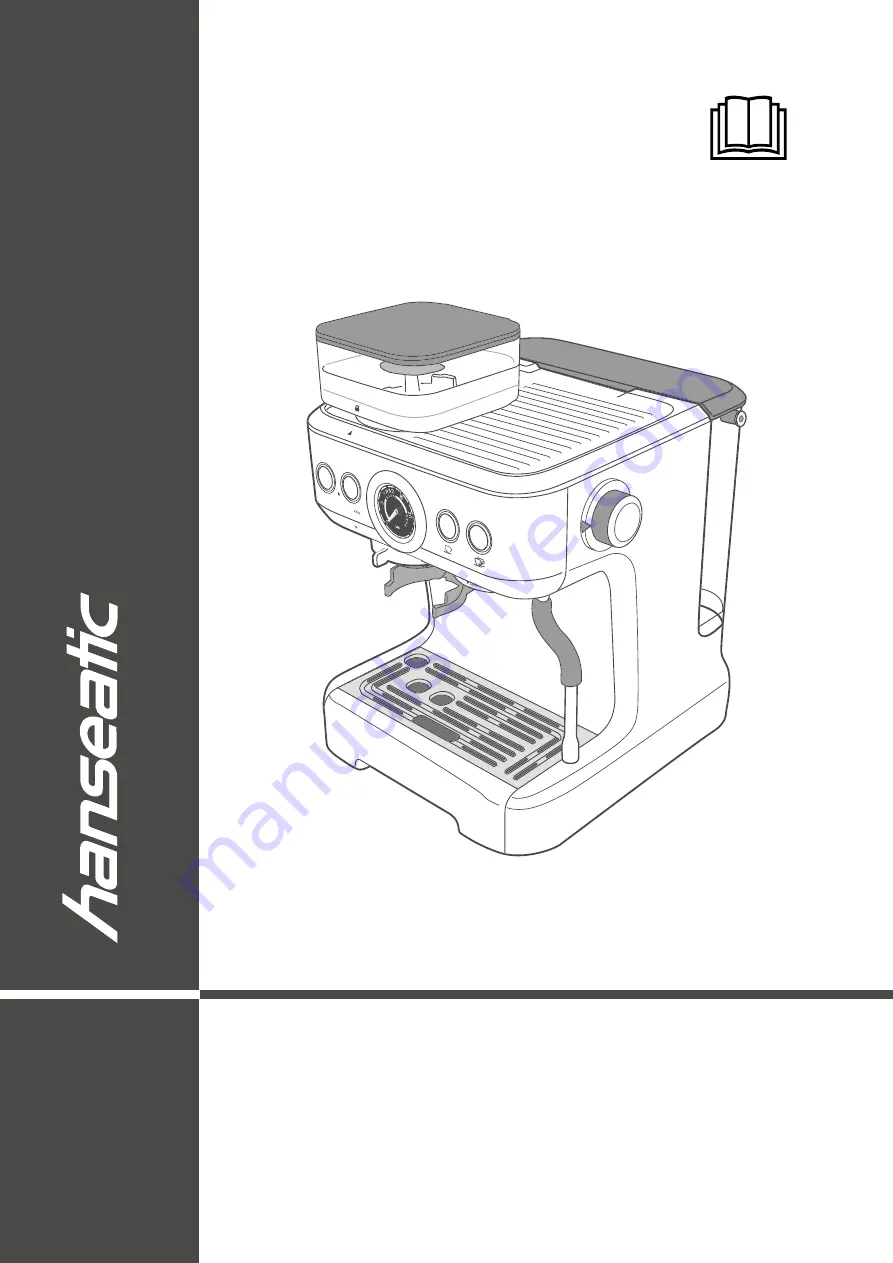
Espresso-Maschine
Gebrauchsanleitung
CM5700AB-GS
ON/OFF
POWER
HOTW
Anleitung_Version:2001-00422 DE 20200722Bestell-Nr.: 71578759Nachdruck, auch aus zugs wei se, nicht ge stat tet!
Page 1: ...Espresso Maschine Gebrauchsanleitung CM5700AB GS ON OFF POWER HOT W Anleitung_Version 2001 00422 DE 20200722 Bestell Nr 71578759 Nachdruck auch auszugsweise nicht gestattet CM5700AB GS ...
Page 2: ...llen DE 16 Reinigung und Pflege DE 17 Reinigung DE 17 Gerät entkalken DE 19 Fehlersuchtabelle DE 21 Service DE 23 Beratung Bestellung und Reklamation DE 23 Ersatzteile DE 23 Umweltschutz DE 24 Elektro Altgeräte umweltgerecht entsorgen DE 24 Verpackungstipps DE 24 Technische Daten DE 24 Bevor Sie das Gerät benutzen lesen Sie bitte zuerst die Si cherheitshinweise und die Ge brauchsanleitung aufmerks...
Page 3: ...en Sie ob die Lieferung vollständig ist 3 Kontrollieren Sie ob das Gerät Transport schäden aufweist 4 Sollte die Lieferung unvollständig sein oder das Gerät einen Transportschaden aufweisen nehmen Sie bitte Kontakt mit unserem Service auf siehe Service auf Seite DE 23 WARNUNG Stromschlaggefahr Nie ein beschädigtes Gerät in Betrieb nehmen Wenn das Netzkabel des Geräts beschä digt ist muss es durch ...
Page 4: ...ICHT Dieser Signalbegriff bezeichnet eine Ge fährdung mit einem niedrigen Risikograd die wenn sie nicht vermieden wird eine geringfügige oder mäßige Verletzung zur Folge haben kann HINWEIS Dieser Signalbegriff warnt vor möglichen Sachschäden Dieses Symbol verweist auf nützliche Zusatzinformationen Sicherheitshinweise In diesem Kapitel finden Sie allgemeine Sicherheitshinweise die Sie zu Ihrem ei ge...
Page 5: ...igenständige Reparaturen an dem Gerät können Sach und Personen schäden entstehen und die Haftungs und Garantieansprüche verfallen Niemals versuchen das defekte oder vermeintlich defekte Gerät selbst zu re parieren Niemals das Gehäuse öffnen Bei Reparaturen dürfen ausschließlich Teile verwendet werden die den ur sprünglichen Gerätedaten entsprechen In diesem Gerät befinden sich elek trische und mech...
Page 6: ...ebträger erst abnehmen wenn sich das Gerät wieder im Standby Mo dus befindet alle LED Ringe leuchten permanent weiß Niemals versuchen den Siebträger wäh rend des Brühens abzunehmen Den Wassertank nicht während des Brü hens oder des Milchaufschäumens ab nehmen Gerät vor dem Auffüllen des Wasser tanks ausschalten alle LED Ringe sind dann erloschen Keine entzündbaren Flüssigkeiten mit Dampf erhitzen G...
Page 7: ...nd unempfindlichen Oberfläche steht Gerät nicht mit leerem Wassertank in Betrieb nehmen Niemals die maximalen Füllmengen überschreiten Gerät nur betreiben wenn die Abtropf schale mit dem Abtropfgitter eingesetzt ist Einzelne Geräteteile vorsichtig entneh men transportieren und einsetzen nie mals fallen lassen Die Oberflächenbeschichtungen von Möbeln enthalten manchmal chemische Zusätze welche die Gum...
Page 8: ...e Seite DE 8 Geräteteile und Bedienelemente 1 Bohnenbehälter 2 Wassertank 3 Dampfregler 4 Dampflanze 5 Abtropfschale 6 Schwimmer 7 Abtropfgitter 8 Tassenablage 9 Aufnahme für Bohnenbehälter ON OFF POW ER HOT WATER 1 2 3 4 5 7 9 8 6 ...
Page 9: ...r Taste 13 Manometer 14 Eine Tasse Taste 15 Zwei Tassen Taste 16 Siebträgeraufnahme für Brühvorgang 17 Siebträgeraufnahme für Mahlvorgang 18 Mahlwerk Auslöser 19 Mahlgrad Einstellring 20 Mahlwerk Entriegelungsknopf ON OFF HOT WATER GRINDER OFF LOCK INSERT 10 11 14 12 15 16 17 18 19 20 13 ...
Page 10: ...t direkt neben einem Herd oder einer anderen Wärme quelle auf Achten Sie beim Verlegen der Netzan schlussleitung darauf dass sie nicht durch scharfe Kanten oder durch den Kontakt mit heißen Oberflächen z B elektrische Kochplatten beschädigt wird Das Gerät kann beschädigt werden wenn das darin befindliche Wasser gefriert Stellen Sie das Gerät nicht in einen Raum in dem die Temperatur unter den Gefr...
Page 11: ...usschalten Drücken Sie zum Ausschalten des Geräts erneut die Ein Austaste 10 Alle LEDs sind erloschen Automatisches Ausschalten Wenn Sie 20 Minuten lang keine Taste an Ihrer Espresso Maschine gedrückt haben schaltet sich das Gerät selbstständig aus Das Aus schalten wird durch den rot blinkenden LED Ring um die Ein Austaste sowie durch einen Signalton signalisiert Siebträger einsetzen ON OFF HOT WA...
Page 12: ...n 5 Wenn der Spülvorgang beendet ist drü cken Sie die Ein Aus Taste 10 um das Gerät auszuschalten 6 Leeren Sie das Auffanggefäß aus 7 Drehen Sie den Siebträger e zurück auf die Position Unlock und nehmen Sie ihn ab 8 Reinigen Sie den Bohnenbehälter 1 die Siebeinsätze d den Siebträger e und den Tamper c mit Spülwasser 9 Trocknen Sie danach alle Teile sorgfältig ab Bohnenbehälter aufsetzen ON OFF PO...
Page 13: ...te und gleichmäßige Andrü cken des Espressopulvers kann der Espresso sein volles Aroma entfalten Ein guter Espresso muss heiß sein Wärmen Sie die Espressotassen deshalb vor Dazu eignet sich die aufgeheizte Tassenablage 8 Schneller geht es wenn Sie die Tassen mit heißem Wasser füllen und erst kurz vor dem Brühen ausleeren Espresso zubereiten 1 Falls noch nicht geschehen Füllen Sie den Wassertank 2 ...
Page 14: ... des Siebträgers auf das Abtropfgit ter 7 13 Um eine Tasse Espresso zuzubereiten drücken Sie die Eine Tasse Taste 14 Um zwei Tassen Espresso zuzubereiten drücken Sie die Zwei Tassen Taste 15 Der Espresso fließt nun langsam in die Tasse n Der Brühvorgang sollte bei ei ner Tasse Espresso 20 30 Sek dauern bei zwei Tassen 25 35 Sek Beobachten Sie das Manometer 13 Wird ein Wert zwischen 9 und 12 bar an...
Page 15: ...zeugt wurde muss eine Pause von mindestens 1 Minute erfolgen So gelingt der Milchschaum ON OFF HOT WATER GRINDER OFF LOCK INSERT 4 3 1 Füllen Sie das Milchkännchen bis zur Hälf te mit kalter Milch 2 Drehen Sie den Dampfregler 3 auf MAX um das Kondenswasser ablaufen zu lassen Wenn nur noch Dampf aus der Dampflanze kommt drehen Sie den Dampfregler zurück auf OFF 3 Halten Sie das Milchkännchen so unt...
Page 16: ...ine Tasse können Sie 20 60 ml für zwei Tassen 60 100 ml einstel len ON OFF HOT WATER GRINDER OFF 12 14 15 Voraussetzung Die Espresso Maschine muss sich im Standby Modus befinden alle LED Ringe leuchten permanent weiß 1 Halten Sie die Eine Tasse Taste 14 und die Zwei Tassen Taste 15 gleichzeitig ca 8 Sekunden lang gedrückt Die LED Ringe um die beiden Tasten blin ken nun der LED Ring um die Heißwas ...
Page 17: ...telhaltigen ätzenden und scheuernden Reinigungsmittel z B Backofen oder Grill Spray oder Reini gungsutensilien wie z B Topfschwämme oder Ähnliches verwenden Diese können die Oberflächen beschädigen Geräteteile nicht in die Spülmaschine stellen Sie sind nicht für Spülmaschinen geeignet Gehäuse reinigen Verwenden Sie zur Reinigung des Gehäuses normales Spülwasser Wischen Sie die Ober flächen mit eine...
Page 18: ...chten Küchentuch abgewischt werden Um die Dampflanze auch von innen zu säu bern lassen Sie nach dem Milchaufschäu men noch etwas Dampf ausströmen Sollte die Dampflanze trotzdem einmal ver stopft sein entfernen Sie die Verstopfung mithilfe der Reinigungsnadel h Geräteteile reinigen HINWEIS Beschädigungsgefahr Die Geräteteile sind nicht für die Spül maschine geeignet sondern müssen von Hand abgewasc...
Page 19: ...sundheitsgefahr Entkalkungsmittel sind reizend und können Ihre Gesundheit beeinträchtigen Außer dem können sie andere Gegenstände und Textilien beschädigen Entkalkungsmittel von Kindern fernhal ten Direkten Kontakt mit dem Entkalkungs mittel vermeiden Bei direktem Kontakt Augen und Haut unter reichlich fließend Wasser spülen Entkalkungsmittel nicht einnehmen Nach Einnahme umgehend ärztlichen Rat ei...
Page 20: ...g gedrückt 6 Drehen Sie den Dampfregler 3 auf MAX Die Entkalkungslösung läuft nun stoß weise aus dem Siebträger und aus der Dampflanze in das Auffanggefäß Die LED Ringe um die Eine Tasse Ta ste 14 und die Zwei Tassen Taste 15 pulsieren 7 Wenn die Entkalkungslösung komplett durchgelaufen ist blinken die LED Ringe um die Eine Tasse Taste 14 und die Zwei Tassen Taste 15 abwechselnd rot 8 Gießen Sie d...
Page 21: ...hr fein 5 sehr grob Der Druck sollte beim Brühen zwischen 9 und 12 bar betragen Der Espresso tröpfelt langsam in die Tasse anstatt zu fließen schmeckt bitter und die Crema sieht dünn und am Rand dunkel aus Zu viel Espressopulver Sie benötigen für eine Tasse 13 15 g für zwei Tassen 20 22 g Espressopulver Der Mahlgrad ist zu fein eingestellt Stellen Sie einen gröberen Mahlgrad ein 1 sehr fein 5 sehr...
Page 22: ...dass das Wasser nicht durchlaufen kann Mahlen Sie neues Espressopulver mit einem gröberen Mahlgrad siehe Espres so zubereiten auf Seite DE 13 Alle LED Ringe pul sieren nach dem Ein schalten zweimal rot Die Espresso Maschine muss entkalkt werden Entkalken Sie die Espresso Maschine siehe Gerät entkalken auf Seite DE 19 Alle LED Ringe pul sieren während des Betriebs rot Es befindet sich zu we nig Was...
Page 23: ...hör bestellen möchten Ersatzteile Kunden in Deutschland Wenden Sie sich bitte an die Firma Hermes Fulfilment GmbH Tel 057 32 99 66 00 Montag Donnerstag 8 15 Uhr Freitag 8 14 Uhr Kunden in Österreich Wenden Sie sich bitte an das Kundencenter oder die Produktberatung Ihres Versandhauses Bitte beachten Sie Sie sind für den einwandfreien Zustand des Geräts und die fachgerechte Benutzung im Haushalt ve...
Page 24: ...reundlich Hersteller Gerätebezeichnung Espresso Maschine Modell CM5700AB GS Artikelnummer 71578759 Versorgungsspannung 220 240 V 50 60 Hz Leistungsaufnahme 2560 3050 W Schutzklasse 1 Fassungsvermögen Wassertank 2 5 Liter Fassungsvermögen Kaffeebohnenbehälter 200 g Pumpendruck 20 bar Länge Netzkabel 95 cm Gerätemaße Höhe Breite Tiefe 405 297 318 mm Leergewicht 11 5 kg Technische Daten Elektro Altge...
Page 25: ...Espresso Machine User manual CM5700AB GS Manual version 2001 00422 EN 20200722 Article no 71578759 Reproduction even of excerpts is not permitted CM5700AB GS ON OFF POWER HOT W ...
Page 26: ...xplanation of terms EN 4 Safety notices EN 4 Explanation of symbols EN 7 Appliance parts and control elements EN 8 Operation EN 10 Suitable location EN 10 Preparation EN 10 Switching the appliance on and off EN 11 Inserting the portafilter EN 11 Cleaning before use EN 12 Attaching the bean hopper EN 12 Making speciality coffees EN 13 Information and tips EN 13 Making espresso EN 13 Frothing milk E...
Page 27: ... package 2 Check that the delivery is complete 3 Check whether the appliance was dam aged during transit 4 If the delivery is incomplete or the appli ance has been damaged during transport please contact our Service Centre see Service on page EN 23 WARNING Risk of electric shock Never use a damaged appliance If the mains cord of the appliance is damaged it must be replaced by the manufacturer thro...
Page 28: ...ter you will find general safety notices which you must always observe for your own protection and that of third par ties Please also observe the warning notic es in the individual chapters Risks in handling household electrical appliances WARNING Risk of electric shock Touching live parts may result in severe in jury or death Connect the appliance only if the mains voltage at the socket correspond...
Page 29: ... Only parts corresponding to the original appliance specifications may be used for repairs This appliance contains electri cal and mechanical parts which are es sential for protection against potential sources of danger CAUTION Risk of injury Improper handling of the appliance can lead to injury When laying the mains cord take care to prevent the risk of tripping Fire hazard The appliance heats up ...
Page 30: ...ank during brewing or while frothing milk Switch off the appliance before filling the water tank all LED rings are then off Do not heat flammable liquids with steam Clean the appliance only after it has cooled down completely Health hazard Dried milk and coffee residues as well as stale water can cause harmful germs and the formation of mould Use a damp kitchen towel to wipe down the steam lance imm...
Page 31: ...ng on a level stable and non sensitive sur face Do not operate the appliance if the wa ter tank is empty Never exceed maximum fill levels Never operate the appliance without the drip tray and drain grid inserted Carefully remove transport and insert the individual parts of the appliance never drop them Surface coatings on furniture sometimes contain chemical additives which can eat away at the rubb...
Page 32: ...ements Page EN 8 Appliance parts and control elements 1 Bean hopper 2 Water tank 3 Steam regulator 4 Steam lance 5 Drip tray 6 Float gauge 7 Drain grid 8 Cup storage 9 Holder for bean hopper ON OFF POW ER HOT WATER 1 2 3 4 5 7 9 8 6 ...
Page 33: ...tton 13 Manometer 14 One cup button 15 Two cups button 16 Portafilter holder for brewing 17 Portafilter holder for grinding 18 Grinder release mechanism 19 Dial for setting the degree of grinding 20 Grinder release button ON OFF HOT WATER GRINDER OFF LOCK INSERT 10 11 14 12 15 16 17 18 19 20 13 ...
Page 34: ...ach of chil dren Do not set up the appliance directly beside a cooker or other heat source When laying out the mains cable ensure that it will not be damaged by sharp edges or through contact with hot surfaces e g electric hobs The appliance could be damaged if the wa ter inside it freezes Do not place the appliance in a room where the temperature may fall below freezing Preparation ON OFF POWE R ...
Page 35: ... in standby mode Switching off Press the On Off button 10 again to turn off the appliance All LEDs will turn off Automatic switch off If you haven t pressed a button on your Espresso Machine for 20 minutes the appli ance automatically switches off The LED ring around the On Off button flashes red and a beep indicates that the appliance is switching off Inserting the portafilter ON OFF HOT WATER GR...
Page 36: ...ss the two cups button 15 to rinse the coffee spout 5 Once rinsing is complete press the On Off button 10 to switch off the appliance 6 Empty the collecting vessel 7 Turn the portafilter e back to the Unlock position and remove it 8 Clean the bean hopper 1 the filter in serts d the portafilter e and the tamper c with rinsing water 9 Then dry all parts carefully Attaching the bean hopper ON OFF POW...
Page 37: ...n the es presso develop its full aroma Agood espresso must be hot Therefore pre heat the espresso cups The heated cup stor age 8 is suitable for preheating Expedite the process by filling the cups with hot water and emptying them just before brewing Making espresso 1 If you haven t already done so please Fill the water tank 2 with fresh tap wa ter Fill the bean hopper 1 with fresh es presso beans ...
Page 38: ...w the portafilter on the drain grid 7 13 Press the one cup button 14 to make one cup of espresso Press the two cups button 15 to make two cups of espresso The espresso will slowly flow into the cup s It should take 20 30 seconds to brew one cup of espresso and 25 35 seconds for two cups Keep an eye on the manometer 13 If a value between 9 and 12 bar is dis played the degree of grinding and the amo...
Page 39: ... Achieving perfect frothy milk ON OFF HOT WATER GRINDER OFF LOCK INSERT 4 3 1 Fill half of the milk pitcher with cold milk 2 Turn the steam regulator 3 to MAX in order to drain the condensed water If only steam is released from the steam lance turn the steam regulator back to OFF 3 Hold the milk pitcher under the steam lance so that the steam lance is inserted approx 1 cm below the surface of the ...
Page 40: ...s You can select 20 60 ml for one cup and 60 100 ml for two cups ON OFF HOT WATER GRINDER OFF 12 14 15 Requirement The Espresso Machine must be in standby mode all LED rings steadily light up white 1 Simultaneously press and hold the one cup button 14 and the two cups button 15 for approx 8 seconds The LED rings around the two buttons now flash the LED ring around the hot water button 12 is no lon...
Page 41: ...ge Do not use any solvent based abrasive or scouring cleaners e g oven or grill spray or cleaning utensils such as scour ing pads or similar They could damage the surfaces Do not put appliance parts in the dish washer They are not dishwasher safe Cleaning the housing Use normal rinsing water to clean the hous ing Use a damp kitchen towel to wipe down the surfaces Cleaning the grinder The grinder c...
Page 42: ...e 4 immediately after frothing milk To clean the inside of the steam lance re lease some steam after frothing milk If the steam lance is still blocked use the cleaning needle h to remove the blockage Cleaning the appliance parts NOTICE Risk of damage The appliance parts are not dishwash er safe and must be washed by hand d e Remove the filter insert d to clean the portafilter e Clean both of them ...
Page 43: ... safety instructions in mind when descaling WARNING Health hazard Descalers are irritating and can affect your health They can also damage other ob jects and textiles Keep descalers out of the reach of chil dren Avoid direct contact with the descaler In case of direct contact rinse eyes and skin under plenty of running water Do not ingest the descaler Seek medi cal attention immediately if ingeste...
Page 44: ... water button 12 for about eight seconds 6 Turn the steam regulator 3 to MAX The descaling solution is now released in termittently from the portafilter and steam lance into the collecting vessel The LED rings around the one cup but ton 14 and the two cups button 15 pulse 7 Once the descaling solution has been completely expelled the LED rings around the one cup button 14 and the two cups button 1...
Page 45: ...rewing The espresso slow ly drips into the cup instead of flowing it tastes bitter and the crema looks thin and dark on the edges Too much ground es presso 13 15 g of ground espresso are required for one cup 20 22 g for two cups The degree of grinding is set too finely Select a coarser desired degree of grind ing 1 very fine 5 very coarse The pressure should be between 9 and 12 bar when brewing Th...
Page 46: ... Making espresso on page EN 13 All LED rings pulse red twice after being switched on The Espresso Machine must be descaled Descale the Espresso Machine see Des caling the appliance on page EN 19 All LED rings pulse red during operation There is not enough water in the water tank 2 Fill the water tank with fresh tap water The water tank is not inserted correctly Reposition the grinder correctly Wat...
Page 47: ... would like to order further accessories Spare parts Customers in Germany Please contact the company Hermes Fulfilment GmbH Phone 49 0 57 32 99 66 00 Monday Thursday 8 a m 3 p m Friday 8 a m 2 p m Customers in Austria Please contact your mail order company s customer service centre or product advice centre Please note You are responsible for the condition of the appliance and its proper use in the...
Page 48: ...presso Machine Model CM5700AB GS Article number 71578759 Supply voltage 220 240 V 50 60 Hz Rated Power 2560 3050 W Protection class 1 Water tank capacity 2 5 l Coffee bean hopper capacity 200 g Pump pressure 20 bar Mains cord length 95 cm Appliance dimensions height width depth 405 297 318 mm Net weight 11 5 kg Technical specifications Disposing of old electrical devices in an environmentally frie...