


NOTE:
Wipe clean the surface where the Door Window Sensor will be mounted.
Any dust and particles can reduce the adhesion of double-sided mounting tape.
●
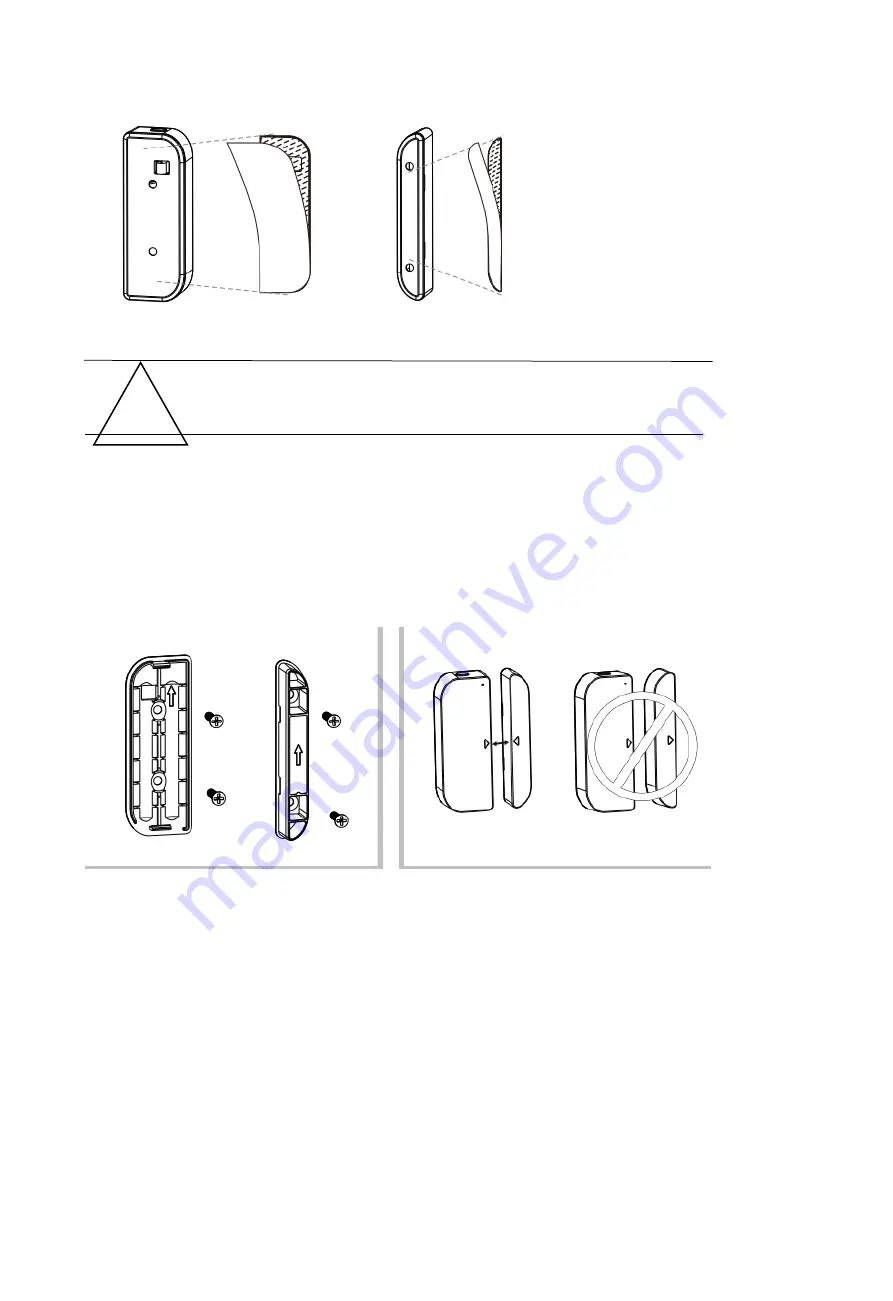
Screw Mode
1) Take the battery cover apart from the device part by pressing and holding the latch button and
the holder of the magnet part;
2) Screw the battery cover on to the door or window frame;
3) Keep the orientation marks of the device part and the magnet are oriented towards each other;
4) Screw the magnet holder to the moving part of the door or window;
5) Mount the device part on to battery cover;
6) Mount the magnet part to the holder.
7.3 Change the battery and change the Wi-Fi network
In the case of the battery is over or the Wi-Fi network is changed (SSID or password is
changed), take down the device part, to replace the battery or config the Wi-Fi network
again;
1) Press and hold the Latch button to take apart the device part. Leave battery cover
tapped on screw on the frame;
2) Change the batteries;
3) Or follow the Device add procedures;
4) Mount the device part back to the battery cover;
7.4 Test and check the device working state
1) Simply to open/close the moving part from the frame, that is to take the magnet part
apart from device part, if the LED is flashing once in blue and state in APP changes
between open and close.
2) Take down device part from the battery cover, the LED is flashing once in blue and
APP will receive a Tampered alarm.
!


