15
Hangar 9 P-47D-40 Thunderbolt 30cc ARF
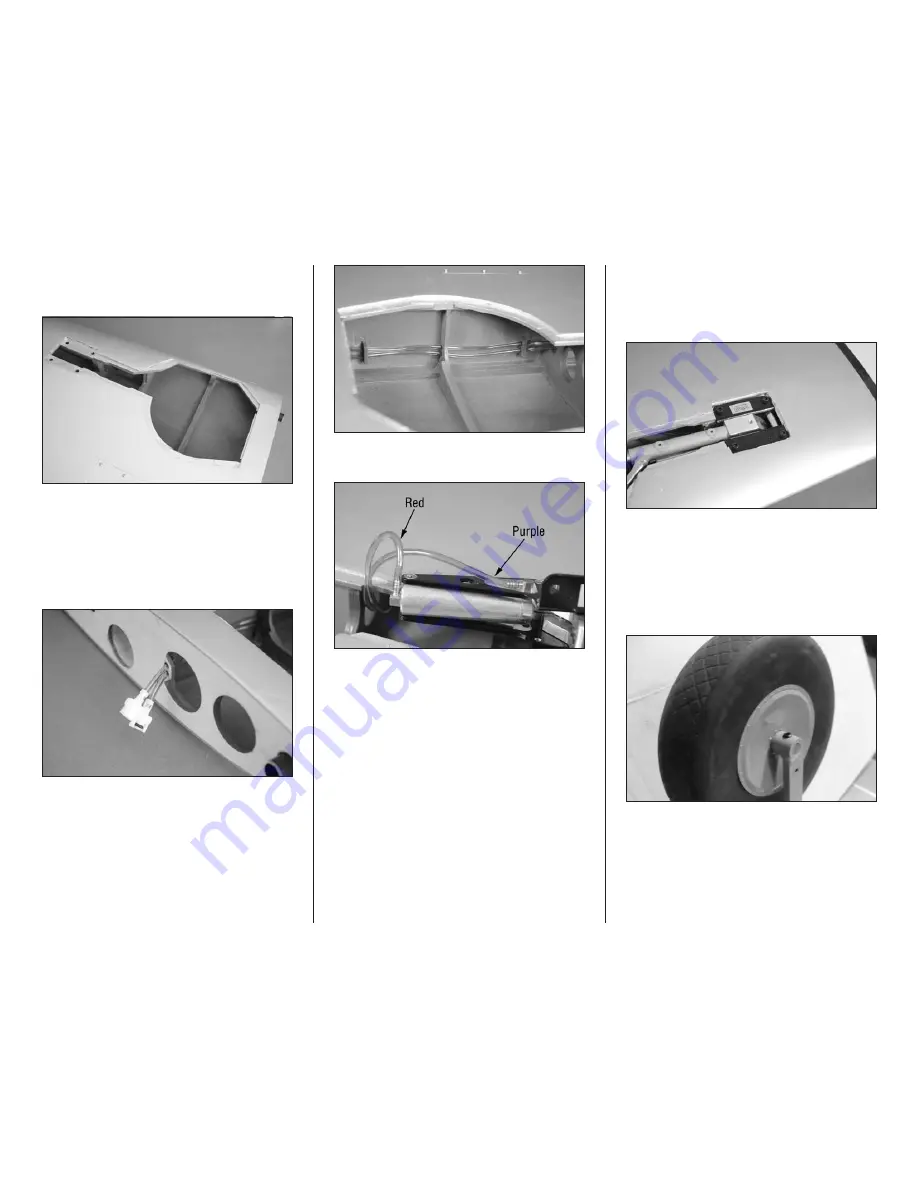
2. Use a hobby knife and #11 blade to remove the
covering from the retract opening. Use a trim seal tool to
iron the covering around the edge of the opening.
3. Cut a piece of red and purple air line to a length
of 15 inches (381mm). Place a quick disconnect on each
line. Make sure to use one connector with the O-ring and
one without to avoid connecting the lines incorrectly.
Guide the air lines through the openings in the wing from
the root to the retract mount. Fittings have been installed
to route the air line so it doesn’t interfere when the
retracts are in the UP position.
4. Attach the air lines to the retract. Note the
orientation of the lines and how they are connected.
Before securing the main gear, we recommend
running a 6/32 x 1-inch socket head screw with a
7/64-inch hex wrench through each of the blind
nuts to remove any paint that may have entered the
blind nut during the assembly of your model.
5. Secure the retract mechanism in the wing using four
6-32 x 1-inch socket head cap screws and a 7/64-inch hex
wrench. The scissor link will face toward the leading edge
of the wing. Make sure to use threadlock on the screws to
prevent them from vibrating loose.
6. Enlarge the hole in the wheel using a drill and
1/4-inch (6mm) drill bit. Secure the wheel to the retract
mechanism using the axle and setscrew provided with the
retract. Use a rotary tool and cutoff wheel to trim the axle so
it is flush with the retract strut. Use a flat file to make a flat
area for the setscrew to tighten to so the axle won’t come
loose. Also use threadlock on the setscrew before tightening
it with a 3/32-inch hex wrench.


