Owner's Manual
II-L201 Pg. 3
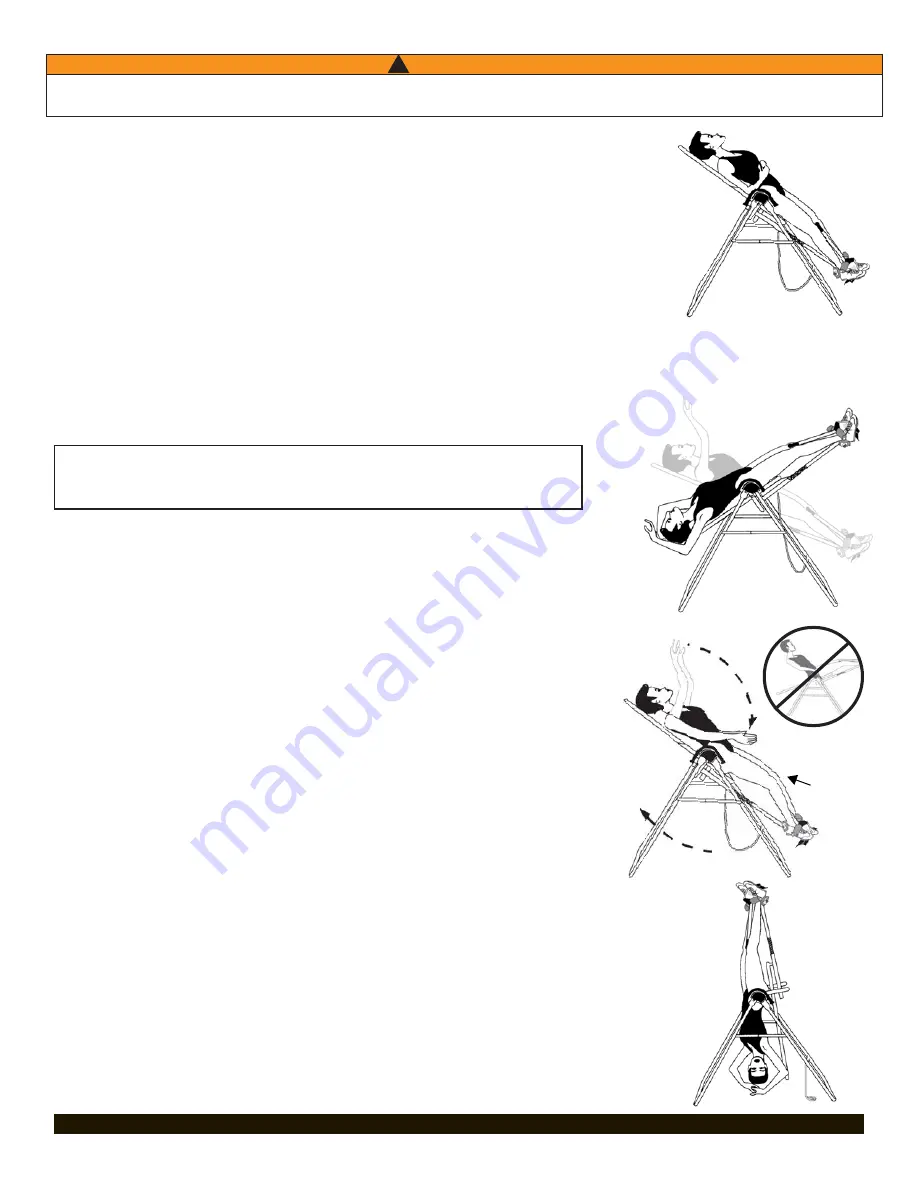
Figure 5
Correctly
Balanced
Bend Knees
Slightly
Figure 8
Figure 7
Figure 6
Figure7A
INVERTING
If correctly balanced, the inversion table will operate much like a teeter totter. By
shifting weight to the head end of the table, you will move in that direction, and
vice versa. Your arms will provide most of the weight needed to rotate the table.
Fastening the tether strap before you start will prevent the table from inverting
completely. (See Figure 6)
• Raise one arm slowly up and over your head, stopping along the way as required
to control the downward rotation of the table. If you raise both arms, the speed
and angle of inversion increases.
• When the table is at an angle you like, rest your arm on the table at whatever
position it's in.
RETURNING UPRIGHT
• To return to the upright position, put your arms at your side. (See Figure 7)
Since your body may have lengthened, arm movements alone may not be
sufficient to return you to the full upright position. You may need to bend your
knees to shift your body weight to the foot side of the pivot point.
Do not lift your
head or try to sit up.
(See Figure 7A)
The correct balance setting will allow your arm movements to rotate the table backward smoothly and slowly and to return to
the full upright position. This is an important step, so you should spend as much time as you need to find your ideal height
setting. Once you do find your setting, it should remain the same as long as your
weight does not change substantially.
BALANCING
The inversion table is like a sensitively balanced fulcrum. It responds to very small changes
in weight distribution. As a result, you must always test to make sure you have the correct
height setting
.
Ensure that there is clearance to rotate without contacting other objects or
people.
• Rest your head on the nylon mat and place your arms at your side. Slowly place your arms
on your chest.
Ö
If your head is lower than your feet, lengthen the height setting by one hole and test
again.
Ö
If your feet do not move at all, then shorten the height setting by one hole and test again.
Ö
If the table comes to rest with your feet lifted a few inches off the A-frame, you have found
the correct balance se
tting! (See Figure 5)
FULL INVERSION
Definition: Hanging completely by your ankles with your back free from the table.
Do not
attempt this step until you are comfortable with partial inversion.
• Disconnect the tether strap.
• Set roller hinges in the top hole setting "A" if you want the table to "lock" firmly while inverted.
If you are 100 kg. (220 lbs.) or more, set the roller hinges in the "B" hole setting.
• From a balanced position on the table, slowly raise both hands over your head to begin
rotation. You may need to assist the last few degrees of rotation by pushing on the floor or A-
frame until the table pulls away from your back. In your correct balance setting, your weight
will keep the table "locked" in this position until you are ready to return upright.
(See Figure 8)
DO NOT
use the hand grips to rotate the table. They are for mounting
and dismounting; they are not a substitute for finding your correct
balance setting.
WARNING
!
For your first few inversion sessions, ask a spotter to assist you until you are able to find your correct balance setting and
are comfortable with the operation of the table.


