background image

-3-

Manure spreader was not damaged in shipment. Check for dents and loose or missing

parts. Report damage immediately to H&S Manufacturing Co., Inc.

All bolts and fasteners are tight.

Manure spreader has been correctly assembled according to instructions in this manual.

All grease fittings have been lubricated. Gearbox is filled to proper level.

Guards and shields are secure.

Wheels are properly mounted to torque specifications.

Tires are inflated to correct pressure.

Drive chain tension and alignment is correct.

Decals are in place and legible.

Main apron chains are adjusted properly.

DEALER PRE-DELIVERY CHECK LIST

AFTER COMPLETION, DEALER SHOULD REMOVE AND RETAIN FOR RECORDS

After the Manure Spreader has been completely set-up, check to be certain it is in correct operating
order before delivering to the customer. The following is a list of points to inspect. Check off each
item as you have made the proper adjustments and found the item operating satisfactorily.

Connect the manure spreader to a proper horsepower tractor and attach the PTO.  Run the
manure spreader and make sure  all components operate properly.

PTO guard turns freely.

Main apron operates smoothly.

Implement and all components are functioning properly.

(Remove Dealer File Copy 

At Perforation)

Serial #

Dealer’s Name

Signature of Pre-Delivery Inspector

Inspection Date

Model Number

Summary of Contents for MS80

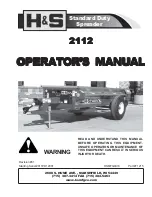
Page 1: ... MANURE SPREADER MANURE SPREADER MANURE SPREADER MANURE SPREADER OPERA OPERA OPERA OPERA OPERAT T T T TOR S MANU OR S MANU OR S MANU OR S MANU OR S MANUAL AL AL AL AL Revision 01 Starting Serial 510919 HSMFG1014 Part 64235 READ AND UNDERSTAND THIS MANUAL BEFORE OPERATING THIS EQUIPMENT UNSAFE OPERATION OR MAINTENANCE OF THIS EQUIPMENT CAN RESULT IN SERIOUS INJURY OR DEATH ...

Page 2: ...ation Explanation of Safety Signs 8 Safety Decals 9 10 Safety Information Warning Owner Must Read and Understand 11 Cap Screw Torque Values 12 Set Up Assembly 13 Transporting 13 Preparing for Opertation 14 Operation 15 Adjustments 16 Service 17 18 Optional Equipment 19 Lubrication Guide 20 21 Decal Location 22 24 Trouble Shooting 25 Service Notes 26 ...

Page 3: ......

Page 4: ......

Page 5: ... properly DEALER PRE DELIVERY CHECK LIST AFTER COMPLETION DEALER SHOULD REMOVE AND RETAIN FOR RECORDS After the Manure Spreader has been completely set up check to be certain it is in correct operating order before delivering to the customer The following is a list of points to inspect Check off each item as you have made the proper adjustments and found the item operating satisfactorily Connect t...

Page 6: ...Intentionally Left Blank 4 ...

Page 7: ...when operating this unit Explain recommended loads for different types of materials Explain to customer that regular lubrication is required for proper operation and long life of machine Show customer the lubrication section of Owner s Manual Give the customer Owner s Manual and make sure they read and understand all operating and service instructions Have the customer sign a completed Warranty Re...

Page 8: ...Intentionally Left Blank 6 ...

Page 9: ...EVER YOUR PERSONAL SAFETY IS INVOLVED TAKE TIME TO BE CAREFUL REMEMBER THE CAREFUL OPERATOR IS THE BEST OPERATOR MOST ACCIDENTS ARE CAUSED BY HUMAN ERROR CERTAIN PRECAUTIONS MUST BE OBSERVED TO PREVENT THE POSSIBILITY OF INJURY OR DAMAGE SAFETY INFORMATION H S MANUFACTURING CO INC ...

Page 10: ...FORMATION OBSERVE MAXIMUM TRANSPORT SPEED The maximum transport speed for this implement is 32 km h 20 m p h Some tractors are capable of operating at speeds that exceed the maximum transport speed of this implement Regardless of the maximum speed capability of the tractor being used to tow this implement do not exceed the implement s maximum transport speed Exceeding the implements maximum transp...

Page 11: ...SAFETY INFORMATION 9 ...

Page 12: ...SAFETY INFORMATION 10 ...

Page 13: ...T ALLOW PERSONNEL OTHER THAN THE QUALIFIED OPERATOR NEAR THE MACHINE Before starting tractor be sure PTO shields turn freely and PTO is securely locked to tractor DO NOT clean adjust or lubricate the machine when any part is in operation Keep hands feet and clothing away from beaters when they are revolving Loose or floppy clothing should not be worn by the operator Be sure the machine is clear of...

Page 14: ... 12 ...

Page 15: ...hten after a few hours of operation as bolts can loosen up on new machinery 5 Lubricate the machine completely check the oil level of the gearbox fill if necessary TRANSPORTING SAFETY Follow state and local regulations when towing farm equipment on public highways Check with local law enforcement agencies for your own particular regulations Unless otherwise prohibited use a slow moving vehicle emb...

Page 16: ...nt may cause damage to the universal joints of the power takeoff Secure the drawbar so that the hitch pin hole is directly below the power drive line TRACTOR CONNECTIONS If this implement is attached to a tractor with a clevis hitch hammer strap style drawbar the hammer strap must be removed to prevent damage to the IID guarding and the IID telescoping members See Figure1 If this implement is atta...

Page 17: ... VOID WARRANTY OPERATION SPREADING 1 When you are ready to unload make sure the beater is in the engaged position 2 Throttle the tractor down engage the tractor PTO slowly then increase the throttle to 540 RPM s and begin moving Failure to do so will cause damage to the gearbox and drive train 3 When the spreader is almost empty the bed can be cleaned by moving the beater control lever to the dise...

Page 18: ...eader until the apron chain rests lightly on top of the chain guides located bellow the axle NOTE Tighten the adjusting bolts on each front corner equally on each side so that the apron slats run parallel with the ends of the bed The apron will be damaged if the machine is operated with one end of the apron slats running ahead of the opposite end Do not tighten the apron chains excessively Tighten...

Page 19: ...moved For Clarity WHEEL HUBS To service or adjust the wheel hubs tighten the castellated nut on the spindle to the point where there is no end play and a slight drag on the bearings Replace the cotter key with a new one of the correct size BEATER The beater paddles are welded to the beater tube Replacement of these paddles should be performed by authorized service personnel who are competent welde...

Page 20: ...ires should be inflated to the appropriate pressure listed in the table Tire Pressure 6 70x15 32 PSI Wheel lug torque should be checked after every 50 hours of operation and tightened to the appropriate torque Wheel bolts must be tightened between 60 65 ft lbs of torque SERVICE ...

Page 21: ... 19 OPTIONAL EQUIPMENT REAR PAN The rear pan shown is optional equipment ...

Page 22: ...performed on hydraulic components valves cylinders hoses etc PTO ASSEMBLY Care must be taken to keep the male and female driving elements well lubricated and free sliding Failure to observe this precaution will result in excessive pressure being required to collapse or extend the assembly while subject to operating torque This excessive force may damage or displace the jackshaft bearings DO NOT lu...

Page 23: ... 21 GREASE ZERK LOCATIONS LUBRICATION 1 at each end of the PTO shaft 1 on each front idler sprocket behind the shields 1 on the side shaft 1 on each end of the drive shaft 1 on jack ...

Page 24: ... Help Avoid Injury 82602 1 Warning Crushing Hazard 93466 1 Maximum Operating Speed 540 RPM 093020 6 Grease Zerk 7143189 1 Beater Disengaged Clean Out 11211176 1 Shear Bolts 111593A 2 Danger Stay Clear of Beater DCRED 1 Red Reflector Your H S Manure Spreader was manufactured with operator safety in mind Located on the Manure Spreader are various decals to aid in operation and warn of danger or caut...

Page 25: ...AL LOCATION 111593A 9194A 8383 093020 1494L 093466 1494B 9194B 1494B 11211176 72203A 71188B 82602 311 093020 54033 66076 66076 Behind Shield 1494A Behind Shield 1494A 093020 Behind Shield 093020 Behind Shield ...

Page 26: ... 24 DECAL LOCATION DCRED 8382 1494J 1494B 1494K 111593A 1494B 66076 093020 12794 093020 9194A 52703C 7143189 3894 71494A Behind Shield 1494A 11211176 ...

Page 27: ...ge Disengage Re adjust or Replace Cable Cable Stretched or Broken Apron Does Not Turn PTO Not Turning Engage Tractor PTO Shear Bolt Sheared Replace Shear Bolt Front Drive Chain Off Replace or Repair Front Broken or Missing Drive Chain Main Apron Broken Replace or Repair Main Apron Keys on Main Apron Shaft Replace Sheared or Missing Sheared or Missing Keys TROUBLESHOOTING WARNING MAKE SURE THAT THE...

Page 28: ...SERVICE NOTES 26 ...

Page 29: ......

Page 30: ...H S MFG H S MFG H S MFG H S MFG H S MFG CO CO CO CO CO products approved for the FEMA FEMA FEMA FEMA FEMA SEAL OF Q SEAL OF Q SEAL OF Q SEAL OF Q SEAL OF QU U U U UALITY ALITY ALITY ALITY ALITY ...

Reviews: