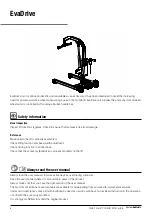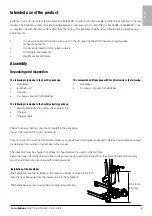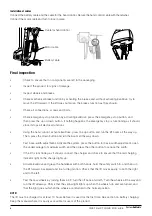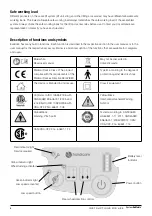
Installation of cables
Connect the battery cable and the cable for the hand control. Secure the hand control cable with the retainer.
Connect the motor cable and turn to lock in place.
Cable for hand control
Battery cable
Motor cable
Final inspection
•
Check to ensure that no components are left in the packaging.
• Inspect the product for signs of damage.
• Inspect wheels and brakes.
• Check mechanical brake function by activating the brakes and, without activating EvaDrive, try to
move the lift forward. If the lift does not move, the brakes function as they should.
• Check all connections, screws and bolts.
• Check emergency-stop function by activating EvaDrive; press the emergency-stop button, and
then press the up or down button. If nothing happens, the emergency stop is functioning as it should,
since it stops all electrical functions.
• Using the hand control, activate EvaDrive, press the up button and run the lift boom all the way up.
Then, press the down button and run the boom all the way down.
• Test base-width adjustment. Activate the system, press the button for base-width adjustment, open
the undercarriage to maximum width, and then press the other button to reduce the width.
• If the lift is functioning as it should, connect the charger and check to ensure that the red charging
indicator light on the charger lights up.
• Activate EvaDrive and grasp the handlebar with both hands, hold the safety switch in, and then run
the lift forward, backward and in a turning motion. Check that the lift moves easily, to both the right
and to the left.
•
Test the rear wheels by turning them a bit; turn the lift back and forth. Turn the wheels all the way and
run the lift sideways. Check that the yellow light lights up when the wheels turn and are turned, and
that the light goes out when the wheels are returned to the normal position.
NOTE!
The lift must be charged for at least 10 hours before it is used for the first time. See section on battery charging.
Keep the manual where it is easily accessible for users of the product.
6
I N S T R U C T I O N S F O R U S E System
RoMedic
TM


