background image

11

ALGIZ 8  Manual - Using the Algiz 8

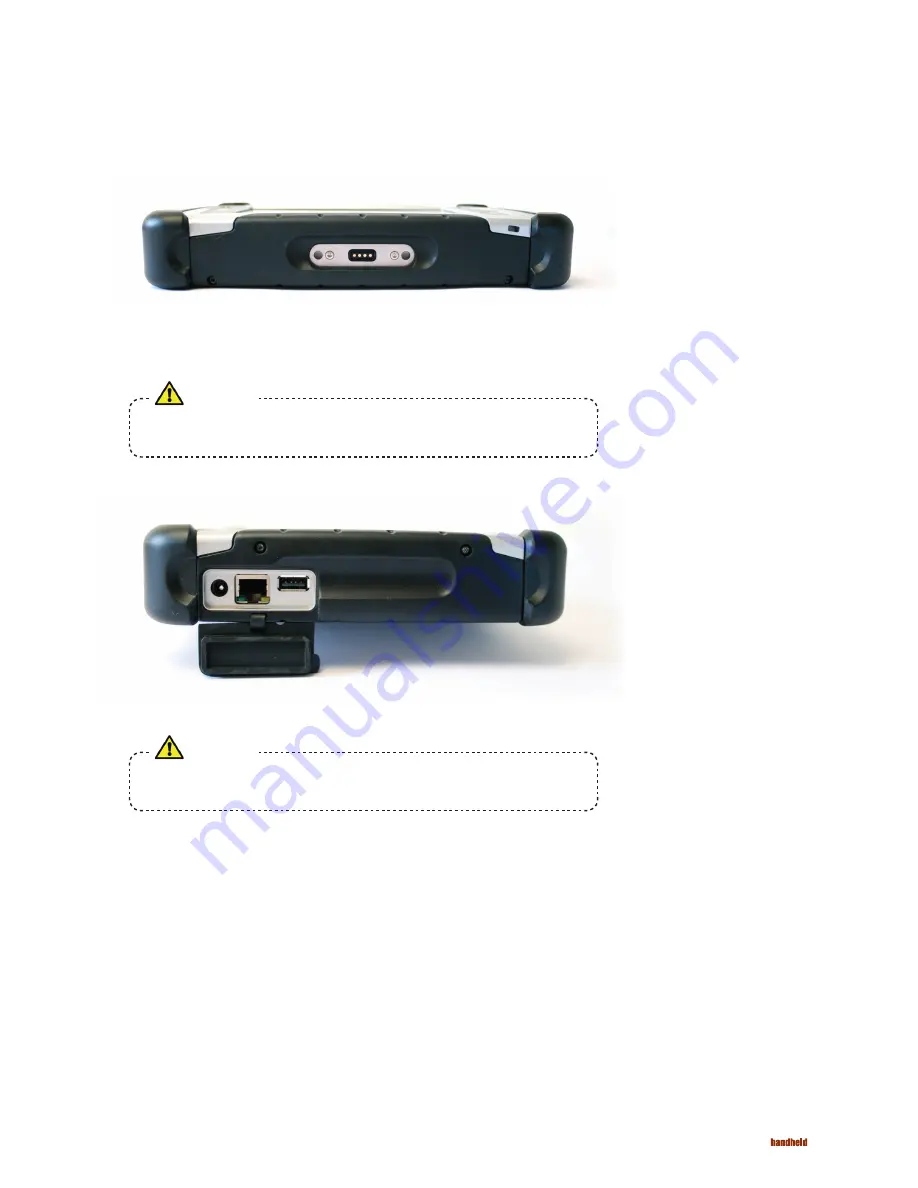
External device connections

Suspend modes

Docking connector

Power connector

Ethernet

USB 2.0

The Docking Connector located at center bottom, is used to connect the different
docks available. The Docking Connector is also used to connect the AC power source,
only connect Handheld approved AC Adaptor. The connector offers connection support for
power and a second USB device.

The Power connector (1) is located under the lid on the left side of the Algiz 8. It is used
to connect an external power source to the Algiz 8.

The Ethernet connector (2) is located under the lid on the left side of the Algiz 8. It is
used to connect the Algiz 8 to a network.

The USB connector (3) is located under the lid on the left side of the Algiz 8. It is used
to connect different external devices.

The operating system makes it possible to suspend system operation of the Algiz 8 without closing 
programs. The suspend modes is used to conserve battery power.
The Algiz 8 can be configured to suspend operation automatically when inactive.

Caution!

Caution!

The Power connector and the Docking connector must not be used at
the same time.

The Power connector and the Docking connector must not be used at
the same time.

Summary of Contents for Algiz 8

Page 1: ...ALGIZ 8 Manual www handheld se www handheldeurope com www handheldfinland com Algiz 8 Manual Version 1 0 ...

Page 2: ...ng 9 Low battery warning 9 Remove a battery pack 9 Insert a battery pack 9 Charge a battery pcak 9 Conserve battery power 9 Bridge battery 10 Replacement of hard disc 10 Replacement of SIM card 10 External device connections 11 Docking connector 11 Power connector 11 Ethernet 11 USB 2 0 11 Suspend modes 11 Standby mode 12 Turn off monitor 12 Suspend to Disk mode 12 Resume from suspend mode 12 Main...

Page 3: ...temperature variations The Algiz 8 is suitable for use in harsh environments such as construction sites warehousing defense manufacturing and field service The Algiz 8 is delivered with a battery and an AC adapter 1 Algiz 8 2 AC adapter Note This User Manual cover the use of a Algiz 8 with Microsoft Windows operating system installed but other operating systems can also be used Please contact your...

Page 4: ... buttons Lithium Ion Battery 5200 mAh hotswap 1 Vehicle docking not in picture 2 AC DC Adaptor 3 DC DC Adaptor not in picture 4 Battery charger 5 Port replicator not in picture 6 Desk mount not in picture ALGIZ 8 Manual General Features Accessories 2 4 ...

Page 5: ...Power on off Ctrl Alt Delete Enter Escape Arrow up Increase brightness Arrow right Tab Arrow left Shift Tab Arrow down Decrease brightness Fn Reset Fn Pre set as Alt Tab No pre setting Pre set as Internet Explorer No pre setting Pre set as E mail client No pre setting ...

Page 6: ...The Algiz 8 is in full function and the Fn key is activated Flashing yellow The Algiz 8 is in standby mode and the Fn key is activated notice that the touch screen is inactivated Off Algiz 8 is off or in suspend mode Red Continuous Battery is charging Flashing Battery capacity is low Off The battery is fully charged or no external power is available The Algiz 8 is equipped with a microphone 1 and two...

Page 7: ...When I press the power button on my computer select Ask me what to do from the drop down list 3 Under When I press the sleep button on my computer select Hibernate Suspend to Disk mode If there is not enough disk space for Hibernation select Shut down 4 Click Apply to save the settings To be revised The Algiz 8 is equipped with an ACPI BIOS which enables the operating system to conserve energy and...

Page 8: ... object on the screen tap the object once To double click tap the object twice To right click an object place the pointer over the object Then press the Shift Tab button on the front To drag an object on the screen press and hold down on the object while dragging it to the new position Release the object when it is in place When used for the first time or when users work in different angles the to...

Page 9: ...40 seconds The action of the sleep signal is described in the chapter Power settings on page 7 To remove the battery from the Algiz 8 1 Turn the Algiz 8 with the backside up 2 To release the battery press and lift the release latch 2 until the battery slides out from the slot The battery pack is being charged when the Algiz 8 is connected to any of the specified power sources The Algiz 8 can charg...

Page 10: ...placement of hard disc 2 Slide the latch over the SIM card holder to the side 3 Push down the SIM card and let it spring out from the slot Assemble in reverse order ALGIZ 8 Manual Using the Algiz 8 Bridge battery The Algiz 8 is equipped with a bridge battery which is located inside the Algiz 8 The purpose of the bridge battery is to supply power when the battery pack is replaced and provide power ...

Page 11: ... an external power source to the Algiz 8 The Ethernet connector 2 is located under the lid on the left side of the Algiz 8 It is used to connect the Algiz 8 to a network The USB connector 3 is located under the lid on the left side of the Algiz 8 It is used to connect different external devices The operating system makes it possible to suspend system operation of the Algiz 8 without closing progra...

Page 12: ...ote Since the suspend to disk mode stores information on the disk make sure there is sufficient disk space available Standby mode Turn off monitor The use of standby mode can increase operation time up to 8 hours In standby mode power to unnecessary functions is turned off It takes approximately 10 seconds for the Algiz 8 to resume operation when in standby mode By use of the turn off monitor func...

Page 13: ...The display touch screen should be cleaned with glass cleaning agent made for that purpose Keep the Algiz 8 clean and free from dust and dirt by using a soft lint free cloth regularly If available you can also use compressed air maximum pressure 2 bar but some caution is to be observed Caution You must avoid oil on the Touch Screen because it can be difficult to remove WARNING No sharp objects or ...

Page 14: ...ower One internal expansion slot i e for extra communication module One expansion slot for grip integrated module using USB interface 11 Control buttons with the following functions Increase brightness Arrow Up Decrease brightness Arrow Down Tab Arrow Right Shift Tab Arrow Left Escape Enter Ctrl Alt Delete Fn Function 3 programmable buttons with 2 functions each 3 functions are pre defined Alt Tab ...

Page 15: ...www handheld se www handheldeurope com www handheldfinland com Algiz 8 Manual Version 1 0 ...

Reviews: