41
3. Compressor handling and Installation
3.1 Compressor handling
After the compressor arrives at the warehouse, check the crate if it is kept in good condition and check all the
compressor accessories and the shipping documents to see if there is any discrepancy. Be noted that the
compressor is charged with 0.5~1 bar nitrogen, so release the inner pressure before loosing any parts on the
compressor is very important.
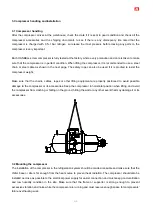
Each HANBELL screw compressor is fully tested at the factory where every precaution and care is taken to make
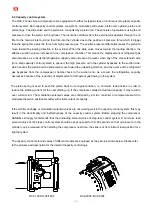
sure that the compressor is in perfect condition. When lifting the compressor, it is recommended to use a steel
chain or steel cable as shown in the next page. The safety rope can also be used if it is proofed to resist the
compressor weight.
Make sure that the chains, cables, ropes or other lifting equipment are properly positioned to avoid possible
damage to the compressor or its accessories. Keep the compressor in horizontal position when lifting, and avoid
the compressor from crashing or falling on the ground, hitting the wall or any other event that may damage it or its
accessories.
3.2 Mounting the compressor
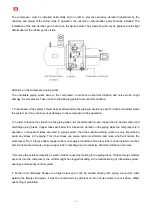
The installation of the compressor in the refrigeration system should be made accessible and make sure that the
chiller base or site is far enough from the heat source to prevent heat radiation. The compressor should also be
installed as close as possible to the electrical power supply for easier connection and must keep good ventilation
and low humidity condition in the site. Make sure that the frame or supporter is strong enough to prevent
excessive vibration and noise while the compressor are running and must reserve enough space for compressors’
future overhauling work.
Summary of Contents for RC2-F Series
Page 6: ...5 2 2 Compressor outline...
Page 7: ...6...
Page 8: ...7...
Page 9: ...8...
Page 10: ...9...
Page 11: ...10...
Page 12: ...11...
Page 13: ...12...
Page 14: ...13...
Page 15: ...14...
Page 16: ...15...
Page 17: ...16...
Page 18: ...17...
Page 19: ...18...
Page 20: ...19...
Page 21: ...20...
Page 22: ...21...
Page 23: ...22...
Page 24: ...23...
Page 25: ...24...
Page 26: ...25...
Page 27: ...26...
Page 85: ...84 Horizontal External Oil Separator OS80 Horizontal External Oil Separator OS100 OS125 OS150...

