background image

WARNING:  

Improper  installation,  adjustment,  alteration, 

service  or  maintenance  can  cause 

injury,  property  damage,  or  loss  of  life. 

Refer  to  this  manual.  For  assistance  or  

additional  information  consult  an    authorized 

installer or service agency.

FOR YOUR SAFETY:

Do not store or use gasoline or other  flammable  

vapours and liquids in the vicinity of this or any other  

appliance.
Installation and service must be performed by an  

authorized installer or service agency.

Tested by:

IMPORTANT: SAVE THESE INSTRUCTIONS

Contact your building or fire officials about restrictions and installation inspection 

requirements in your area. 

PLEASE READ THIS ENTIRE MANUAL BEFORE INSTALLATION AND USE OF THIS 

PELLET-BURNING ROOM HEATER. FAILURE TO FOLLOW THESE INSTRUCTIONS 

COULD RESULT IN PROPERTY DAMAGE, BODILY INJURY OR EVEN DEATH.

FpI FIREplAcE pROdUcTS INTERNATIONAl, lTd.  6988 Venture St., delta, Bc,  canada  V4G 1H4

GCI60-079

4/19/2011

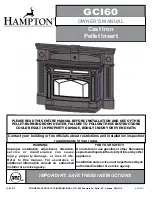
GCI60

OWNER'S MANUAl

cast Iron

pellet Insert

Summary of Contents for GCI60

Page 1: ...and service must be performed by an authorized installer or service agency Tested by IMPORTANT SAVE THESE INSTRUCTIONS Contact your building or fire officials about restrictions and installation insp...

Page 2: ...ve any questions about your product that are not covered in this manual please contact the HAMPTON DEALER in your area Safety Note If this stove is not properly installed a house fire may result For y...

Page 3: ...sions Specifications 6 Control Board Functions 7 Automatic Safety Features of Your Pellet Stove 7 Operating Your Pellet Stove 8 Turning Your Pellet Stove Off 9 Slider Damper Set Up 9 Routine Cleaning...

Page 4: ...cleaned daily A low ash fuel may allow longer intervals between cleaning CLINKERING clinkers are silica sand or other impurities in the fuel that will form a hard mass during the burning process This...

Page 5: ...s lining have not been damaged OPERATION The door and ash drawer must be kept closed when the unit is in operation to prevent fume spillage and for proper and safe operation of the pellet stove Also e...

Page 6: ...ributing plate must be taken to achieve it DO NOT INSTALL A FLUE DAMPER IN THE EXHAUST VENTING SYSTEM OF THIS UNIT DO NOT CONNECT THIS UNIT TO A CHIMNEY FLUE SERVING ANOTHER APPLIANCE FRESH AIR This u...

Page 7: ...ood corn wheat barley Voltage Current Max Power 110 120 V 4 2 Amps 504 Watts Frequency Hopper Capacity Consumption on Low 60 Hz up to 50 lb 22 7 Kg 1 5 lb hr 0 68 Kg hr Testing Standard Weight with fu...

Page 8: ...WN Heat Level Arrow to adjust setting 3 Light is the default setting Depending on Fuel quality Ignition problems may occur at higher altitudes this can be resolved by trimming the Combustion Fan to a...

Page 9: ...it will switch to the designated heat setting Once a fire has been established the convection blower will turn on after ten minutes To OPERATE Press the Heat Level buttons to change the desired Heat L...

Page 10: ...s can be measured using a Magnahelic pressure gauge once the unit has been running on heat level 5 setting after one hour of burn time This adjustment is necessary for varying venting configurations T...

Page 11: ...ks at the right rotate the top of the agitator towards the back of the firebox to unlock it slide it to the left and lift it out of the burn pot liner 4 Lift the burn pot liner out of the stove 5 Lift...

Page 12: ...extended use the gasketing may come loose To repair this glue the gasketing on using high temperature fiberglass gasket glue available from your local dealer This is important to maintain an airtight...

Page 13: ...ished using the pellet appliance for the season unplug the stove for added electrical protection It is very important that the stove be cleaned and serviced as stated above CLEANING PAINTED SURFACES P...

Page 14: ...1 Remove Cast Ash Drawer Front 2 Slide open the Cast Top 3 Lift off Cast Sides 4 Clip Side Rails to unit 5 Attach Front Rail using the quick release pins as shown in Fig 12 6 Adjust leg height and lo...

Page 15: ...efects in materials and workmanship for part repair or replacement for the first three 3 years and limited labour for the first two 2 years to the original purchaser Please see the exclusions and limi...

Page 16: ...fy the Limited Warranty on this stove If unsure as to the extent of this Limited Warranty contact your authorized Hampton dealer before installation 10 FPI will not be responsible for inadequate perfo...

Page 17: ...to replace or repair items under this Limited Warranty will be covered per our warranty service fee reimbursement schedule Labour rates are set per component and as such total labour costs may not be...

Page 18: ...______ Installer ____________________________________________________________ Phone ____________________________________________________________ Date Installed ________________________________________...

Reviews: