background image


USE AND CARE GUIDE

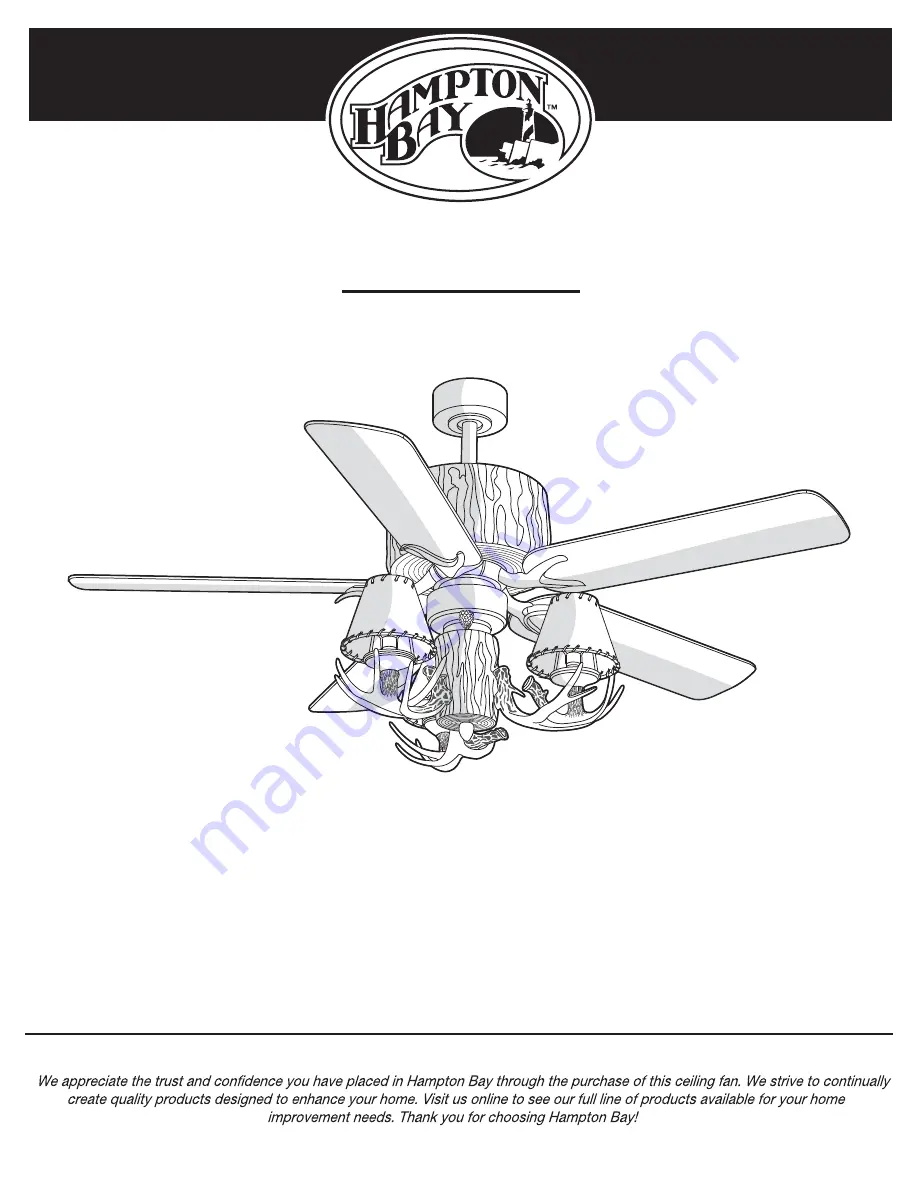
LODGE 52 IN. CEILING FAN

THANK YOU

THANK YOU


Item #1001292673

Model #

YG098-NM

1-855-HD-HAMPTON

HAMPTONBAY.COM 

Questions, problems, missing parts? Before returning to the store,  

8 a.m. - 7 p.m., EST, Monday-Friday, 9 a.m. - 6 p.m., EST Saturday 

call Hampton Bay Customer Service 

Summary of Contents for 1001292673

Page 1: ... FAN THANK YOU THANK YOU Item 1001292673 Model YG098 NM 1 855 HD HAMPTON HAMPTONBAY COM Questions problems missing parts Before returning to the store 8 a m 7 p m EST Monday Friday 9 a m 6 p m EST Saturday call Hampton Bay Customer Service ...

Page 2: ...tions Care and Cleaning Troubleshooting Service Parts 17 17 17 18 18 19 20 Table of Contents 2 Table of Contents Safety Information Warranty Pre installation Specifications Tools Required Hardware Included Package Contents Installation Assembly Hanging the Fan Attaching the Fan Blades 2 3 4 4 4 4 5 6 7 8 10 14 ...

Page 3: ... cautious when working around or cleaning the fan 7 Do not use water or detergents when cleaning the fan or fan blades A dry dust cloth or lightly dampened cloth will be suitable for most cleaning 8 After making electrical connections spliced conductors should be turned upward and pushed carefully up into the outlet box The wires should be spread apart with the grounded conductor and the equipment...

Page 4: ...est useful life when protected from varying weather conditions A certain amount of wobble is normal and should not be considered a defect Servicing performed by unauthorized persons shall render the warranty invalid There is no other express warranty We hereby disclaim any and all warranties including but not limited to those of merchantability and fitness for a particular purpose to the extent pe...

Page 5: ...ock washer preassembled Remote control holder mounting screw not to scale Clevis pin preassembled Cotter pin preassembled Collar setscrew preassembled Light kit mounting plate screw preassembled Light kit mounting screw preassembled 40 watt candelabra bulb not to scale Plastic plug 1 preassembled 1 extra Nut preassembled Lock washer preassembled Balance kit not to scale Cross pin preassembled Sets...

Page 6: ... shade Light kit Receiver Remote control Remote control holder Quantity Quantity 5 1 1 3 1 1 1 1 Part Part A B C D E F G H Quantity Quantity 1 1 1 1 1 1 1 5 Description Description Mounting bracket preassembled Canopy Canopy bottom cover preassembled Hanger ball downrod assembly 4 Extra downrod 6 Coupling cover Fan motor assembly Blade H I J K L M N O P F G A B C D E ...

Page 7: ...tlet box SS not included SS SS TT SS SS A Installation MOUNTING OPTIONS MOUNTING OPTIONS WARNING To reduce the risk of fire electric shock or personal injury mount the fan to an outlet box marked acceptable for fan support using the screws provided with the outlet box An outlet box commonly used for the support of lighting fixtures may not be acceptable for fan support and may need to be replaced ...

Page 8: ...QQ VV PP UU E Remove the hanger ball UU from the 4 downrod VV by loosening the setscrew QQ at the top of the 4 downrod VV which holds the hanger ball UU to the 4 downrod VV Slide the hanger ball UU down the 4 downrod VV and remove the cross pin PP Insert the cross pin PP in the holes at the top of the 6 downrod E and slide the hanger ball UU up the 6 downrod E Make sure the cross pin PP is properl...

Page 9: ...mbly D Align the holes at the bottom of the hanger ball downrod assembly D with the holes in the collar on top of the fan motor assembly G Carefully insert the clevis pin FF through the holes in the collar and the hanger ball downrod assembly D Be careful not to jam the clevis pin FF against the wiring inside the hanger ball downrod assembly D Insert the cotter pin GG through the hole near the end...

Page 10: ...mbly D in the mounting bracket A socket Make sure the tab on the mounting bracket A socket is properly seated in the groove in the hanger ball downrod assembly D This will help to balance the ceiling fan A SS 6 WARNING To reduce the risk of fire electric shock or other personal injury mount the fan only to an outlet box or supporting system marked acceptable for fan support and use the mounting sc...

Page 11: ...ations to prevent possible interference from or to other remote units The frequency switches on your receiver N and remote control O have been preset at the factory Please recheck to make sure the switches on the remote control O and the receiver N are set to the same position Any combination of settings will operate the fan as long as the switches in the remote control O and receiver N are set to...

Page 12: ...e wire marked AC in N from the receiver N If your outlet box SS has a ground wire green or bare copper connect it to the fan ground wires otherwise connect the hanger ball downrod assembly D ground wire to the mounting bracket A Secure each wire connection with a plastic wire nut AA provided with the electrical hardware After connecting the wires spread them apart so that the green and white wires...

Page 13: ... screw BB WARNING Make sure the tab on the mounting bracket A properly sits in the groove in the hanger ball downrod assembly D before attaching the canopy B to the mounting bracket A by turning the canopy housing until it drops into place NOTE Adjust the mounting bracket screws BB as necessary until the canopy B and canopy bottom cover C are snug 10 Attaching the canopy bottom cover Attach the ca...

Page 14: ...jects between rotating fan blades H Attach the blades H to the blade arms I using the three blade attachment screws and fiber washers CC Start a screw and fiber washer CC into the blade arm I but do not tighten Repeat for the two remaining blade attachment screws and fiber washers CC Tighten each screw securely starting with the center screw Make sure the blade H is straight Repeat these steps for...

Page 15: ...ening the two mounting plate screws II previously loosened and the one II previously removed Attaching the light kit to the switch housing Assembly Installing the Light Kit Remove the plug LL from the switch housing K Carefully feed the light kit wires black and white through the hole in the switch housing K Attach the light kit M to the switch housing K using the nut MM and lock washer NN Tighten...

Page 16: ...stallation disconnect the power by turning off the circuit breaker or removing the fuse at the fuse box Turning power off using the fan switch is not sufficient to prevent electric shock 17 Installing the the light shade Assembly Installing the Light Kit continued I M J G AAA JJ While holding the light kit assembly M under the fan motor assembly G snap together the wire connection plugs AAA Carefu...

Page 17: ...o the ceiling fan and test for proper operation HI MED LOW buttons set the fan speed FAN OFF button turns the fan off LIGHT DIMMER button turns the light ON or OFF and also controls the brightness setting Press and release the button to turn the light ON or OFF Press and hold the button to set the desired brightness The light key has an auto resume it will stay at the same brightness as the last t...

Page 18: ... Water could damage the motor or the wood or possibly cause an electrical shock Apply oil to your fan or motor The motor has permanently lubricated sealed ball bearings Do not Do not 18 REVERSE OPERATING INSTRUCTIONS REVERSE OPERATING INSTRUCTIONS Speed settings for warm or cool weather depend on factors such as the room size ceiling height number of fans and so on Warm weather Counterclockwise Di...

Page 19: ... pads are used between the mounting bracket and outlet box The fan will not start The fan sounds noisy WARNING Make sure the power is off at the electrical panel box before you attempt any repairs Refer to step 8 Making the electrical connections on page 12 Verify that all blades and blade bracket screws are secure most fan wobble problems are caused by loose parts Once the fan is properly install...

Page 20: ...OO PP QQ RR Description Description Mounting bracket screw preassembled Blade attachment screw and fiber washer Blade arm screw and lock washer preassembled Remote control holder mounting screw Clevis pin preassembled Cotter pin preassembled Collar setscrew preassembled Light kit mounting plate screw preassembled Light kit mounting screw preassembled 40 watt candelabra bulb Plastic plug preassembl...

Page 21: ...N HAMPTONBAY COM Retain this manual for future use YG098NM0001 A Questions problems missing parts Before returning to the store 8 a m 7 p m EST Monday Friday 9 a m 6 p m EST Saturday call Hampton Bay Customer Service ...

Reviews: