4
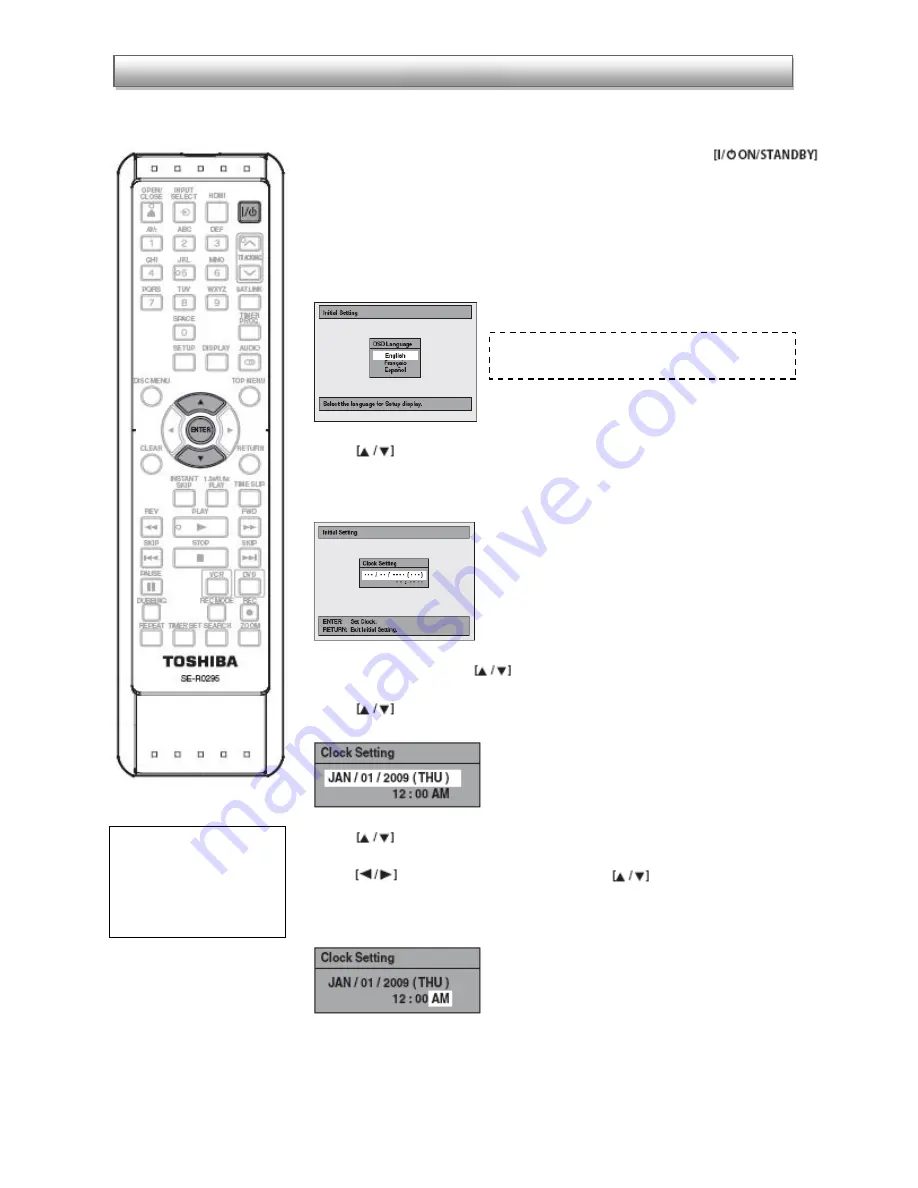
When you turn on this unit for the first time, you need to follow these steps to set up the unit.
1. After you have made all the necessary connections, press
to turn
on the unit. Turn on your TV.
2. Press the button on the TV’s remote control that accesses the external input
channel. It may be labeled “SOURCE,” “AV,” or “SELECT” (refer to your TV’s manual for
additional help). Or press “2” on the TV’s remote control, then press the channel down
button repeatedly until you see the “Initial setting” menu.
3. Use
to select your desired language, then press [ENTER] to set language.
4. Press [ENTER] to activate “Clock setting.”
5. Press [SETUP] and use
to select “General Setting,” then press [ENTER].
6. Use
to select “Clock,” then press [ENTER]. Clock menu will appear.
7. Use
to select calendar or time and then press [ENTER].
8. Use
to select an item to set, and use
to select the
month/day/year/hour/minute, then press [ENTER]. For setting the day, year, hour and
minute, the Number buttons on your remote can also be used.
9. Press [SETUP] to exit.
Initial Setting
Any time the recorder is
unplugged or there is a
loss of power, steps #5-‐9
will have to be
completed.
Setting the language will only need to be
completed the first time the recorder is set up.


