Hameg HM8011-3 Operating Manual Download Page 13

13

Sous réserve de modifications / Reservado el derecho de modificación

Maintenance

The most important characteristics of the
instruments should be periodically checked
according th the instructions provided in the
sections  “Operational check and “Alignment
procedcure. To obtain the normal operating
temperature, the mainframe with inserted module
should be turned on at least 60 minutes before
starting the test. The specified alignment procedure
should be strictly observed.

When removing the case detach mains/line cord
and any other connected cables from case of the
mainframe HM8001. Remove both screws on rear
panel and, holding case firmly in place, pull chassis
forward out of case. When later replacing the case,
care should be taken to ensure that it properly fits
under the edges of the front and rear frames.
After removal of the two screws at the rear of the
module, both chassis covers can be lifted. When
reclosing the module, care should be taken that
the guides engage correctly with the front chassis.

Operation of the module

Provided that all hints given in the operating
instructions of the HM8001 Mainframe were

followed  especially for the selection of the correct
mains voltage  start of operation consists practically
of inserting the module into the right or left opening
of the mainframe. The following precautions should
be observed:

Before exchanging the module, the mainframe
must be switched off. A small circle (o) is now
revealed on the red power button in the front centre
of the mainframe. If the BNC sockets at the rear
panel of the HM8001 unit were in use before, the
BNC cables should be disconnected from the basic
unit for safety reasons. Slide in the new module
until the end position is reached. Before being
locked in place, the cabinet of the instrument is
not connected to the protective earth terminal
(banana plug above the mainframe multipoint
connector). In this case, no test signal must be
applied to the input terminals of the module.

Generally, the HM8001 set must be turned on and
in full operating condition, before applying any test
signal. If a failure of the measuring equipment is
detected, no further measurements should be
performed. Before switching off the unit or
exchanging a module, the instrument must be
disconnected from the test circuit.
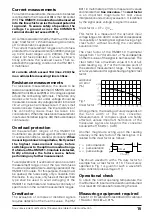
(1) DIGITAL DISPLAY

     (7-segment LEDs)

The digital display indicates the measured value
with a resolution of 4

½

 digits, the most significant

digit being used up to ”11”. The measured value is
displayed with correct point position and sign.
When DC values are measured, thedigitsare
preceded bya minus sign, if the positive pole of the
measured quantity is connected to the COMMON
input

(5)

. If the measurement range is exceeded

(>19999), the display flashes and displays ”0”, and
the buzzer beeps intermittently.

(2) mA

     (pushbutton)

Function selection switch for current measure-
ments (AC and DC current).

(3) mA 

(shock-proof socket for connectors of 4mm

diameter)
Connection (high potential) forAC and DC current
measurements in combination with the COMMON
input (low potential).  The input is fuse-protected.

(4) k

     (pushbutton)

Function selection switch for resistance
measurements.

(5) COMMON 

(shock-proof socket for connectors

of 4mm diameter)
The COMMON socket (low potential) serves as a
common connection for all measurement functions,
to which the earthy potential of the measured
quantity is applied.  This input is connected with
the internal shielding of the set.

The voltage across this terminal with respect
to the cabinet (non-fused earthed conductor,
ground) should not exceed 500V to ensure
safety of operation.

(6) k

     (pushbutton)

Function selection switch for voltage measure-
ments (AC und DC voltage).

Summary of Contents for HM8011-3

Page 1: ...Instruments Handbuch Operating Manual HM8011 3 Deutsch 4 English 11 Fran ais 18 Espa ol 25 Printed in Germany St 240800 H b tke...

Page 2: ...eibt d rfen Datenleitungen zwischen Me ger t und Computer eine L nge von 3 Metern aufweisen Ist an einem Ger te interface der Anschlu mehrerer Schnittstellenkabel m glich so darf jeweils nur eines ang...

Page 3: ...erg nzt durch 93 68 EWG Low Voltage Equipment Directive 73 23 EEC amended by 93 68 EEC Directive des equipements basse tension 73 23 CEE amend e par 93 68 CEE Angewendete harmonisierte Normen Harmoni...

Page 4: ...100dB 50 60Hz 0 5 NMRR 4 60dB 50 60Hz 0 5 Gleichstrom Me bereiche 200mA 2mA 20mA 200mA 2A 10A 20A Aufl sung 10nA 100nA 1 A 10 A 100 A 1mA Genauigkeit 0 2 200mA 0 2 v M 0 01 v E 2A 10A 0 3 v M 0 01 v E...

Page 5: ...ung mit dem Anschlu wert des Netzes ber einstimmt Die Verbindung zwischen Schutzleiteranschlu HM8001 und dem Netz Schutzleiter ist vor jegli chen anderen Verbindungen herzustellen Netzstek ker HM8001...

Page 6: ...mit 4mm Durchmesser Anschlu High Potential f r Gleich und Wechsel strommessungen in Verbindung mit dem COMMON Eingang 5 Low Potential Der Eingang ist durch Schmelzsicherungen gesch tzt 4 k Drucktaste...

Page 7: ...stische Signal geber dauernd Das erleichtert die Fehlersuche bei Kurzschl ssen Wahl der Betriebsart Mit einem Tastensatz zur Betriebsartumschaltung wird die gew nschte Me funktion eingeschaltet Zwisch...

Page 8: ...s tzlicher AC Fehler Abb 1 Crestfaktor Diese h ngt unter anderem von der Bandbreite des RMS Wandlers ab Messungen komplexen Signa le werden kaum beeinflu t wenn nicht wesentli che harmonische Komponen...

Page 9: ...en Mit 6 VR104 Anzeige auf Null stellen G Wechselspannungsverst rkung 1 Me bereich 2V AC einschalten 1 8V AC 400 Hz anlegen Mit 7 VR103 Anzeige auf 1 8000V 5 Digit einstellen H Wechselspannungsverst r...

Page 10: ...u messenden Widerstandswert Der negative Pol der Me spannung liegt an der Commonbuchse Spannungsabfall bei Strommessungen 0 2mA 20mA Bereich 0 5Vmax 200 mA Bereich 1 5Vmax 2000 mA Bereich 0 5Vmax berl...

Page 11: ...red short term on the 10A range Builtinprotectioncircuitsontheinputcircuitry protect the instrument from damage caused from improper operation Overloads of 1 000 Volts on the higher ranges and over 35...

Page 12: ...res are unavoidable on the opened up instrument these must only be carried out by qualified personnel acquainted with the danger involved Symbols as Marked on Equipment ATTENTION refer to manual DANGE...

Page 13: ...Before being locked in place the cabinet of the instrument is not connected to the protective earth terminal banana plug above the mainframe multipoint connector In this case no test signal must be ap...

Page 14: ...the measured value The measured values are displayed by five 7 segment LED displays The maximum value of the first digit is 1 which corresponds to a 4 digit display with a capacity of 19999 digits The...

Page 15: ...o the line which carries the lowestpotential to ground To ensure safety of operation the voltage to ground across the COMMON terminal should not exceed 500 Vp AC currents are determined by their true...

Page 16: ...tter survey the checks should be performed in the recommended sequence a DC voltage measurement range b AC voltage measurement range 1 99 36 100 64 2 98 86 101 14 1 9936 1 0064 2 9886 1 0114 1 9 936 1...

Page 17: ...r mAAC all ranges 0 05 o v 0 01 o r all ranges 0 015 o v 0 001 o r o v of value o r of range Current at resistance measurements 200 range 1mA 2k range 100 A 20k range 10 A 200 k range 1 A 2 20M range...

Page 18: ...3 100dB 50 60Hz 0 5 TRMS 4 60dB 50 60Hz 0 5 Courants continus Gammes de mesure 200 A 2mA 20mA 200mA 2A 10A 20A R solution 10nA 100nA 1 A 10 A 100 A 1mA Pr cision 0 2 200mA 0 2 L 0 01 G 2A 10A 0 3 L 0...

Page 19: ...garantie de fonctionnement de 2 ans Sous r serve toutefois qu aucune modification n ait t apport e a l appareil Il est recommand de conserver soigneusement l emballage d origine pour d ventuelles exp...

Page 20: ...valeur de mesure sera affich e avec virgule et signes de polarit En mesure de grandeurs continues un signe moins appara t devant les chiffres lorsque la polarit positive de la valeur mesur e est reli...

Page 21: ...tive de la valeur mesur e se trouve la borne COMMON 5 Avec les entr es court circuit es l affichage indique selon la gamme de mesure la valeur z ro 2 unit s En d passement de gamme dans les gammes de...

Page 22: ...cr te Pour l valuation de signaux complexes ou d form s la d termination de la valeur efficace vraie est n cessaire Le multim tre num rique HM 8011 3 permet des mesures de grandeurs alternatives avec...

Page 23: ...4 20Hz to 100Hz Gamme R f rence 23 C Limites d affichage 100 00 A 1 000mA 10 000mA 100 00mA 1000 0mA 1 000A 200 A 2mA 20mA 200mA 2A 10A Tab 3 99 78 100 22 9978 1 0022 9 978 10 022 99 78 100 22 996 8...

Page 24: ...ture G de la gamme Courants de mesure en mesures de r si stances gamme200 1 mA gamme200k 1 A gamme2k 100 A gamme2 20M 100nA gamme20k 10 A T T T T Tension de mesure en mesures de r si stances 0 3V typi...

Page 25: ...10 A 100 A 1mA Precisi n 40Hz 100Hz 0 2 200mA 0 7 v m 0 07 v f 2A 10A 1 v m 0 07 v f Resistencia M rgenes de medida 200 2k 20k 200k 2M 20M Resoluci n 10m 100m 1 10 100 1k Precisi n 0 1 v m 0 01 v f 50...

Page 26: ...tensi n Conexi n a tierra Garant a Antes de salir de fabrica todos los aparatos se someten a una prueba de calidad con un calen tamiento de 24 horas Manteniendo el aparato en funcionamiento intermiten...

Page 27: ...de procedimiento Antes de acoplar lase aldemedidaelmodulodebeestarconectado ydispuestoparaelfuncionamiento Sisereconoce cualquiertipodeaveraenelaparatodemedici nno se debe proseguir midiendo Antes de...

Page 28: ...m s alto para ir cambiando despu s hasta aquel margen que ofrezca la indicaci n m s adecuada Indicaci n del valor medido Los valores medidos se representan en una indicaci n LED de 5 cifras El valor m...

Page 29: ...ocidas debe comenzarse por el m rgen de medida superior bajando entonces hasta al canzar el m rgen cuya indicaci n sea ptima Si se produjese cualquier aver a en el HM8011 3 deben suprimiese el factor...

Page 30: ...y el HM 8011 3 conviene utilizar un cable blindado para evitar posibles influencias exteriores indeseadas sobre la se al de medida a M rgenes de tens on cont nua b M rgenes de corriente cont nua c M...

Page 31: ...ref 23 C VDC m rgen200mV 0 007 v m 0 001 v f otros m rgenes 0 005 v m 0 001 v f VAc todos m rgenes 0 02 v m 0 005 v f mADC todos m rgenes 0 02 v m 0 005 v f mAAC todos m rgenes 0 05 v m 0 01 v f todos...

Page 32: ...e 800 247 1241 Telefax 516 794 1855 E mail hamegny aol com Great Britain HAMEG LTD 74 78 Collingdon Street LUTON Bedfordshire LU1 1RX Phone 01582 413174 Telefax 01582 456416 E mail sales hameg co uk S...

Reviews: