background image

12

13

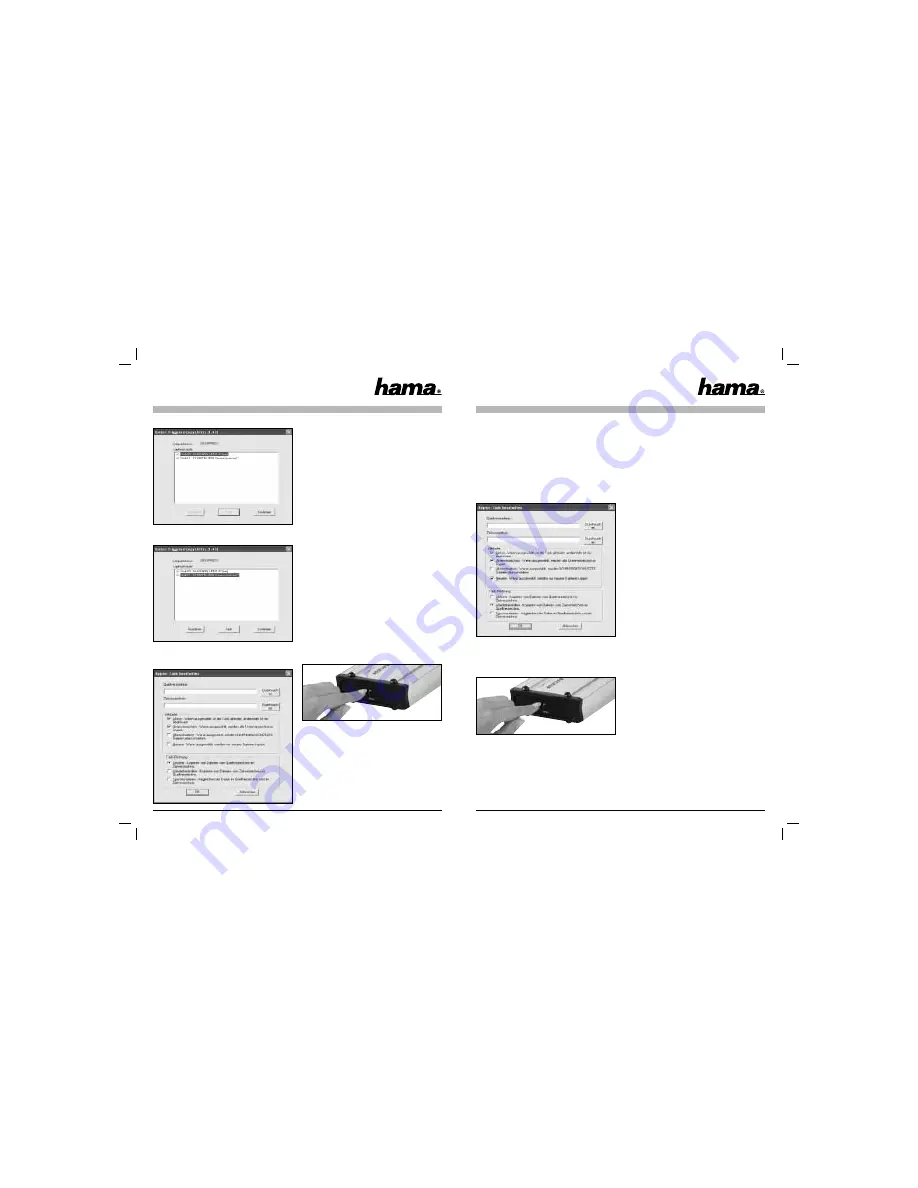
The backup program opens.

Select the USB hard drive and click 

“Task”

.

The backup menu opens to allow you to make 
various settings.

•  Source directory: Specify the folder or drive you 
  want to backup.
•  Target directory: Select the USB hard drive, and a 
  sub-folder if required, to which you want to save 
 the 

data.

The following attributes can be set for data 
backup:

• 

Active:

 This box must be ticked for the backup 

  task to be carried out at the push of a button.
• 

Sub-directory: 

This box must be ticked so that all 

  sub-folders in the source directory are also 
 backed 

up.

• 

Overwrite:

 If this attribute is set, all write-

  protected fi les in the target directory are 
 overwritten.
• 

Newer:

 If this attribute is set, only fi les which 

  have been changed or added since the last 
  backup are copied.

Click 

“OK”

 to confi rm your entries.

After the backup task has been created, you can 
start data backup by pressing the backup button at 
the rear of the housing.

6.2 Restoring a backup

There are two ways of restoring a data backup from 
the hard drive:

Option 1:

Open the backup task in the software and select 

“Restore”

 under Task – Direction. Click 

“OK”

 to 

confi rm your change. 

After the backup task has been change, you can 
start restoring the backup by pressing the backup 
button at the rear of the housing.

You can also access the backed up data via Win-
dows Explorer (

option 2

).

7. Safety  instructions:

•  Do not operate the device in damp or dusty 
 environments
•  Do not operate this device on radiators or near 
 heat 

sources

•  This device is designed for indoor use only
•  Protect the device from pressure and impact 
 during 

operation

•  Do not open or move the device during operation


Summary of Contents for Smart Backup HDD-Enclosure

Page 1: ...HDD Enclosure Smart Backup 00062707 Hama GmbH Co KG Postfach 80 86651 Monheim Germany Tel 49 0 9091 502 0 Fax 49 0 9091 502 274 hama hama de www hama de 00062707 05 06 www hama de...

Page 2: ...kseite ab Ziehen Sie Platine und den Metalleinschub aus den Aluminiumgeh use Schlie en Sie die Festplatte am Metalleinschub an und fixieren Sie die Festplatte mit den beiliegenden Schrauben wie im obi...

Page 3: ...fwerk Ihres PC s ein ffnen Sie das Verzeichniss VBTUCopy dass sich im Ordner VT6204 auf der Installations CD befindet F hren Sie die Datei Setup exe in diesem Ver zeichnis aus Der Installationsassiste...

Page 4: ...rt haben oder hinzugef gt worden sind Best tigen Sie Ihre Angaben mit einem Klick auf OK Nachdem der Sicherungstask angelegt ist kann die Datensicherung durch einem Klick auf den Sicherungsknopf an de...

Page 5: ...tray from the alumi nium housing Connect the hard drive to the metal tray and secure the hard drive with the enclosed screws as shown above Insert the metal tray and the hard drive into the aluminium...

Page 6: ...ectory in the VT6204 folder on the installation CD Run the Setup exe file in this directory The Installation Wizard now starts automatically Click Next to start installation Confirm the licence agreem...

Page 7: ...een changed or added since the last backup are copied Click OK to confirm your entries After the backup task has been created you can start data backup by pressing the backup button at the rear of the...

Page 8: ...u bo tier en aluminium Branchez le disque dur au coffret m tallique et fixez le disque dur l aide des vis fournies comme indiqu dans l illustration ci dessus Faites glisser le coffret m tallique et le...

Page 9: ...py qui se trouve dans le dossier VT6204 du CD d installation Ex cutez le fichier Setup exe L assistant d installation devrait s ouvrir automa tiquement Cliquez sur Suivant afin de d marrer l installat...

Page 10: ...e derni re sauvegarde seront copi s Confirmez votre saisie en cliquant sur OK La sauvegarde peut tre d marr e en appuyant sur le bouton de sauvegarde situ sur la face arri re du bo tier d s que la t c...

Reviews: