6
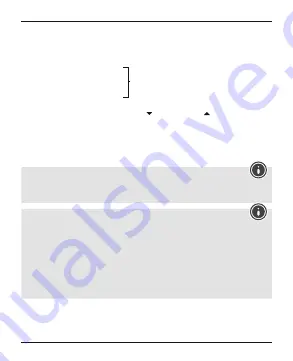
• Set the following information in the order listed:
• Year (B – 1)
• Month (B – 4)
• Day (B – 3)
• 12/24 hour format (B – 1)
• Hours
• Minutes
• Seconds (only zeros possible)
• Day of the week language (B – 5)
• To select the individual values, press the button (5) or the button (6) and
confirm each selection by pressing the
CLOCK
button (2).
• Press the
CLOCK
button (2) immediately to adopt the set value displayed and
skip ahead.
• If you do not make an entry for 30 seconds, the device automatically exits the
settings mode and the settings you made are saved.
Note – Day of the week
• You can choose from English (
GB
), French (
FR
), German (
DE
), Spanish (
ES
) and
Italian (
IT
) for the display of the day of the week.
Note – 12/24-hour format
• The time is displayed in 12-hour format as standard. The radio signal icon will
disappear as soon as you change the time display to 24-hours format. The alarm
clock will automatically search for the radio signal again at the next interval
(usually at 2:00/3:00 o’clock in the morning). The icon will be displayed again as
usual when a radio signal is received successfully.
• If the radio icon should still not appear, change the installation location
and avoid areas with possible sources of interference (cordless and mobile
telephones, wireless speakers, WLAN, etc.), if necessary.
Time (B – 1)
Summary of Contents for RC 550
Page 2: ...A B 2 1 12 10 6 9 5 4 3 8 7 11 1 7 RESET RCC CLOCK ALARM ALARM 2 4 3 5 6 8 9 10 11...
Page 36: ...35 2 RC 550 2 3...
Page 37: ...36 4 11 2 11 RESET 8 5 5 6 5 1 DCF DCF 3 5...
Page 38: ...37 DCF DCF DCF DCF 3 RCC 9 DCF 6 12 RCC 9 3 RCC 9...
Page 39: ...38 DST B 8 5 2 2 CLOCK 2 B 1 B 4 B 3 12 24 00 B 5 5 6 CLOCK 2 CLOCK 2 30 GB FR DE ES IT B 1...
Page 60: ...59 2 RC 550 2 AA 3...
Page 61: ...60 4 11 AAA 11 LCD RESET 8 5 5 6 5 1 DCF DCF 3 5...
Page 62: ...61 DCF DCF DCF DCF 3 RCC 9 DCF 6 12 RCC 9 3 RCC 9...
Page 132: ...2 RC 550 2 AA 3 131...
Page 134: ...133 DCF DCF DCF DCF RCC 9 3 DCF 6 12 RCC 9 RCC 9 3...


