7
6.6 Maximum and minimum temperature and
humidity values
•
The base station automatically stores the maximum and
minimum outdoor/indoor temperature and humidity
values.
•
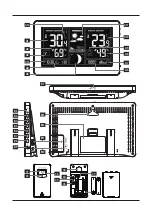
Repeatedly press the MEM button (B8) briefly to
switch between the current temperature and humidity,
minimum temperature and humidity (MIN) and maximum
temperature and humidity (MAX).
•
Press and hold the MEM button (B8) for approx. 3
seconds to reset the stored maximum and minimum
values.
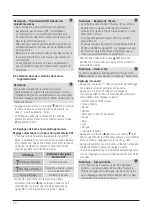
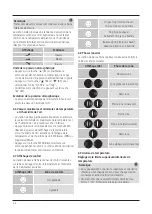
6.7 Comfort display
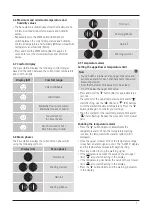
The base station displays the following comfort ranges
based on the ration between the current room temperature
and room humidity:
Display (A9)
Comfort range
Very comfortable
Comfortable
Somewhat too cool or warm /
Somewhat too dry or humid
Too cold or hot /
Too dry or humid
Much too cold or hot /
Much too dry or humid
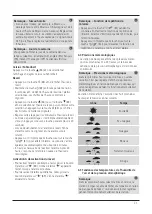
6.8 Moon phases
The base station displays the current moon phase (A5)
using the following symbols:
Display (A5)
Moon phase
New moon
Waxing crescent
Half-full
Waxing gibbous
Full moon
Waning gibbous
Half-full
Waning crescent
6.9 Temperature alarm
Setting the upper/lower temperature limit
Note
•
You can define a lower and an upper limit value and
activate an alarm for each channel and/or connected
measuring station.
•
Note that the lower limit value must be at least
1°C/1°F below the upper limit value.
•
Press and hold the “ ” button (B6) for approximately 2
seconds.
•
The symbol for the upper temperature limit alarm “ ”
starts flashing. Use the “ ” (B4) and “ ” (B5) buttons
to set the desired maximum temperature. Press the “ ”
button (B6) again to confirm your settings.
•
Then the symbol for the lower temperature limit alarm
“ ” starts flashing. Repeat the procedure for the lower
limit.
Enabling the temperature alarm
•
Press the “ ” button (B6) to enable/disable the
temperature alarm. When the temperature warning
is active, the temperature/frost alarm symbol (A3) is
displayed.
•
Once the upper or lower limit of the temperature range
is reached, an alarm signal sounds. The “ALERTS” display
and the temperature display (A3) begin flashing.
•
Press any button to stop the warning signal.
•
If the temperature exceeds the value of the set upper
limit, “ ” also starts flashing in the display.
•
If the temperature goes below the value of the set lower
limit, “ ” also starts flashing in the display.
•
Press the “ ” button (B6) to end the warning indicators
in the display.
Summary of Contents for Premium 00186380
Page 35: ...34 4 4 1 C7 10 B12 4 2...
Page 38: ...37 B3 3 B3 B4 B5 B3 20 B1 2 24 B9 B9 B1 5 B1 6 4 12 24 8 6 5 A1 A2 A10 A8 A6 B7 3 B4 B5 B7...
Page 39: ...38 24 A7 6 6 MEM B8 MIN MAX MEM B8 3 6 7 A9 6 8 A5 A5 6 9 1 C 1 F B6 2 B4 B5 B6...
Page 40: ...39 B6 3 ALERTS 3 B6 6 10 1 C 3 C 3 6 11 5 USB USB 11 USB 6 12 B1 15 7 8 Hama GmbH Co KG...
Page 58: ...57 4 4 1 C7 B10 B12 AA 4 2...
Page 128: ...127 AC 4 4 1 C7 10 12 AAA 4 2...
Page 133: ...132 B6 A3 ALERTS A3 B6 6 10 1 C 3 C A3 6 11 5 W USB USB 11 USB 6 12 1 15 7 8...


