8
9
5
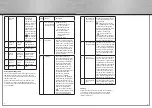
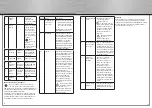
Indicator
lamp
Displays the
charge state.
The indicator lamp
lights up red when
the batteries are
being charged.
The indicator lamp
lights up green
when the batteries
are fully charged.
The indicator
lamp fl ashes
if the batteries are
defective.
6
Charging
socket
Charging
station
Connection:
LED light [10] to
charging station [3]
7
LED array
36 LEDs
Source of light
8
2-level
switch
Switch on
the side of
the light
Switch LED light
[10] off and on
with 2 levels of
brightness
9
Hook (not
shown)
Swivelling
plastic
hook
Hang up the light
(rear side of the
LED light [10])
10
LED light
Lamp
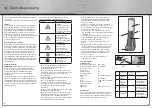
Getting Started and Operation
This section explains how to begin using your universal
LED light and describes its basic functions. Read this
section carefully so that you understand and can use the
functions of the light.
Observe the instructions below, especially the safety
instructions, to avoid using the light improperly and
possible defects. Consult the troubleshooting list if there
are any problems.
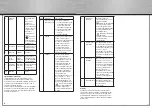
Step
Action
Description
1
Insert batteries
or rechargeable
batteries (see 4)
a) Slide the battery
compartment cover on
the rear side of the
light downwards and
then lift up the cover.
b) Insert the recharge-
able batteries that are
included in the scope
of delivery.
c) Close the cover.
2
Assembly
Place the charging station on a
stable, level and normally fl am-
mable surface. Plug the power
supply unit’s round low-voltage
plug into the charging socket
on the charging station. Next,
put the light into the charging
station. The power supply unit
operates on 230 V.
3
Charging
We recommend that you
charge the batteries for about
4 hours before using the light
for the fi rst time. The batteries
charge only when the light
is switched off and placed
in the charging station. The
red charging indicator lamp
lights up during charging. The
charging indicator lamp
switches to green when
charging is completed.
After you have completed the
initial charging, charging will
still take about 4 hours each
time the batteries are charged.
If the light is not used, it should
still be recharged regularly
(approx. every 6 months).
Do not place the light
into the charging station
if you are operating it with
non-rechargeable batteries.
4
Operation with
non-recharge-
able batteries
Unlike rechargeable batteries,
conventional batteries cannot
be recharged.
Therefore, never put the
LED light into the charging
cradle if non-rechargeable
batteries are being used. Both
the light and the charging
cradle may be damaged.
Non-rechargeable
batteries may explode if
you attempt to recharge them!
Be sure that the charging unit is
disconnected from the mains.
5
Operating in the
charging cradle
The light can be used as a table
lamp if it is kept in the charging
cradle. It can be used this way
even if the light’s rechargeable
batteries are fully discharged.
Use the 2-level switch on the
side of the light to switch the
light on.
6
Using as a
hand-held light
The light can be used for about
2.5 hours when the recharge-
able batteries are fully charged
and about 3 hours with conven-
tional batteries. Avoid using the
light when the rechargeable
batteries are fully discharged
so that the batteries are not
subject to a permanent deep-
discharge. This could damage
the rechargeable batteries. Use
the 2-level switch on the side of
the light to switch the light on.
7
Hanging up the
light
The light may be hung up using
the hook that can be folded out
from the rear side of the light.
Cleaning
Unplug from the mains before cleaning. To avoid dangers
caused by electricity, clean the device with a slightly
damp cloth. Never use harsh cleaners or chemicals
(solvents, petrol, etc.).
00092610bda.indd Abs2:8-Abs2:9
00092610bda.indd Abs2:8-Abs2:9
05.03.2009 12:51:49 Uhr
05.03.2009 12:51:49 Uhr


